Got a tip for us?

iPad

The iPad is a tablet computer from Apple that runs the iOS mobile operating system. Similar in functionality to the iPhone, the iPads purpose is often quite different, sometimes even serving as a general desktop computer replacement.

Apple News+ subscribers get access to a new Quartiles puzzle every day. Players select tiles containing two to four letters from a four-by-five grid to form words, and you can use up to four tiles per word. The more tiles you use, the more points you score.

A word formed from four tiles is called a Quartile and is worth 8 points, and when you find all five Quartiles, you get an additional 40 points. The object of the game is to earn the 100 points necessary to reach the Expert rank, though you can keep forming words and accumulating points after that. Not all possible words qualify, either, like proper nouns and profanity.

Note: Apple News, Apple News+, and puzzles aren’t available in all countries or regions.
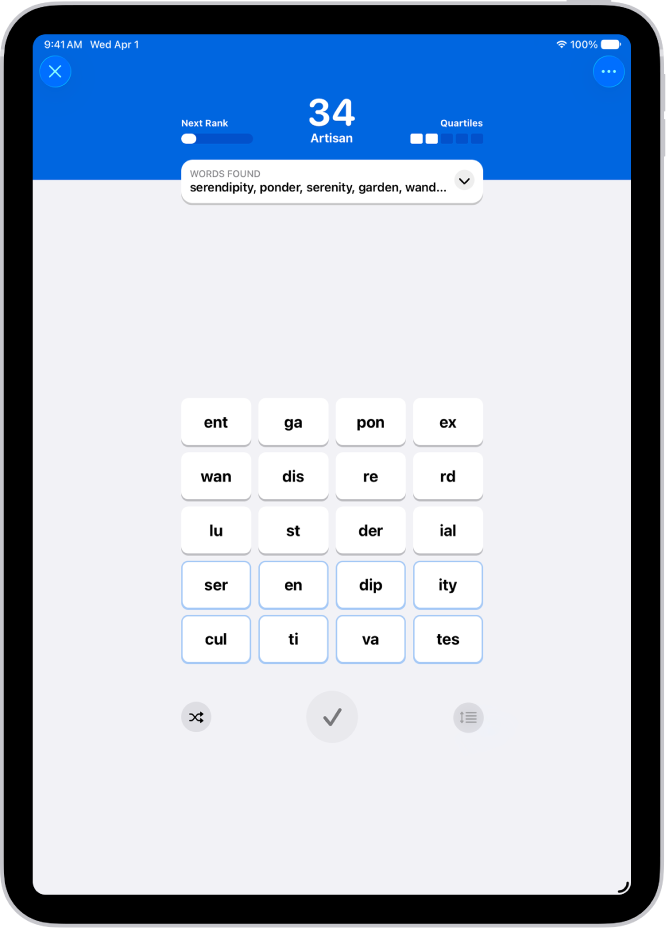
A Quartiles puzzle in the News app.

Play Quartiles

  1. Start the News app on your iPad.
  2. Open a Quartiles puzzle.
  3. Tap tiles to create a word and then tap the Enter button to enter it.

    For example, to score a single point, tap “pear,” then tap the Enter button. To score 2 points, tap “ap,” then “pear” to form the word, “appear.” Go for 4 points by tapping “ap,” “pear,” then “ance.” Complete the Quartile and score 8 points by spelling “disappearance.”

    Completed words appear in the Words Found box, and any Quartiles you find appear in groups of four tiles.

    Not all possible words qualify in Quartiles puzzles. For example, obscure and technical terms, proper nouns, and profanity never appear in the word list.

  4. Do any of the following:

    • Reorder your tiles: After you tap the tiles to place them above the grid, you can touch and hold. Then drag to reorder them.
    • See points needed to move to the next rank: Tap Next Rank.
    • Clear tiles you don’t want to use: Tap the Remove button.
    • See how many words remain: When you reach the Expert rank, the Words Found box shows how many words you haven’t found.
    • See each word’s points: Tap the Expand button in the Words Found box.

Quick tip: For a quick Quartiles tutorial, tap the More button, then tap How to Play. To open the Quartiles puzzle feed instead, tap More Puzzles.

Shuffle or group tiles

  1. Start the News app on your iPad.
  2. Open a Quartiles puzzle and start finding words.
  3. Quartiles you find are anchored to the bottom of the grid. If you’d rather anchor them to the top of the grid, tap the More button. Then choose Sort Found Quartiles.
  4. Tap the Shuffle button to shuffle tiles that aren’t part of found Quartiles.
  5. To shuffle all tiles in the grid, tap the Arrangement button to turn off anchoring. Tap the Shuffle button.

Reveal all words

  1. Start the News app on your iPad.
  2. Open a Quartiles puzzle.
  3. Tap the More button and tap Reveal All Words. The words you didn’t find are shown.
    • If you reveal before you reach Expert rank: The puzzle doesn’t count in your Scoreboard stats and streaks.
    • If you reveal after you reach Expert rank: Your stats or streaks aren’t affected.

See also

Tag: News

In sudoku puzzles, you place the numbers 1 to 9 into squares in a grid of nine blocks with nine squares each, so that every number appears exactly once in each block, row, and column. Each grid comes with a few givens, squares already filled in.

Apple News+ subscribers get new sudoku puzzles every day in three difficulties: easy, moderate, and challenging. Easy puzzles include more givens, while challenging puzzles require more complex strategies to narrow down options for each empty square. You can also keep track of which numbers might work in each square with notes.

Note: Apple News, Apple News+, and puzzles aren’t available in all countries or regions.

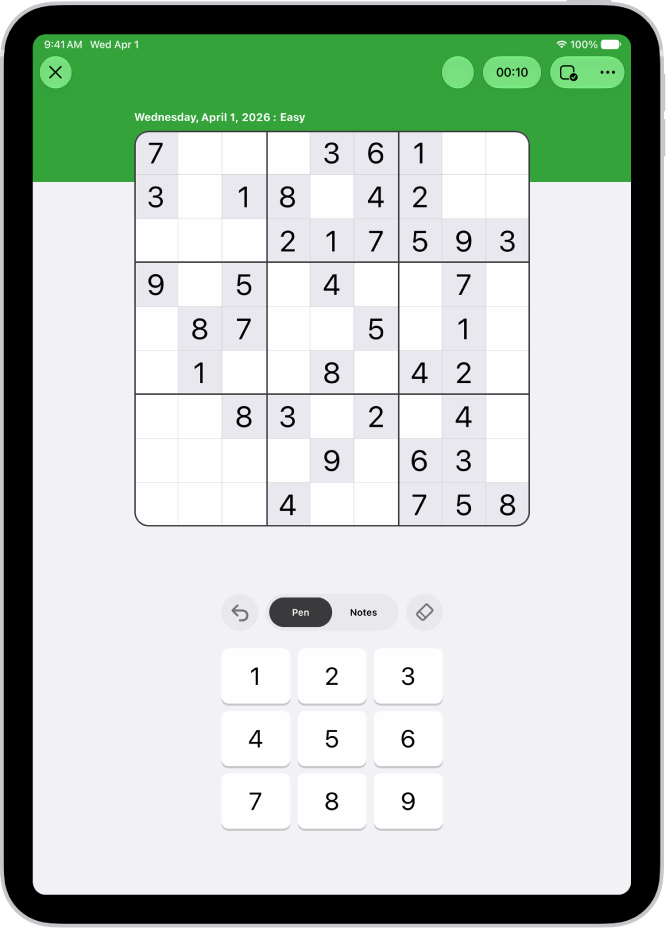
A Sudoku puzzle in the News app.

Solve a puzzle

  1. Open the News app on your iPad.
  2. Open a sudoku puzzle.
  3. Do any of the following:

    • Enter a number: With the Pen tab selected, tap a square and tap a number key near the bottom of the screen.
    • Delete an answer: Tap a square where you entered a number, then tap the Eraser button.
    • Step back through your actions: Tap the Undo button to undo.
  4. Continue entering numbers until every square is filled correctly.

    Tip: Turn on Autocheck to indicate when you successfully complete a block, row, or column.

Track possible answers

Using notes within the puzzle is a way to keep track of which numbers might work in each square.

  1. Open the News app on your iPad.
  2. Open a sudoku puzzle.
  3. Do any of the following:

    • Manually enter notes: Tap a square, tap Notes, and tap numbers to add them to the square. If your iPad is connected to an iPad keyboard, you can also press number keys. Tap the number again to remove it.

      When you enter an answer, any matching notes in that square’s block, row, or column are removed. To turn this feature off, tap the More button, tap Settings, then turn off Automatically Remove Notes.

    • Automatically show notes: Tap the Puzzles Options button, then tap Autofill Notes. Notes representing possible numbers appear in empty squares, based on all filled squares at that moment—givens and your answers (even if incorrect). You can still add and delete notes manually. Using Autofill doesn’t affect stats or streaks.
    • Play with or without notes: Tap the Puzzles Options button and then tap Show Notes or Hide Notes.

You commit a number in your notes that you think is the right answer by touching and holding it on the onscreen keypad.

Get help

If you’re unsure of an answer, you can get a little help.

  1. Open the News app on your iPad.
  2. Open a sudoku puzzle.
  3. Do any of the following:

    • Highlight matching numbers: Tap a number on the keypad, or tap any square with a number in it. (The square you select can be a given or one where you entered or revealed the answer.) Matching numbers are highlighted in answers and notes. To turn this feature on or off, tap the More button, tap Settings, and then tap Highlight Matching Numbers.
    • Check for duplicated numbers: Tap the More button, tap Settings, and then turn on Show Conflicts. When you enter a number that already appears in a block, row, or column, the squares’ bottom-right corners are marked with red triangles.
    • Mark incorrect answers as you enter them: Tap the Puzzles Options button and tap Autocheck. All incorrect answers you already entered have a red slash through them. As you enter additional numbers, the app checks whether or not they’re correct.

      When you turn on Autocheck inside a puzzle, it stays on for that puzzle only. To turn Autocheck on for all sudoku puzzles, tap the More button, tap Settings, turn on Always Autocheck, tap the Done button, tap the Puzzles Options button, then tap Autocheck (if it’s not already on).

    • Check answers: Tap the Puzzles Options button and then tap Check Square or Check Puzzle. A red slash indicates incorrect answers. Checking a square or puzzle doesn’t affect stats or streaks.
    • Identify a solvable square: Tap the Puzzles Options button, then tap Get Hint. The square having the most information available to deduce its answer is highlighted. Tap the Hint button to learn the strategy and recommended actions, like obvious pairs and hidden triplets. Using hints doesn’t affect stats or streaks.
    • Reveal answers: Tap the Puzzles Options button and tap Reveal. Tap Square or Puzzle to display the correct answer.

      Note: When you reveal all or a portion of a puzzle, the puzzle isn’t counted toward stats in your Scoreboard or as part of a streak. To maintain a sudoku streak, solve at least one of the current day’s sudoku puzzles of any difficulty level without revealing answers. Revealing also prevents you from undoing previous actions.

    • Review the sudoku tutorial: Tap the More button, then tap How to Play.

Restart your puzzle

Clearing a puzzle’s answers and resetting the timer gives you a fresh start.

  1. Open the News app on your iPad.
  2. Open a sudoku puzzle.
  3. Tap the Puzzles Options button and then tap Clear Puzzle.

Show or hide the timer

You can show or hide the timer that appears above your puzzle.

  1. Open the News app on your iPad.
  2. Open a sudoku puzzle.
  3. Do one of the following:
    • Tap the Timer button.
    • Tap the More button, choose Settings, then turn Show Timer on or off.

You don’t have to finish puzzles all at once, since the timer pauses while you’re away.

See also

Tag: News

The Today feed in the News app presents top stories selected by Apple News editors, the best stories from the channels and topics you follow, and stories and issues from Apple News+.

It also includes stories suggested by Siri, trending stories, My Sports, and more. Depending on your location, you may see Apple News Today audio briefings, puzzles, and local news with your weather, too. You can refresh the feed for the latest stories anytime, and influence what appears in it by following and blocking channels and topics.

Note: Local news and puzzles aren’t available in all countries or regions.

Access stories in the Today feed

  1. Start the News app on your iPad.
  2. Do one of the following:
    • Open a story: Tap the story.
    • Read more stories within a group: Tap the arrow next to the name of the group.
    • Play a video: Tap the Play button in the thumbnail.
    • Get newer stories: Next to Top Stories, swipe down to refresh the Today feed with the latest stories.

Follow, unfollow, block, and unblock channels and topics

By following and blocking channels and topics, you can influence what appears in the Today feed.

  1. Start the News app on your iPad.
  2. Do any of the following:
    • Open a channel feed: Touch and hold a story, tap the channel name, and then tap Go to Channel. Or tap a story in the Today feed and tap the channel name at the top of the story.
    • Open a topic feed: Tap the topic title—Movies or Travel, for example.
  3. At the top of the feed, do any of the following:
    • Follow: Tap the Add button.
    • Unfollow: Tap the More button. Then tap Unfollow Channel or Unfollow Topic.
    • Block: Tap the More button and then tap Block Channel or Block Topic.
    • Unblock: Tap the More button and tap Unblock Channel or Unblock Topic.

Note: Top Stories look the same for everyone, so if a story from a channel you blocked is in Top Stories, you’ll see the headline, but the channel stays blocked in the rest of your feed.

Manage your favorites

Favorites holds the channels and topics from your Following list that you like most, though you can have only a limited number of them. Adding them to Favorites makes them easier to access.

Note: You can add only channels and topics you currently follow to your Favorites.

Favorites appear in the sidebar.

  1. Start the News app on your iPad.
  2. Tap Edit at the top of the sidebar.

    If you don’t see the sidebar, tap the Sidebar button.

  3. Do any of the following:

    • Add a channel or topic to your Favorites: Tap the Add Favorite button next to a channel or topic.
    • Remove a favorite: Tap the Remove Favorite button next to a channel or topic you no longer want as a favorite.
    • Reorder favorites: Touch and hold the Reorder button and then drag favorites to the order you prefer.
  4. Tap the Done button.

Tell News what kind of stories you prefer

  1. Start the News app on your iPad.
  2. Tap Today in the sidebar or tab bar.
  3. Tap the More button below a headline. Then tap Suggest More or Suggest Less.

See stories only from the channels you follow

  1. Start the Settings app on your iPad.
  2. Tap Apps, then tap News.
  3. Turn on Restrict Stories in Today and then confirm your choice.

Note: When you restrict stories, the variety of stories in the Today feed is significantly limited, and Top Stories and Trending Stories don’t appear.

See also

Tag: News

You can remove cards that you don’t use anymore from Apple Wallet. You can also remove credit and debit cards from Apple Pay if your iPad is lost or stolen.

You can view a card’s recent transactions, along with the last four digits of its number and its Device Account Number. Removing a card on your iPad doesn’t remove it from Wallet on your other devices, and you can add it back later.

Note: If you sign out of iCloud in Settings > [your name], all your credit and debit cards for Apple Pay are removed from iPad. You can add the cards again the next time you sign in to your Apple Account.

View card details

  1. Open the Settings app on your iPad.
  2. Tap Wallet & Apple Pay, then tap a card.
  3. Do any of the following:
    • Tap Transactions to view your recent history. To hide this information, turn off Show History. To view all your Apple Pay activity, see the statement from your card issuer.
    • View the last four digits of the card number and Device Account Number—the number transmitted to the merchant.
    • Change the billing address.
    • Remove the card from Apple Pay.

Remove a card

  1. Open the Settings app on your iPad.
  2. Tap Wallet & Apple Pay.
  3. Tap the card you want to remove. Tap Remove Card.

    Note: If you remove a payment card on your iPad, it’s not removed from Apple Wallet on your other devices. You can add the card again later.

Remove your cards from Apple Pay if your iPad is lost or stolen

If you turned on Find My, it can help locate and secure your iPad.

Removing your cards from Apple Pay takes another device or a call to the issuers of your cards.

See also

You can review and change your settings for the Maps app, including travel mode and units. Maps defaults to your preferred travel mode when providing directions, whether that’s driving, walking, transit, or cycling, and you can change the units used for the scale on a 2D map.

Choose a default travel mode and preferences

Your preferred travel mode is what Maps defaults to when providing directions. Pick from driving, walking, transit, or cycling.

  1. Start the Maps app on your iPad.
  2. Tap your picture or initials next to the search field, tap Preferences, and then tap options.

    (If neither your picture nor initials appear next to the search field, tap Cancel next to the field, or tap the search field, then tap Cancel.)

  3. To find more options, tap Maps Settings at the bottom of the screen.

Some modes of travel come with other route options, like avoiding hills or heavy traffic when walking or cycling, picking an arrival time when driving, or choosing which transit method you prefer.

Change the units used in Maps

As you zoom out on a 2D map, a scale appears in the upper left, and you can change the units it uses.

  1. Start the Settings app on your iPad.
  2. Tap General and tap Language & Region.
  3. Tap Measurement System and select an option.

See also

Tag: Maps

In the Mail app, you can annotate email attachments to give feedback on a draft, decorate a photo, and more. You can draw and write on a photo, video, or PDF attachment, then save or send it back.

Markup’s drawing tools let you draw with just your finger. When you’re finished, you can reply to the sender, start a new message, or discard your edited attachment, and you can save the annotated attachment to your files.

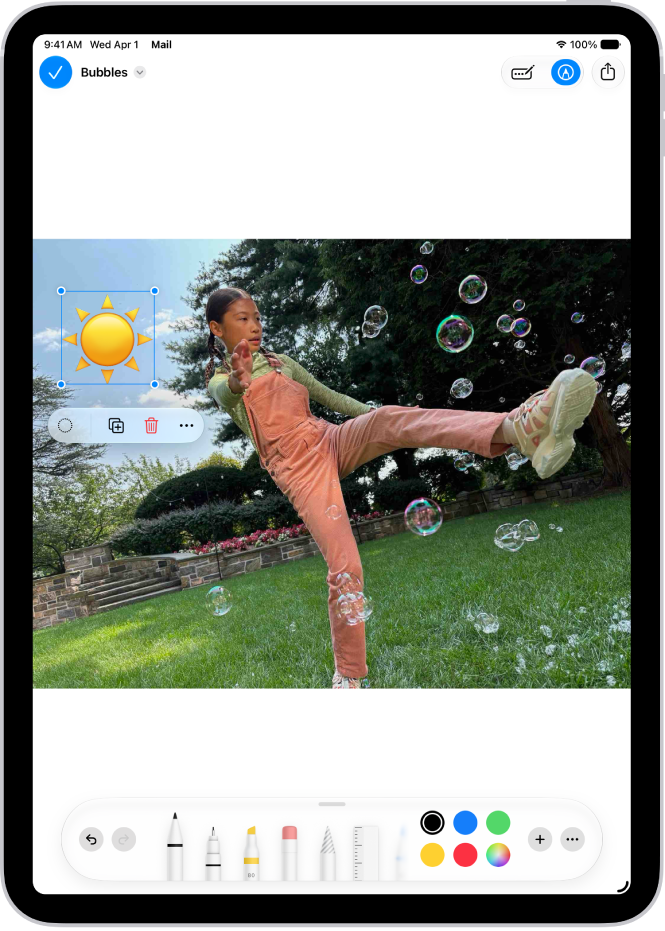
In Mail, a PDF of an attachment has text added and a sticker of an emoji. Below the webpage are the markup tools.

  1. Open the Mail app on your iPad.
  2. In the message, tap the attachment. Tap the Markup button.
  3. Using the drawing tools, draw with your finger.
  4. When you’re finished, tap the More button. Then choose to reply to the attachment sender, start a new message, save the annotated attachment to your files, or discard your edited attachment.

See also

Tags: Mail, Markup

If you have difficulties with hand tremors, dexterity, or fine motor control, you can adjust how the iPad touchscreen responds to tap, swipe, and touch-and-hold gestures. You can have iPad recognize faster or slower touches and ignore multiple touches.

You can also prevent iPad from waking when you touch the screen, or turn off Shake to Undo if you unintentionally shake iPad. After you set up Touch Accommodations, you see a personalized list of options, like Hold Duration and Tap Assistance.

Set up and adjust Touch Accommodations

  1. Start the Settings app on your iPad.
  2. Tap Accessibility and tap Touch. Then tap Touch Accommodations.
  3. Tap Set up Touch Accommodations. Then follow the onscreen instructions.

    After you complete setup, you’ll see a personalized list of Touch Accommodations—like Hold Duration or Tap Assistance—that you can turn on.

  4. You can adjust any of your Touch Accommodations after setup. Tap Settings, then adjust any of the following:

    • Respond to longer or shorter touches: Turn on Hold Duration. Then tap the Decrement button or the Increment button to adjust the duration.

      Note: When you turn on Hold Duration, taps and swipes within the duration are ignored. You can turn on Swipe Gestures to make swiping easier when Hold Duration is on.

    • Make swiping easier while Hold Duration is on: Turn on Hold Duration, then tap Swipe Gestures. Turn on Swipe Gestures, then choose the required movement before a swipe gesture begins.
    • Treat multiple touches as a single touch: Turn on Ignore Repeat. Then tap the Decrement button or the Increment button to adjust the amount of time allowed between multiple touches.
    • Respond to the first or last place you touch: Under Tap Assistance, choose Use Initial Touch Location or Use Final Touch Location.

      If you choose Use Initial Touch Location, iPad uses the location of your first tap—when you tap an app on the Home Screen, for example.

      If you choose Use Final Touch Location, iPad registers the tap where you lift your finger. iPad responds to a tap when you lift your finger within a certain period of time. Tap the Decrement button or the Increment button under Tap Assistance Gesture Delay to adjust the timing. Your iPad can respond to other gestures, such as a drag gesture, if you wait longer than the gesture delay.

      Note: When you turn on Tap Assistance, taps and swipes within the duration are ignored. You can turn on Swipe Gestures to make swiping easier when Hold Duration is on.

    • Make swiping easier while Tap Assistance is on: Choose either Use Initial Touch Location or Use Final Touch Location. Then tap Swipe Gestures. Turn on Swipe Gestures. Then choose the required movement needed before a swipe gesture begins.

You can recalibrate or reset Touch Accommodations at any time.

Adjust settings for touch-and-hold gestures

You can use the touch-and-hold gesture to see additional options or actions you can perform, or to get a preview of content. If you have trouble performing this gesture, do the following:

  1. Start the Settings app on your iPad.
  2. Tap Accessibility and tap Touch. Then tap Haptic Touch.
  3. Choose the touch duration—Fast or Slow.
  4. Test your new settings on the image at the bottom of the screen.

Recalibrate or reset Touch Accommodations

  1. Start the Settings app on your iPad.
  2. Tap Accessibility and tap Touch. Then tap Touch Accommodations.
  3. Do either of the following:
    • Recalibrate your Touch Accommodations: Tap Recalibrate Touch Accommodations.
    • Reset your Touch Accommodations: Tap Reset Touch Accommodations.

Turn off Tap to Wake

On a supported iPad model, you can prevent touches on the screen from waking iPad.

  1. Start the Settings app on your iPad.
  2. Tap Accessibility, tap Touch, and then turn off Tap to Wake.

Turn off Shake to Undo

If you tend to unintentionally shake iPad, you can turn off Shake to Undo.

  1. Start the Settings app on your iPad.
  2. Tap Accessibility and tap Touch. Then turn off Shake to Undo.

Quick tip: To undo text edits, swipe left with three fingers.

See also

View each memory in your Memories collection as a movie that’s set to music. All the collections and albums you have in the Photos app can also be viewed as a memory movie that you can edit to make more personal.

With Apple Intelligence, you can create a custom memory movie of the story you want to see. While one plays, you can pause it, mute it, go backward or forward, or close it.

Note: Apple Intelligence on iPadOS 27 or later is available on an Apple Intelligence-enabled iPad mini (A17 Pro) and iPad models with M1 or later. Apple Intelligence is not available in all languages or regions. Usage limits may apply.*

Play a memory movie

  1. Open the Photos app on your iPad.
  2. Tap Collections.
  3. Swipe left under Memories to scroll through a selection of your memories, or tap Memories to view them all.
  4. Tap the Play button in the bottom-right corner of a memory to play it.
  5. As the memory movie plays, you can do any of the following:
    • Pause: Tap the screen and tap the Pause button.
    • Go backward or forward: Swipe left or right. Or tap the screen. Slide the frames at the bottom of the screen left or right.
    • Mute: Tap the screen, then tap the Mute button.
    • Close a memory: Tap the screen and tap the Close button.

Want to customize the memory movie? See our guide, Personalize your memory movies.

Play a memory movie from an album or collection

All the albums and collections you’ve got in the Photos app can be viewed as memory movies.

  1. Open the Photos app on your iPad.
  2. Tap Collections.
  3. Select an existing album or collection. Tap the Play button to watch the photos and videos as a memory movie.

For customizing the memory movie, see our article, Personalize your memory movies.

Create a memory movie with Apple Intelligence

Right in Photos, you can make a custom memory movie of any story you want to see. After you type a description, Apple Intelligence finds the best photos and videos, sets them to music, and crafts a storyline with unique chapters and a narrative arc.

  1. Open the Photos app on your iPad.
  2. Tap Collections, tap Memories, and tap Create.
  3. Enter a description of the movie you want to create and then tap the Close button.

*Apple Intelligence is available with Siri and device language set to Chinese (Simplified), Chinese (Traditional), Danish, Dutch, English, French, German, Italian, Japanese, Korean, Norwegian, Portuguese, Spanish, Swedish, Turkish, or Vietnamese. Some features may not be available in all regions or languages. Some devices may not be available in all regions. Siri AI is available in beta in iOS 27, iPadOS 27, macOS 27, watchOS 27, and visionOS 27 and requires an Apple Intelligence–enabled device set to a supported language. Available in English to start. Siri AI will not be initially available in the EU on iOS, iPadOS, and watchOS. Certain Apple Intelligence features that rely on server-side models are subject to daily usage limits, including but not limited to Siri AI, Intelligent Photo Editing Tools, Image Playground, and AFM 3 Cloud models in Shortcuts. Daily limits may vary by feature, request complexity, system demand, system policies, and other factors. Expanded access to such features will be available for a fee in the future. Use of these features is subject to the Apple Intelligence Terms and Conditions.

See also

If you’re unable to speak or have lost your speech over time, you can use Live Speech on iPad to have what you type spoken out loud during in-person conversations and in apps like FaceTime. You can choose from dozens of system voices or use a Personal Voice you create.

On a FaceTime call, the other person hears Live Speech on their end. You can also save phrases you use often, and add them to custom categories like school or work.

Note: Live Speech isn’t available in all languages.

Have what you type spoken out loud

  1. Open the Settings app on your iPad.
  2. Tap Accessibility and tap Live Speech. Then turn on Live Speech.
  3. Triple-click the top button or Home button (depending on your iPad model) and tap Live Speech (if the Accessibility Shortcut is set up with more than one feature).
  4. Tap the Live Speech window, type what you want to have spoken and then tap Speak.

    You can also paste copied text into the window, or tap suggested words that appear above the keyboard as you type.

Live Speech is output on the other end of the call if you’re on a FaceTime call. Otherwise, your iPad’s speaker outputs Live Speech.

Have saved phrases spoken out loud

Live Speech keeps a list of phrases you use often to select from. Your phrases can go into custom categories like school or work, too.

  1. Open the Settings app on your iPad.
  2. Tap Accessibility and tap Live Speech. Then turn on Live Speech.
  3. Tap Phrases and then do any of the following:
    • Create a new category: Tap the Add Category button, enter a category name, select an icon, and then tap Add Category.
    • Add a new saved phrase: Tap a category, tap the Add Phrase button, enter a phrase, and then tap Save.
  4. Triple-click the top button or Home button (depending on your iPad model). Then tap Live Speech (if the Accessibility Shortcut is set up with more than one feature).
  5. Tap the Phrases window and then do any of the following:
    • Speak a phrase from a saved category: Scroll to the left to select a category, then tap a phrase.
    • Quickly add a new phrase: Tap the Add Phrase button in any category, enter a phrase, tap Done, and then tap the phrase.
    • Quickly speak a recently used phrase: Tap Recent and then tap a phrase.

To remove a phrase, swipe left on it, then tap Delete.

Allow audio from other apps in calls

Allowing audio from apps to be audible in voice and video calls is helpful when you use apps that assist with speaking and communication.

  1. Open the Settings app on your iPad.
  2. Tap Accessibility, tap Audio & Visual, and tap Add Audio in Calls.
  3. Turn on Allow Apps to Add Audio in Calls.

    When this option is on, both audio and microphone input are included in calls. To silence all audio during a call, mute the microphone.

See also

With Apple Intelligence, you can create custom emoji—called Genmoji. Simply describe what you want the Genmoji to look like, combine existing emoji with descriptions, or create one of friends and family based on their photos.

You can add Genmoji to messages, share them as a sticker or Tapback, and more. You can add up to three people from your Photos library, and delete a Genmoji you no longer want. If a description doesn’t match the person you selected, the Genmoji is personalized based on the photo instead.

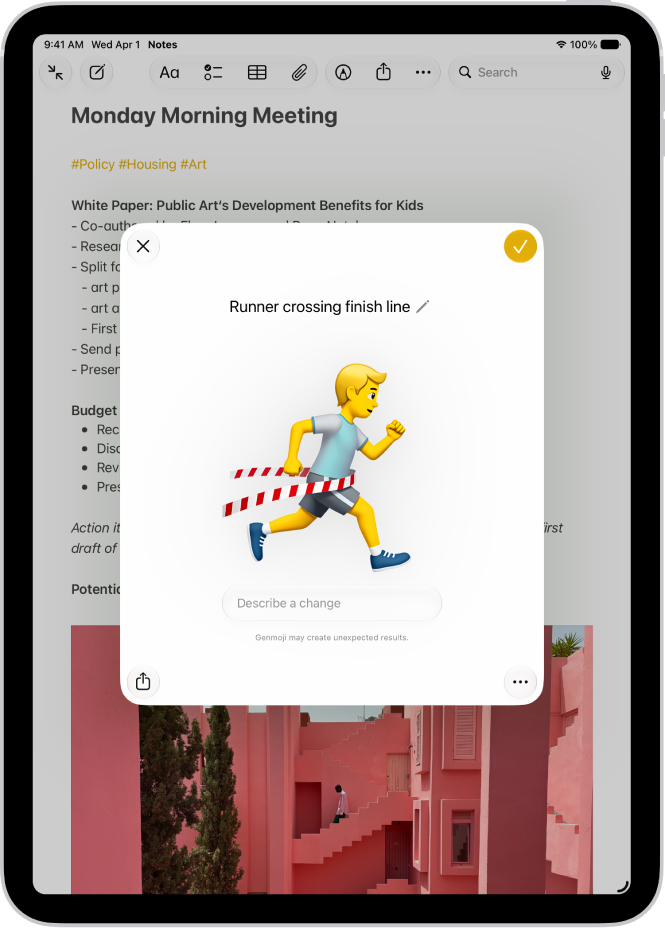
The Genmoji window showing a created Genmoji of a man running across a finish line

Note: Apple Intelligence on iPadOS 27 or later is available on an Apple Intelligence-enabled iPad mini (A17 Pro) and iPad models with M1 or later. Apple Intelligence is not available in all languages or regions. Usage limits may apply.*

Create Genmoji

  1. Tap a text field. Then tap the Emoji button or the Next Keyboard key to switch to the emoji keyboard.
  2. Tap Genmoji at the top right of the onscreen keyboard.
  3. Do any of the following:

    • Describe it: Enter a description.
    • Use existing emoji or Genmoji as a base: Tap the Emoji button to choose emoji or Genmoji.
    • Add a person from your Photos library: Tap the Choose Person button, then select a person. You can add up to three people.

      Note: If you provide a text description that doesn’t match the person you selected, your image is personalized based on the photo you selected rather than the text description.

    • Add a photo of something else, like a pet, nature, or food: Tap the Choose or Take Photo button. Then choose an option.
  4. Tap the Submit button to create your Genmoji.
  5. To refine your Genmoji, describe a change or add existing emoji or Genmoji to the one you created.

    Note: Scroll up or down to move between versions of your Genmoji. You can move to a different version at any time and keep refining from there.

  6. When you’re happy with your Genmoji, tap the Done button.

    Genmoji you create are saved with your stickers.

Image Playground can create a Genmoji, too; read our guide, Create original images with Image Playground.

Delete Genmoji

  1. Tap a text field. Then tap the Emoji button or the Next Keyboard key to switch to the emoji keyboard.
  2. Swipe right or tap the Stickers button.
  3. Tap the Stickers button, touch and hold a Genmoji, and tap Delete.

You can also tap the Add button in a Messages conversation, then tap Stickers. Tap the Stickers button, touch and hold a Genmoji, then tap Delete.

You can block access to image creation features, like Genmoji, in Screen Time settings. See Block or allow Siri and Apple Intelligence features. The recommended age for realistic images is 18+.

*Apple Intelligence is available with Siri and device language set to Chinese (Simplified), Chinese (Traditional), Danish, Dutch, English, French, German, Italian, Japanese, Korean, Norwegian, Portuguese, Spanish, Swedish, Turkish, or Vietnamese. Some features may not be available in all regions or languages. Some devices may not be available in all regions. Siri AI is available in beta in iOS 27, iPadOS 27, macOS 27, watchOS 27, and visionOS 27 and requires an Apple Intelligence–enabled device set to a supported language. Available in English to start. Siri AI will not be initially available in the EU on iOS, iPadOS, and watchOS. Certain Apple Intelligence features that rely on server-side models are subject to daily usage limits, including but not limited to Siri AI, Intelligent Photo Editing Tools, Image Playground, and AFM 3 Cloud models in Shortcuts. Daily limits may vary by feature, request complexity, system demand, system policies, and other factors. Expanded access to such features will be available for a fee in the future. Use of these features is subject to the Apple Intelligence Terms and Conditions.

See also