Got a tip for us?

Ready to check out the best iPhone 15 Pro and iPhone 15 Pro Max tips and tricks? From the new smart display mode to health features, interactive widgets to a new Action Button experience, Live Voicemail to offline Apple Maps, and more, here are the top 15 iPhone 15 Pro and iPhone 15 Pro Max tips and tricks you should try out first.

The iPhone 15 Pro and iPhone 15 Pro Max in the natural titanium finish.

KEY POINTS

  • The iPhone 15 Pro and iPhone 15 Pro Max have a ton of tips and tricks that you’ll want to take advantage of if you’ve just purchased the device.
  • The Action Button is among the biggest features on the iPhone 15 Pro and Pro Max.
  • There are plenty of iPhone 15 Pro tricks, such as deleting duplicate verification codes automatically or cross-fading between songs in Apple Music, that will work on any iPhone running iOS 17.

iPhone 15 Pro in black titanium, white titanium, blue titanium, and natural titanium finishes.

If you’re upgrading from a much older iPhone model, there’s going to be a bit of a learning curve when it comes to navigating your brand-new iPhone 15 Pro or iPhone 15 Pro Max.

If you just bought the the iPhone 15 Pro or Pro Max, you may be wondering what an Action Button is (that little button at the left side of your phone). If you bought any of the iPhone 15 models, you’ll want to know what visual lookup is and how to use it. There are also hidden iPhone 15 Pro hacks you should know about, such as StandBy mode, which i’m using all the time and can really come in handy.

Here are the best iPhone 15 Pro and iPhone 15 Pro Max tips and tricks to get you started.

Best iPhone 15 Pro tips and tricks to try first

1. Customize Action Button

A screen showing that the Action button is located on the left edge of the iPhone 15 Pro. You can customize the function of the button in Settings > Action Button.  

The iPhone has had a ring/silence switch since the very beginning, and the iPhone 15 Pro and iPhone 15 Pro Max finally changes that. The switch has been replaced with the Action button.

By default, just press and hold the button to toggle between ring and silence, just like the switch used to do. You’ll get a haptic response and animation in the Dynamic Island. But there are a number of other modes available, too. You can set the button to launch the camera, start a voice recording, activate an accessibility feature like launching the Magnifier or flashlight, or running a Shortcut.

That last one is especially exciting, as it means you can quickly perform complex actions, or even just launch any app you want.

Should you want to take advantage of all iPhone 15 Pro Action Button tips and tricks, the Settings app is where to go. Open the app and scroll down until you find the Action Button tab.

The first thing you will notice is how different the user interface looks compared to other settings on the iPhone. There’s a fancy animation of the Action Button as you swipe through the programmable functions.

Your options include Silent Mode (default), Focus, Camera, Flashlight, Voice Memo, Accessibility, Shortcut, and Translate (arriving later this year).

Apple allows you to map a specific function with the broader categories. For example, a drop-down box on the Camera slide gives you the options of Photo, Selfie, Video, Portrait, and Portrait Selfie.

2. Turn on Face ID for Private Browsing in Safari

Safari has added several new privacy settings on iOS 17: You can now choose a different search engine like [DuckDuckGo when privately browsing, automatically strip all tracking information from URLs, and securely share passwords with friends and family. And you can even lock your private browsing tabs in Safari — but you’ll need to toggle this setting on before you can use it.

In Settings, go to Safari and toggle on Require Face ID to Unlock Private Browsing. That’s all you need to do! If you want to test out the feature, open the Safari web browser and make your way to Private Browsing. If you attempt to browse privately, you’ll be asked to use Face ID to access your private tabs.

3. Automatically delete your verification codes

This iPhone 15 Pro trick cleans up the clutter of verification codes in your text messages, and it’s somewhat hidden in your settings. And oh yeah, it’s not enabled by default, so it’s up to you to turn it on.

In the Settings app, go to Passwords > Password Options and toggle on Clean Up Automatically. Now, when you receive authentication notifications in Messages (or even in Mail), they’ll be automatically deleted from their respective applications — as long as you use the verification code with the autofill feature at the top of your keyboard. If you don’t use the autofill feature, the verification code will stay in your messages or emails.

4. Enable the level in your camera

If you want to take better photos, or at least straighter photos, then this iPhone 15 Pro trick is for you. The native Camera application on your iPhone has a new, somewhat hidden feature that adds a virtual horizontal level as you snap a photo. You’ll know the shot is level with the ground when it turns yellow and you feel the haptic feedback.

This feature is once again, not enabled by default, so go to Settings > Camera and toggle on Level under the _Composition_section. Now when you take a photo, you should see a broken straight line in the middle of your screen — this is the level. Adjust your phone to make it yellow, signifying that it’s now level to the ground.

5. Use Apple Maps offline to navigate

You might be surprised to learn this, but you’ve never been able to use Apple Maps offline. Instead, you’d have to be connected to the internet, which is useless if you need to find your way back home when you’re out in the wilderness or in an area with no connection. In iOS 17, you can finally download an offline map to grab directions even when you don’t have service.

In Maps, tap your profile photo in the top right of the navigation window and go into Offline Maps. Depending on where you drive most, you may see a suggested map to download, along with the size of the map, in case you don’t have much storage. You can also just hit Download New Map, type a city, manually adjust the map if needed and download it to your iPhone.

6. Crop your photos using the zoom feature in Photos

Cropping a screenshot or picture in the Photos app is a relatively easy process, but Apple has made it even easier on iPhone 15 Pro.

Now, when you’re viewing a photo and you zoom in on it, a new Crop button will appear in the top-right. This will automatically take you into edit mode and allow you to then adjust the crop even more, or you can simply hit Done to finish the crop. You must act quick though, as the crop button appears for only a few seconds after you zoom in to a photo.

7. Use Visual Look Up to figure out laundry codes

You grab a shirt and look at the tag. It’s filled with symbols that are supposed to help you figure out how to wash this specific article of clothing — maybe it can only be washed in cold water, or it might require a dry cleaning. Unfortunately, you might not know how to read these laundry symbols. But your iPhone 15 Pro can.

With this iPhone 15 Pro trick, you can now use the Visual Look Up feature, which can identify words and objects in your photos, to decipher what these laundry codes say. All you have to do is take a clear photo of your laundry symbols, go into the **Photos **app, find the image of the laundry symbols, swipe up and tap on Look Up Laundry Care. The results will show you what each of the recognized laundry symbols mean.

8. Use Crossfade for smoother transitions in Music app

If you’re in charge of playing music at a friend’s party or in the car, you can use an iPhone 15 Pro trick to cross-fade effect between songs in Apple Music.

In the Settings app, go to Music and toggle on Crossfade. Once the setting is enabled, you can choose how long you want the cross-fade to be: Choose between one second and 12 seconds, in second intervals. If you choose five seconds, for example, the next song in the playlist/album will begin to slowly play in the background five seconds before the current song ends.

9. Interact with certain widgets on your home screen

The widgets that live on your home screen are no longer there just for looks. Apple has brought interactive widgets to the iPhone, allowing you to control applications from your home screen, much like you would from the control center.

For now, the number of interactive widgets is limited, but if you want to add one to your home screen, press down on an empty space on your home screen to enter edit mode, tap the plus sign in the top right, and scroll through the list of widgets. A few interactive widgets available include Podcast, Home, Notes and Music.

For example, in Music you can play or pause music, while in Home, you can turn any connected devices off and on, such as a smart light bulb or a thermostat.

10. Change Siri volume and speaking rate

With iOS 17, you can change how loudly, softly, or quickly Siri speaks on your iPhone 15 Pro.

Change Siri’s speaking volume on your iPhone 15 Pro

To change Siri volume on your iPhone15 Pro, just activate the assistant then say "Speak louder" or "Speak quieter."

Change Siri’s speaking speed on iPhone 15 Pro

To change how quickly or slowly Siri speaks on your iPhone 15 Pro, follow the steps below:

  1. Open the Settings app and tap Accessibility.
  2. Tap Siri.
  3. Slide the Speaking Rate slider toward the right for faster speech, toward the left for slower speech.

What do you think about iPhone 15 Pro? Are there any other useful but subtle tips and tricks that I missed? Let me know in the comments below.

11. Use StandBy Mode

StandBy is a new customizable Lock Screen mode in iOS 17 that activates when an ‌iPhone‌ is charging and positioned on its side. Think of it as a kind of smart display for your ‌‌iPhone‌‌ that offers fast access to different screens of glanceable information that can be viewed at a distance, when your device is charging on a kitchen, desk, or nightstand, for example.

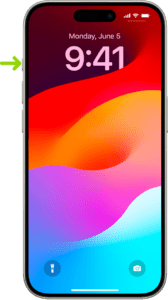
  1. With your iPhone 15 Pro screen locked, place it in landscape on an upright charger (the mode won’t work on flat or low-angle chargers or when your screen is unlocked – and it must be charging)
  2. iPhone StandBy will automatically appear – the feature is enabled by default.
  3. The classic analog clock plus calendar widget on the right is the default StandBy view, swipe up on either to change them. Press and hold on either one to add or remove widgets.
  4. On the first StandBy view, do a big swipe from right to left to change views
  5. Press and hold on the other StandBy views to customize them.

You can tweak StandBy settings by heading to Settings > StandBy.

12. Create Your Own Contact Poster

Contact Posters allow you to customize how you’re represented when you give people a call. You can use photos and emoji to personalize your Contact Poster, which appears on a person’s ‌iPhone‌ when you phone them. And like the ‌iPhone‌ Lock Screen, you can match images with eye-catching typography.

But your Contact Poster doesn’t just show up in calls. It’s also part of your contact card in the Contacts app, giving consistency in the places where you communicate and share. The following steps show you how it’s done:

  1. Open the Contacts app and tap on your own name.
  2. Tap the Contact Photo & Poster option.
  3. Tap Edit, then tap Customize.
  4. Tap Poster.
  5. Use the buttons at the bottom of the screen to take a photo, choose a photo you want to use from your library, pick a Memoji, or add a simple Monogram of your initials.
  6. To go along with your chosen image, you can optionally customize the font size, style, and color. (Note that you cannot change your name from this interface – that needs to be done by changing your contact info.)
  7. Swipe across the poster to preview a selection of filters, including black and white, duotone, and color wash in the color of your choice.
  8. When you’re ready, tap Done to preview what a person sees when you call them. If you’re happy with the look, tap Continue.
  9. Now you can opt to edit the crop of your Contact Photo, choose a different photo to use, or Skip this step.

13. Don’t read articles — listen to them

If you’re a fan of podcasts, you’ll probably enjoy a hidden iPhone 15 Pro trick that lets you ask Siri to read news articles, informational sites or anything else in Safari out loud, meaning all you have to do is listen.

One way to get Siri to read the selected article to you is to hold your iPhone’s side button which will activate Siri. Then say "Read this to me." Alternatively, simply say "Siri, read this to me," hands-free. (In iOS 17, you don’t even have to prefix a command with "Hey" to invoke Siri any more.)

Siri will then begin reading the article to you out loud, and a media player panel will appear in the upper section of the screen, allowing you to rewind, fast-forward, adjust the volume, and even AirPlay the spoken audio to another device.

Another way to get Siri talking is to tap the Aa icon in the address bar, then choose the Listen to Page option in the pop-up menu. Siri will immediately begin reading the page to you.

The only difference with this method is that, unless you lock your device while Siri is reading, you won’t see a media control panel on the screen. If the article is still open in Safari, you can stop Siri reading it by tapping the Pause Listening option that replaces the "Listen to Page" option in the Aa pop-up menu.

14. Set multiple timers

Yes, for the first time ever, you can set multiple timers to run at the same time on an iPhone. Just start a timer in the Clock app as before, and then tap the sign at the top right to add a new one. You can label each timer so that you don’t get confused as to what they’re counting down to, just as you can with various alarms.

15. Live voicemail

For those who’d rather text than call, this iPhone 15 Pro trick is for you. Live Voicemail makes it easy to know if you’d like to pick up a call while someone is leaving a message without having to call them back.

The Live Voicemail feature is turned on by default on iPhone 15 Pro.

When you receive a call and let it go or send it to voicemail, you’ll see the phone and recording icon in the Dynamic Island or at the top of your iPhone
Tap the phone icon to jump to the Live Voicemail transcription
Now you can block the caller, answer the call, or let them finish leaving a voicemail – and you can swipe up from the bottom to leave Live Voicemail at any time..

The success of an individual will depend on what they interact with and what they do with that. Academic excellence is one thing that many scholars would admire.
You could be studying a course that you are passionate about. Therefore, you won’t have any other option than to succeed in it. But now, do you have all that it takes to achieve that? Besides, what are the valuable tools you might require?
Below, we have various IOS apps that are crucial for the success of scholars. Read on to learn more about that and why they are relevant to your education!
IOS Apps You Can Access With Your Phones

Not every scholar can afford a PC for managing academic tasks. It is thus crucial to find out the best and most reliable options to use when in need of such help. Today, you can access online relevant sources like Wikipedia if you have an IOS app installed on your device that can access the internet.
Today, managing academic work has become easy, thanks to the advancement in technology. With a smartphone and a stable internet, you can search for scholarly resources, compile a report and scan through them for corrections. So, what are some of the useful IOS apps for managing school work? They include:

Adobe

Do you find it complex writing notes in class because maybe the tutor was fast or you weren’t paying attention? With an IOS phone, you can install adobe apps to help you out with such issues. With this tool, you can download pdf format documents and access the content from your mobile phone. At times, you might not get the most relevant article for use in your academic work because they are all in pdf form. With this IOS app, it will be effortless to retrieve info from such a document.
Besides, you can edit a pdf document with the help of this tool. Moreover, you might also have to install a pdf word converter app on your phone. This will help you to navigate from pdf to word documents with ease.

CamScanner

Another useful IOS app is the CamScanner. Many times, students will encounter relevant documents for their school work. But now, you might not be in a position to copy the entire document. In such cases, it would be best to rely on a cam scanner to finish the job for you. Here, you’ll scan through the document and save it in pdf form.

Google Assistant

A Google assistant will listen to you and access the information from the internet. Such an app is useful when you need quick answers to long queries. You have to turn on your data before accessing this app. Ensure that you are audible enough when providing instruction for the tool to capture your words and present precise answers to your challenges.

Google Drive

Where can you save academic work and access it with ease? Google Drive provides storage for individuals who might want to save data online. The best thing is that it isn’t specific on the type of data to store. For instance, students can save word documents, pictures, videos and so forth.
The best thing about this storage app is that you’ll receive 15 GB of free storage space for every Google account that you have. When the storage gets full, you can purchase 100 GB of extra space from Google. From there, you can save as much data as you can.
Additionally, this IOS app allows individuals to access their documents at any time from any smartphone. Nonetheless, you’ll need a stable internet to achieve that. Additionally, you are sure that the data is safe from third-party access or loss.

Google Translate

Last but not least, you can boost your understanding of particular languages with the help of Google translate. This IOS helps to convert the language used on a page to one that you can easily understand. Funny enough, you don’t have to pay to access the service.
All these apps relate to each other at some point in your studies. For instance, you can access the saved data in your CamScanner with the help of the Adobe IOS app. Therefore, individuals need to select the best fit of IOS apps to rely on for academic success.
There are some which you’ll have to buy, while others are free. Additionally, you should check the compatibility with your phone, as some might not support various IOS apps.

One of the most common questions regarding using MacBook is how to download videos from YouTube and save them as MP3s on Mac. This is a deceptively simple question, and we’re going to push aside any of the complexities of downloading YouTube videos in MP3 format on Mac, and instead we’ll show you the single most direct method of downloading videos from YouTube in MP3 format on Mac in 2023, since that is usually what most people are looking to do.

There are numerous reasons why you might want to download YouTube videos in MP3 on Mac – being able to listen to them when you’re on a train, for instance, or if you just want to save something for future use. Thankfully, downloading your favorite YouTube videos in MP3 on Mac is dead simple!

Downloading YouTube videos to MP3 on Mac is easy, and there are lots of reasons to give it a try. For example, it lets you listen to music without an internet connection, which is fantastic for keeping yourself entertained during the long traffic and trips to places without reliable internet connection.

Downloading YouTube videos to MP3 on Mac is also great if you have a Wi-Fi connection. You can download YouTube playlist to your Mac using your home Wi-Fi, and listen to music on the move without risking going over your data allocation.

Which tool should you use, though? Well, that’s where things get complicated.

There are a couple of YouTube videos to MP3 downloader softwares for Mac on the market and most of them are quite good. However, there is a software that is preferred out there that always snag the most recommendations.

We took a look at some of those YouTube videos to MP3 downloader software for Mac and came up with the best.

The best YouTube to MP3 converter for Mac right now is: 4K YouTube to MP3.

4K YouTube to MP3

Of all the YouTube to MP3 converter applications we’ve tried, 4K YouTube to MP3 is the best.

Whether you want to listen to music from a video offline whenever you like, or turn your favorite YouTube’s channel into a podcast that you can enjoy when you’re working, 4K YouTube to MP3 is the best tool for the job. Provided that you have the copyright owner’s permission, that is – bear in mind that YouTube’s terms of service explicitly prohibit unauthorized downloading.

4K YouTube to MP3 is the world’s first YouTube to MP3 converter for MacBook. It provides a complete solution to download high-quality audio from the major social networks including YouTube, Soundcloud, Vimeo, Instagram, Facebook, Flickr, Dailymotion, Metacafe, Twitch,, Tumblr and more. Unlike many other YouTube to MP3 converter software for Mac, 4K YouTube to MP3 supports all kinds of audio formats and types including MP3, M4A and OGG.

How to download YouTube videos in MP3 format on Mac using 4K YouTube to MP3

Let’s take a look at how to download YouTube videos to MP3 and save them on your Mac using 4K YouTube to MP3. As you’ll see, downloading YouTube playlists and channels in MP3, M4A or OGG on Mac is a simple and straightforward process. Below are step-by-step instructions for how to download YouTube videos in MP3 format on Mac using 4K YouTube to MP3.

Step 1: Get 4K YouTube to MP3

Download, install and launch 4K YouTube to MP3 on your Mac.

4K YouTube to MP3

Step 2: Copy and paste the video URL

Launch your web browser, find the content you want to download from YouTube and copy its URL from the address bar.

Step 3: Open 4K YouTube to MP3 and click The Paste URL button.

Step 4: Wait until the download process is complete.

Once the audio has finished downloading, it will appear in the destination folder. You can also right-click it in 4K YouTube to MP3 and select Play. Unless you adjust the settings, the audio will remain in this list until you choose to remove it – even if you close and restart the software.

There you go! Now you can enjoy listening to YouTube audio on your Mac even when you are offline.

Should I buy 4K YouTube to MP3?

Absolutely! 4K YouTube to MP3 is the best free YouTube to MP3 converter on the market. It’s easy to use, highly customizable, ad-free, and doesn’t include any malware. Unlike other YouTube to MP3 converter software that work only on a single operating system, 4K YouTube to MP3 supports Windows, macOS and Linux, and this gives it an edge over other software. 4K YouTube to MP3 is used by beginners as well as experts in Apple products. And therefore, we recommend it to our readers.

Availability and price

4K YouTube to MP3 is available on Mac, Windows, and Linux.

4K YouTube to MP3 is free to use. However, Upgrading to the premium version for a one-off fee will unlock additional features, including unlimited downloads, concurrent downloads, ad-free usage, and the ability to download entire channels, playlist, etc.

Licenses start from $15 for a Personal license and go up to $65 for a Bundle that includes licenses for 4K Video Downloader Pro and 4K Stogram Pro, and 4K YouTube to MP3.

Highlights of 4K YouTube to MP3

  • Download YouTube playlist and channels
  • Download private YouTube content with access in original quality.
  • Built-in music player
  • Download audio in the same quality it is stored on the website.
  • Supports many video sites including YouTube, Soundcloud, Vimeo, Instagram, Facebook, Flickr, Dailymotion, Metacafe, Twitch, and Tumblr
  • YouTube Premium download
  • Audiobooks download
  • Download speed control
  • Great choice of audio formats including MP3, M4A and OGG.
  • Smart file organization
  • Simple to use
  • Available for Windows, macOS and Linux.

Start downloading and converting YouTube videos to MP3

You’ve successfully downloaded Youtube videos in mp3 format on your Mac using 4K YouTube to MP3! 4K YouTube to MP3 is intuitive, user-friendly, and accomplishes its intended goal in a very short amount of time.

Go ahead download 4K YouTube to MP3 and give it a try. If you have any other questions about this software or our 4K YouTube to MP3 review, drop us a comment and let us know.

TikTok is currently the most fun app for short-form videos. Yes, it’s even more popular than Instagram when it comes to vertical videos. The app, previously known as Musical.ly, lets users create fun 15 seconds lip-sync videos. You can spend hours just looking at fun videos in TikTok. But what if you want to download and save some of your favorite TikTok videos offline? Or share them with your friends on WhatsApp? Of course, quickly downloading the entire content of TikTok account would be great, too. Qoob Clips lets you do all of this and more. It’s a TikTok downloader, viewer, and Backup tool that’s surprisingly easy to use.

qoob

What Is Qoob Clips? Why should you download it?

Qoob Clips is a smart tool that lets you helps you view and download videos and music from both – public and private TikTok accounts, silently follow TikTok profiles, and monitor anyone’s account feed.

  • What does Qoob Clips offer that others don’t?
  • Can Qoob Clips download all videos of a TikTok account?
  • Can Qoob Clips download TikTok videos with captions?
  • Can Qoob Clips download all TikTok videos by hashtags?
  • Can Qoob Clips auto-download TikTok videos for accounts and hashtags?
  • Can Qoob Clips backup your TikTok account?

I’ll cover all that and more in this Qoob Clips review.

I summarized my thoughts on Qoob Clips below, but read the full review to get a comprehensive look at this professional TikTok video downloader tool for Mac.

Qoob Clips Review Summary

Qoob Clips is a true jack of all trades, able to download all videos of a TikTok account, download TikTok videos with captions, download all TikTok videos by hashtags, auto-download TikTok videos for accounts and hashtags and backup your TikTok account. It boasts better performance than most when it comes to downloading TikTok videos. I challenge anyone to find a TikTok downloader for Mac with more advanced features while keeping the experience simple and novice-friendly.

Using Qoob Clips, you can not only download TikTok videos but also automatically backup your TikTok page on macOS, Windows, or Ubuntu computers. Even better, you can save these videos in MP4 format and HD quality of up to 720p. Let’s understand how to use Qoob Clips to download TikTok videos on Mac.

Download TikTok Videos on Mac Using Qoob Clips

Here are the step-by-step instructions on how to set up Qoob Clips and download TikTok videos on Mac:

Step 1: Download and install Qoob Clips on your Mac .

Step 2: Enter the username and Click on the Download button. That’s it! Now you can enjoy watching TikTok videos even when you are offline.

Qoob Clips Features

  • Download all videos of a TikTok account: Just type in an account’s username on the search field and hit the Download button. The content of this account will automatically be downloaded to your Mac. To pause download, simply hit the cross located in the upper right and Update icon to resume the download process.
  • Download TikTok videos with captions: Grab TikTok videos along with their original captions. Hover the cursor over the saved TikTok videos to reveal their captions in-app, copy them to the clipboard.
  • Download all TikTok videos by hashtags: Grab TikTok challenge videos and other content from TikTok hashtags. Save them in MP4 format and HD quality up to 720p. To do this, type in a hashtag on the search bar and hit download.
  • Auto-download TikTok videos for accounts and hashtags: Subscribe to the automatic downloading of new videos from your favourite TikTok creators and hashtags. Get the updates saved immediately they are uploaded on TikTok.
  • Full control over the automatic downloading feature: Control what you want to download. Set a specific time range in the in-app calendar to only download TikTok videos from this period.
  • Backup Your TikTok Account: Not a single person is immune from bans on social media. To have a piece of mine, simply go ahead and back up your own TikTok account with Qoob Clips.

Qoob Clips: Features to expect in the near future

More features like selective TikTok video download, search by music, download by link, location/Region change, private and recommended video download will be supported in the upcoming updates.

Availability and Price

Qoob Clips is available on Mac, Windows, and Ubuntu.

Only a small number of TikTok video downloader for Mac deliver their promises and Qoob Clips has no exception. Once you set this application up, you can download TikTok content on your Mac without any effort. The vast majority of people won’t even think about the price and they would be ready to pay any price for this amazing tool.

Qoob Clips offers a free plan for people who want to test the application before using it. The good news is that the free version offers up to two hashtag accounts and 50 daily video downloads.

Once you have decided to pay for Qoob Clips then you would notice that the pricing is quite affordable. The premium plans of Qoob Clips start from 10 dollars per month. This plan allows you to subscribe to up to 10 accounts and you can enjoy 500 downloads every day. An amazing and unique thing about this plan is that it even allows new video auto-download and it’s advertisements free.

If you want to enjoy all the Qoob Clips features without any restriction then you can opt for the professional plan. This plan is available for 30 dollars per month. With this plan, you can subscribe to unlimited accounts and it also allows you to use the software for commercial purposes.

The bottom line: Is Qoob Clips worth buying?

Absolutely! Qoob Clips has the best interface which is easy to navigate and is very appealing to the eye. You immediately get started on this tool after downloading it on your Mac. This TikTok video viewer and downloader is very easy to use so you don’t have to have any expert skills to get started with it.

Qoob Clips has been tested by many tech experts. Most of these experts have been surprised by the amazing features bundled on this tool. Qoob Clips works beautifully and accomplishes its intended goal in a very short amount of time. It can download TikTok videos very efficiently without any hassle. If you are looking for a reliable TikTok video downloader for Mac, then look no further. Just go ahead and download Qoob Clips without any second thought.

You’ve successfully downloaded TikTok videos on your Mac using Qoob Clips! If you have any other questions about this software or our Qoob Clips review, drop us a comment and let us know!

The first thing that an iOS phone user might think when asked about translating something would be Siri that can do all sorts of things and entertain you with basically anything. However, if you have to travel and translate things into several languages, it is better to consider some stand-alone apps that will help you cope with the basics. Regardless if you would like to learn some phrases to feel more comfortable at the restaurant or talk to the bank clerk as you open the foreign account, these iOS apps will fit any taste, budget, and requirements!

Top 8 Language Learning Apps For iOS Users

1. DuoLingo.

It is one of the most popular language-learning apps that supports over 23 languages from Spanish and French to Irish and Swahili. You can choose anything that you like and enjoy learning in a fun and entertaining way. Regardless if you are only starting or already know the bits here and there, this app will make you satisfied.

2. HelloTalk.

What makes it unique is the great community of people from all over the world that will help you polish your verbal language skills. It supports over 150 languages and lets you talk to native speakers by teaching them back. It is user-friendly and always helpful as you can ask people to translate things you do not know. Do so because you need a certified translator for such kind of work!

3. iTranslate.

It is the best for those who like to travel because it lets you listen to translations and type your text. It supports over 100 different languages and dialects. The voice-to-voice approach is a great way to learn when you need to storm your brain with pronunciation rules. You will also learn the basic dictionary and will understand the meaning of certain expressions.

4. Rosetta Stone.

It supports up to 24 languages and helps you with it all by implementing speech recognition, reading, writing, and speaking tools. It also has an amazing accent coaching feature. It offers both online and offline learning modes with relevant courses.

5. Free Microsoft Translator.

It is one of the most accurate translation tools that you will enjoy for those business purposes when you have to start a multi-language conversation. If you need to sign an agreement, always approach a verified translation company because such documents hold legal power. For all other purposes like pointing your phone at the restaurant menus, you can use Microsoft Translator!

6. Google Translate.

It is good when you do not have an online connection because it supports 59 different languages. It lets you point your device camera to various objects, identify handwriting, or just handle your text. The phrase suggestion tool is second to none.

7. Babbel.

It lets you improve your basic reading and writing skills by supporting 14 languages. It has one of the best pronunciation training and speech recognition engines.

8. Speak and Translate.

It is quite versatile and accurate! You can safely communicate in various languages as you talk into your phone and earn. It is also free and supports up to 100 languages as you compose a written conversation.

The Cultural Aspect

No matter what language learning app you would like to add to your collection of helpful tools, the most important is to do your best to learn more about the culture. Talk to the locals, consider reading about the customs and traditions in your native language first, and always keep your mind open. You will always learn so much more!

Each Apple Watch has its own set of functions and abilities, and a vibrant community of third-party applications adds to the utility of your step-tracking. Apps that allow you to get things completed, help during your trips, receive answers to your queries, and get on with your life without continuously reaching for your phone in your pocket. It also can help to cope with the language barrier you may face when you travel to other countries, work with individuals who speak a different language, or have personal relations with people whose native language is not yours.

Here is the list of the best translation apps for your Apple Watch.

  1. iTranslate Converse

This app transforms your Apple Watch into a two-way personal translator that you can carry with you everywhere you go. iTranslate Converse for Apple Watch is as simple to use as the full phone version – when you press the button and utter a sentence, the app will read it out loud to your interlocutor, whether you are talking to a policeman, waiter, or flight attendant.

iTranslate Converse also includes a textual translation, which is presented upside down to make it simpler for the other party to understand what you’re saying.

  1. IHG Translator App

Developed by InterContinental Hotels Group (IHG), one of the most prestigious hotel chains in the world, the app incorporates the most popular aspects of its mobile counterpart, allowing users to “travel like a local” on any device.

Travelers can translate from English into 13 different languages in real-time by speaking straight into the watch or picking from a list of pre-loaded popular words. Translations are shown instantaneously on the device’s screen in the selected language, allowing users to read the word or phrase using phonetic spelling. There are formal, informal, and slang settings accessible.

  1. iTranslate Translator

iTranslate is a language converter iOS app that also includes a dictionary (synonyms alternative meanings). As a result, the user might benefit twice from this app.

It can correctly translate all the terms in your native language. Just like any professional online translation company, the app has over 100 languages available, which means it covers all the languages spoken in the United States, Europe, India, and other Asian countries. The conversion may be heard in both male and female voices.

Offline and speech-to-text translation services are available, however, they are premium features. There are three subscription options to choose from, depending on your needs and budget.

  1. Speak & Translate App

Speak & Translate is a voice application that allows you to speak the words and receive a translation. You can communicate with the individual in another language in this manner. It’s a fun tool to use to amaze your friends or employer who speaks a different language.

This app includes translation capabilities for all major languages. First and foremost, because English is an international language and the language of science and technology, it is utilized as a voice translator from/to any language.

  1. Microsoft Translator

Keep the Microsoft Translator on your Apple Watch Series 5 or previous watches at all times. It is one of the most reliable translation applications on the market, providing accurate results.

You can always have a trip guide with you if you have a cellular connection – no additional gadgets are necessary. Add Microsoft Translator to your Apple Watch’s home screen for easy access to the app’s features — and go back to enjoying your traveling experience.

  1. Babbel

Babbel is not exactly a translation app, it is more of a vocabulary learning game. There are no restrictions on how long you may play the game. You may check your word pocket to see whether you have a good score. It’s a fun way to learn new words while having fun.

The app is intended to integrate into your daily routine, allowing you to acquire a new language while interacting with your environment.

Every year, many people travel to new countries with little or no understanding of their native language. Translation apps may now be carried on your wrist thanks to the Apple Watch, and it is one of the most convenient features ever.

As you plan to embark on your travel, one thing you may want to think about are some apps that can make that travel experience more efficient, more enjoyable, and provide resources that you will want or need.

There are a huge number of such apps, and it is difficult to isolate and identify those that will be best for both leisure and business travelers.

Here are seven apps that, if you do not already have, you should consider adding to your phone before you leave.

  1. ~~Google Translate~~

This is not a perfect translation tool, but it does fulfill basic needs for simple translations. One of the coolest features of this app is that a traveler can actually take a picture of a sign, menu, etc. and have it translated immediately.

This is not an app to use for important translations, however.

  1. ~~Uber/Lyft~~

Both of these companies have gone global, Uber a bit faster than Lyft. Still, you can now order one of them in all major cities on the planet. Think about these benefits: they will be cheaper than taxis; you will get the car description, the driver’s name, and time of arrival. Plus, you order and pay for your ride using your bank card, not cash – no hassle with local currency and tips.

  1. ~~Banking Apps~~

Be certain to upload the apps for your bank and your credit/debit card accounts. You don’t want to risk using hotel Wi-Fi web services where you are unsure of the security measures they may or may not have in place.

  1. ~~Airbnb/Hostelworld/Couchsurfing~~

Yes, these are three separate apps, but for leisure travelers, all three may be of use. Whether you need a couch, a room, an apartment, a house, or a reasonable hostel, these will serve you well. Each of these apps allows you to explore all of your options, pricing, and many are available on very short notice. If you do not have a set agenda, these apps will come in handy. With each of them, you can set your parameters and be shown all that is available in the locale. If you do have an itinerary, you can book in advance – your budget will thank you.

  1. ~~Maps.Me~~

This is an app you can use offline when traveling. All you have to do is download a map for a specific locale, and you will have walking routes for wherever you want to go. It’s a simple and easy-to-use app, and perfect for sightseeing when you prefer to walk.

One note here: If you are walking about, you must be aware that, in certain cities, you will need to carry your travel documents with you. It will be important to have duplicates of these should those you carry be lost or stolen. Research the documents you will need for every country you plan to visit and get translated forms of them to keep in the hotel safe or other secure places.

  1. ~~Skyscanner~~

Rather than check cheap flights via every website and app that offers them, roll all of your searchings into a single app. It will search through millions of flights from all other sources and find you the cheapest, based upon your entry details. The added bonuses with this app are that it will show the best days to travel the cheapest and will send you notices when prices change.

  1. ~~Airline Apps~~

Every major airline has an app that you can download to an Android or iPhone device. You should download all of those that you regularly use, for a number of conveniences:

  • ~~You get a digital boarding pass which will streamline your passing through checkpoints – no more printed out boarding passes~~
  • ~~You can sign up for notifications from all of these airlines. They will notify you of flight delays, gate changes, and more.~~

These Seven…

Is this a complete list? Absolutely not. Every traveler will have unique needs – methods for tracking expenses, a complex itinerary compiled all in one place, finding attractions, restaurants, etc. Think about what types of apps will serve your needs, do the research to find the best ones, and keep that phone charged.

Students are overloaded with tons of homework, which makes them stressed out. Hence, they are constantly looking for strategies to relieve their academic burden. Luckily, smartphone apps are great helpers in this respect.
Any iOS-based devices, including iPhones, are perfect tools for writing assignments. With an iPhone you can write your paper no matter where you are, whether it’s on your way to college or in line for your morning coffee. Today, there are a wide variety of mobile applications available for students, from very simple text-editors to feature-rich writing suites. It doesn’t matter if you are just taking notes, doing a term paper, or working your way to creating a big writing project, there is an app for any purpose in your App Store.
This article will help you to choose a tool that you need for successful studies, so keep reading!

Grammarly

Even the best writers will tell you that sometimes Grammar is very hard and confusing. Therefore, you need Grammarly, which is one of the top online grammar checkers in the world. This app has a free version if you are going to download it for personal use. Grammarly catches and fixes all the mistakes you make while typing your text. It corrects repetitive words, misspelled words, and punctuation errors. It can also replace weak expressions with stronger ones by suggesting new words. With Grammarly, you can focus on what is really important – your message. You will stop worrying about details and will become more confident about your writing. This app also has an in-built plagiarism detector, so you can make sure that your work is original before submitting it to instructors.

Editorial

Editorial is one of the most powerful text editors for iPhone with a wide range of features. For example, it has a smart keyboard and snippets that ease your user experience. You can create your own document templates for papers in different disciplines so there is no need to start your regular assignment from scratch every time you create a new document. Another useful feature of Editorial is global search that supports even ‘fuzzy’ matching of file names, so you can easily find necessary materials both within the current document and across all your files.

Dictionary.com App

We all misspell difficult words from time to time and rely on that red line on the screen to tell us about our mistakes. However, this approach is not always right, so we may miss some of the errors. Hence, it’s better to rely on your knowledge only and always check difficult words in the dictionary. Dictionary.com app could be a perfect choice in this case. By using this tool, you can not only see the right word spelling but also check the meanings of new words and find synonyms for overused expressions. Additionally, this app is free and it is available in a lite version, which is especially good for students on a budget.

iA Writer

iA Writer is a very clean app that emphasizes simplicity. However, there are quite a few advanced features that can come in handy while creating a college paper. You can use Syntax Control that breaks down your piece of writing and shows you its structure. This feature highlights different language parts, such as adjectives, nouns, conjunctions, etc. The app also works in Focus Mode that keeps you from getting distracted and dims everything but the current sentence or paragraph, so can easily concentrate on one line at a time. iA Writer also allows you to search and quickly swap between files from different clouds, which saves you much time.

Terminology

Strictly speaking, this is not an app in which you write. But it’s present on this list because Terminology has proven itself to be essential to any writer. It offers both U.S. English dictionary and thesaurus. You can find definitions, synonyms, antonyms and some deeper word relations as well as save your favorite terms and add your own notes to them in Terminology. The word lookup functions are available both on and offline. What’s more, the app supports a wide set of actions that can be integrated with other apps and the web, so Terminology turns itself into a powerful research companion.

I’m a huge fan of Apple Music, but I recently encountered a really annoying—and apparently common—bug. No matter what playlist, artist, or album I was listening to on my iPhone, Apple Music would pause every song or two, and I’d have to tap Play for it to continue.

Apple Music is undoubtedly an excellent music streaming platform with millions of users worldwide. Having said that, Apple Music is not flawless as many users encounter a variety of problems when streaming with this platform. Apple Music keeps pausing is among the most common issues encountered by its users. Can you imagine how frustrating it is to keep pressing the Play button after every song?

To get a better experience when streaming with Apple Music, you need to know how to get rid of this issue. So if Apple Music keeps pausing on you, there are several solutions that can help you regain the excitement of listening to Apple Music. Ranging from the simple restarting the music app to resetting Network Settings, let’s get to know more here!

See also: Clever iPhone Tricks Make Your Music Louder – so you can use it as a speaker

Force-Quit Apple Music App

Most of the time, merely force-quitting an app can end up resolving lots of minor issues associated with it. The same goes for the Music app.

Start by swiping up from the bottom of your iPhone’s screen to bring up the App Switcher. Then, swipe up on the Music card to remove it.

Follow by relaunching the Music app and start playing a track or album. If it continues to pause a lot, move on to the next solution.

Check the Apple Music System Status

Issues with the Apple Music servers can also cause sudden pauses while streaming music. To check if that’s the case, load Apple’s System Status page and check the status next to Apple Music. If you notice an outage, stay patient until Apple sorts things out. Usually, you won’t have to wait for long.

Restart Your iPhone

Sometimes, restarting your iPhone is all it takes to fix any underlying issues causing songs in Apple Music to pause randomly.

Go to Settings > General > Shut Down to turn off the iOS device. Then, follow by holding down the Side button to reboot it.

Troubleshoot Wi-Fi Woes

If Apple Music continues to cut off regularly over Wi-Fi, you’re likely dealing with a spotty connection. Here’s what you can do to fix that:

  • Activate and deactivate Airplane Mode
  • Renew the IP lease
  • Reset the router
  • Switch to another Wi-Fi network
  • Switch to cellular data

If you switch to using cellular data, go to Settings > Music > Cellular Data and ensure that the Music app has the permissions to stream and download tracks over cellular data.

Disable Low Data Mode

Low Data Mode on the iPhone helps conserve bandwidth, but it can also cause issues while streaming content over Wi-Fi or cellular data. So if you’ve activated the functionality, try disabling it.

Here’s how to do that for Wi-Fi and cellular.

Wi-Fi: Go to Settings > Wi-Fi and tap the Info icon next to the active Wi-Fi connection. Then, turn off the switch next to Low Data Mode.
Cellular: Go to Settings > Cellular > Cellular Data Options and deactivate the switch next to Low Data Mode.

See also: Best iPhone & iPad Apps To Download Free Music

Deactivate Low Power Mode

Low Power Mode (which turns the iPhone’s battery icon yellow) is another reason that can prevent apps from working correctly, especially when they continue to run in the background.

If Apple Music pauses a moment after switching to another app or shutting down the display, go to Settings > Battery and turn off the switch next to Low Power Mode.

Disable Automatic Ear Detection in AirPods

If you use a pair of AirPods, you may experience random pauses because of a feature called Automatic Ear Detection. It’s helpful if you want the music to stop as you take off your wireless earbuds. But it can also work against you if you fidget with them a lot.

To turn off Automatic Ear Detection, go to Settings > Bluetooth and tap the Info icon next to your AirPods (you must have them connected). Then, disable the switch next to Automatic Ear Detection.

See also: 20 Best Tips And Tricks For Getting The Most Out Of Your Apple AirPods

Download the Track or Album

If the issue continues to occur while streaming a track or album, downloading it may help fix the problem. To save an individual song to local storage, tap the three-dot icon next to it (or long-press the track) and select Download.

To download an album, tap the Download icon to the top-right of the screen. Or, long-press the album and select Download.

Delete and Redownload Track or Album

If a downloaded track or album ends up pausing randomly, it’s likely corrupted. Try deleting and redownloading it.

To delete a downloaded track or album, tap the three-dot icon next to it and select Remove > Remove Download/Downloads.

Reset the iPhone’s Network Settings

If none of the solutions above fixed your Apple music issues on iPhone try resetting the network settings on your phone. To do that, go to Settings > General > Reset and tap Reset Network Settings.

After the network settings reset, reconnect to Wi-Fi manually (the reset procedure deletes all saved Wi-Fi networks) or use cellular data to listen to Apple Music.

Apple Music keeps stopping on iPhone still

The fixes above should’ve helped you get back to chilling out to your favorite Apple Music tracks without any annoying pauses.

However, if Apple Music keeps pausing, check for any pending updates to the iPhone’s system software and apply them. To do that, go to Settings > General > Software Update and tap Download and Install. Aside from fixing any known audio-related problems in iOS, that should also apply the latest performance enhancements to the Music app.

Additionally, you can choose to perform a complete setting reset to revert any corrupt or conflicting system-related configurations to their defaults. To do that, go to Settings > General > Reset and tap Reset All Settings.

The massive shift in education modules and tools has led to an increased dependence on electronic gadgets and devices. Apple is a common mention among students, and most of them fancy owning apple products as they are top-notch in design and utility.
Many Apple products are best suited for students who have to prepare projects, assignments and read modules continually during their years of obtaining an education at the universities. Apple launches a range of utility products each year, making for a long list to select from.

Apple’s latest iPad
Tablets are easy to carry, convenient for use, and offer all the latest software for everyday use. While many brands offer tablets at a reasonably lower price when it comes to Apple’s iPad, it has a sleek and modern design, a powerful processor, and impressive storage capacity. There is no better product to purchase than the iPad Air for students looking to learn the latest software in design and graphics.
Adding to the list of impressive features, the Apple iPad Air has a high-definition camera perfect for capturing images or FaceTime. The latest accessories added to the list are the Apple Pencil and a magic keyboard that makes designing or working on the iPad seamless. You can double the iPad as a laptop to carry out some functions if you left the computer at home or are simply hooked to using the iPad for every task!

MacBook Air

MacBooks are famous for their thin, sleek, and light design. It can easily beat laptops from other brands when it comes to its stunning looks. Easy to hold, carry and use- the Apple MacBook Air is laden with features that are crazy powerful and incredibly smooth at use. The latest M1 processor is a new addition to the elements, and that alone has increased the power and utility of the product.
The retina display produces real life like colors, and the 8-core quad processor makes every task at hand run smoothly and at ease. A significant factor about every Apple product is that it runs with absolute precision, and seldom do we hear complaints about the device’s function. The battery life is quite strong, making it ideal for students to carry it to college and use it for completing all essential assignments on time.

Apple’s AirPods

The Apple AirPods were nothing short of a revolutionary product at the time of their launch. Creating a buzz in the market, these expensive yet highly powerful earphones quickly become a sensation. Apple cutting off the use of wires in earphones just makes the use seamless, convenient, and are easy to carry.
The product is undeniably pricey, but there is a solid reason for that – the features like noise cancellation, made to fit the ear, and powerful sound ability. The AirPods are water-resistant and deliver a battery life of 5 hours of continuous use.
The AirPods case is a self-charging device, and all you need to do is place the AirPods back into the case when not in use. At the moment, Apple offers two ranges for this product.

iMac

Apple’s desktop, commonly known as the iMac, is a powerful machine that comes in models that offer big screen sizes like 27” and 21.5”. Apple’s Operating Software is what drives most users to come back to re-purchase the latest models. These products are indeed pretty expensive, but they are for a valid reason, and, i.e., the strength and ability of the operating system are to allow breezy use and functions that are tailor-made to suit all users’ needs.
The iMac is a beneficial product for students looking to complete everyday tasks without worrying about storage. The computer setup is perfect for students as it comes with the Magic Mouse and keyboard.

Mac Mini

The Mac Mini is the cheapest OS device that is also the most portable. One could say that it is a mini version of a laptop but without a screen. Ideal for students on a budget, the Mac mini is a perfect computer that offers a similar level of performance, just like the MacBook Air or MacBook Pro.
The Mac mini is a favored device in educational institutions solely because it allows good learning and at a fraction of the price of the other Apple products. Students can compile their devices by adding a keyboard, mouse, and monitor. The Mac Mini is compatible with other products, and numerous test run has proven that its capability is at par with the benchmarks that the other Apple devices offer.

iPhone

Apple’s iPhones are easily the rage among students and young adults. The Apple models that launch every year are always only better in design, performance, and features. Compared to other similar devices, iPhones are faster, stronger, and have impressive software integrations that go unmatched. iPhones are known to be the most straightforward devices to use, and they allow complete user discretion- whether it is about updating software or choosing themes, the choice lies with the end-user.

Conclusion

Apple’s products are highly recommended for students as they are more like a one-time investment – and offer an array of benefits that come into use each day. The Apple laptops, iPads, and AirPods are perfect for completing assignments and projects with ease, as the products are long-lasting and robust. Once you invest in these products, you are all set for the best use and for a long time.