One of the most appreciated features of the new iOS 14 update is the ability to take screenshots by tapping the back of your iPhone. With this feature, you can either perform a double-tap or a triple-tap on the back of your iPhone to capture a screenshot.
Typically, you can take screenshots on your iPhone by pressing the power button and either of the volume buttons at the same time. If you are using an iPhone with Touch ID, pressing the side button and the home button simultaneously does the trick. This hasn’t changed though. But this new iOS 14 feature seems like a much easier way to take a screenshot on an iPhone.
In this article, I’ll show you how to take a screenshot on your iPhone by tapping the back— either twice or thrice. But before we dive into steps, let’s see how the Back Tap feature works.
How Does The Back Tap feature Work?
The Back Tap feature is powered by the accelerometer on iPhone 8 models or newer. An accelerometer is a device that is made up of axis-based motion sensing. It can help to measure the vibration or acceleration of motion of a structure.
For iPhones, you can assign unique functions/actions to your device’s accelerator in the Settings menu.
Take Screenshot by Tapping the Back of Your iPhone
To take screenshots by tapping the back of your iPhone, please follow these steps:
please note: This feature only work on iPhone 8 models or newer.
start by ensuring that your iPhone is running iOS 14 operating system.
Next, open the settings up on your iPhone.
scroll down and tap “Accessibility.”
Tap on “Touch” under the “Physical and Motion” section.
Now, choose “Back Tap”
Next, select either “Double Tap” or “Triple Tap” depending on the gesture you want to set up for screenshot.
Finally, select “Screenshot.”
You can now take a screenshot by tapping the back of your iPhone.
As a regular AirPods user you have probably already experienced it: an incoming message that interrupts your music. It can be very useful to have Siri read messages to you, but we have a tip for those who no longer want this.
For example, you can turn off Announce Messages with Siri
When wearing AirPods, Announce Messages with Siri can be very useful. Especially if you are expecting a message that you really don’t want to miss. But it can also be very annoying. Just in the middle of an intriguing podcast episode, Siri starts reading an incoming message. If the latter sounds familiar to you, it is definitely worth reading on.
Turn off Announce Messages with Siri
Open the settings app on your iPhone and choose Notifications;
Select Announce Messages with Siri;
You can now turn off the feature for all apps by turning off the toggle at the top next to Announce messages with Siri .
You can also choose to turn notifications on or off from a specific app. You can also choose between different senders: Favorites, Recent, Contacts and Everyone. For example, you can choose to receive a notification from your employer while listening to a podcast and to let other messages pass you by.
Add Announce messages with Siri to Control Center
Do you want to be able to adjust your settings regularly? Then put ‘Announce messages with Siri’ in your Control Center. This is done as follows:
Go to Settings and select Control Center;
Under More controls, tap the plus sign and choose Announce messages with Siri;
You can now tap the icon when you want to turn the function on or off.
MagSafe is one of the most interesting new iPhone 12 features, but what exactly is it and what can you do with it? GeeksModo answers.
MagSafe FAQ: What is MagSafe and more
With MagSafe, Apple brings an interesting new function to the iPhone, which is mainly intended to make chargers and accessories work better with the smartphone. In this article, we answer six frequently asked questions about MagSafe.
MagSafe FAQ
What is MagSafe?
Where does the term MagSafe come from?
What are the charging benefits of MagSafe?
Which iPhones support MagSafe?
Which accessories work with MagSafe?
What does this mean for future iPhone accessories
1. What is MagSafe?
MagSafe is a new magnetic connector in the iPhone 12 lineup. The housing of the iPhone contains a circular magnet, which you can attach securely with accessories that have a similar circular magnet. For example, you can click covers onto the iPhone, or attach the ‘MagSafe charger’ to improve wireless charging.
2. Where does the term ‘MagSafe’ come from?
It is not the first time that Apple has used the term MagSafe: Mac enthusiasts know the term from the MacBooks until 2016. MagSafe was the name for the adapter, which you could click on the MacBook with a magnet. However, if your cable accidentally got stuck behind, the magnet shot loose and your MacBook didn’t fall to the floor. With the switch to usb-c, MagSafe on the Mac has unfortunately disappeared.
3. What are the charging benefits of MagSafe?
If you charge smartphones wirelessly, the charging speed depends on how you place the device on a wireless charger. It is important that the charger is properly placed on the rechargeable battery, but that is sometimes difficult to determine.
With MagSafe that is a thing of the past: the magnetic connection clicks onto the charger exactly the right way, so that you can charge wirelessly up to two times faster, according to Apple.
4. Which iPhones support MagSafe?
Because a special magnet has to be placed in the iPhone, older iPhones cannot use MagSafe. For the time being, only the iPhone 12, iPhone 12 mini , iPhone 12 Pro and iPhone 12 Pro Max support this connection. But assume that all future iPhones will do this too.
5. What kind of accessories work with MagSafe?
The MagSafe connection offers possibilities for new accessories. Not only chargers, but also covers can be attached to an iPhone more easily and securely. In addition, completely new things are possible. For example, a small card holder has already been unveiled that you can ‘stick’ on the back of your iPhone and a special MagSafe case will be released later this year that completely covers your iPhone and only leaves room for a clock.
The handy thing is that the magnet is so strong that you can stick multiple MagSafe products together. An iPhone 12 with a MagSafe case and a MagSafe card holder on it, for example.
6. What does this mean for future iPhone accessories?
During the iPhone 12 event, Apple has already mentioned that MagSafe will also be available for third-party accessory makers. Belkin would already be working on products that support MagSafe. So you can count on us in the coming months and years to see many accessories that will take advantage of this new connection.
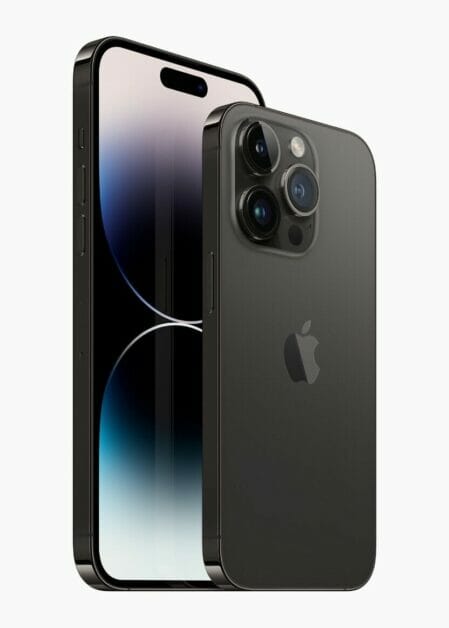
Finally, the Cupertino tech giant unveild the iPhone 12 Pro and iPhone 12 Pro Max with numerous new features and changes. The 2020 iPhone 12 series was released after a month delay due to the ongoing pandemic. Both the iPhone 12 Pro and iPhone 12 Pro Max offers a better design and performance than the last year’s iPhone 11 Pro lineup. Now the entire body is made up of aluminum and Apple redesigns the antenna adjustments for enhanced network connectivity. The iPhone 12 Pro lineup offers a major improvements in the camera, performance, and connectivity department.
Design and Display
The iPhone 12 series received a Huge design enhancement. All the iPhone 12 models have a shape like the latest iPad Pro, boxy design with a stainless steel body. The iPhone 12 Pro comes in a 6.1-inches OLED display which is a leap forward from the last year’s iPhone 11 Pro which was a 5.7-inches OLED display. The Cupertino based brand achieved this by shrinking the bezels of the iPhone 12 Pro. While on the other side the iPhone 12 Pro Max comes in a 6.7-inches OLED display which is a leap forward from the last year’s iPhone 11 Pro Max which was 6.5-inches. Both devices have a Super Retina XDR display. The displays do support Dolby Vision, HDR10, and HLG.
According to Apple, the 2020 iPhone 12 series has the toughest screen glass in any smartphone in the market and they call this glass “Ceramic Shield”. The glass is 4X better drop resistant than any available smartphone in the market. Also, it improved IP68 certification rated for up to 6m depth now.
Camera Improvement and LiDAR
The iPhone 12 Pro lineup features a triple camera setup with a LiDAR (Light Detection and Ranging). There is a difference in the camera setup of the iPhone 12 Pro and iPhone 12 Pro Max. Let’s start with the LiDAR sensor. The primary purpose of this sensor is to use in Augmented reality(AR) but Apple also used this sensor for the enhancement of camera performance. According to Apple, this sensor enhances low-light photos and help the pro model iPhones to take good photos in dark environment.
The iPhone 12 Pro features a 12-megapixel main camera with OIS(Optical Image Stabilization) with an f/1.6 aperture. The main sensor uses a new 7P lens that offers better low-light performance.
While the iPhone 12 Pro Max features a bigger 12-megapixel main camera that’s 47% larger with 1.7um large pixels. It also features a sensor-shift OIS for better low-light photos which help for stabilization up to 2 seconds of handheld exposure time in low-light shots.
Both iPhones comes with a 12-megapixel ultra-wide shooter with a 120-degree field of view and f/2.4 aperture. The Cupertino based company also introduced the night mode feature in the ultra-wide camera and also the front selfie camera. Both the iPhone can record better low light videos and night mode time-lapse with the help of Smart HDR3. Apple is also releasing the Apple ProRAW feature for iPhone 12 Pro and Pro Max users which will come later this year. This feature will allow users to take full control over colors, contrast, and much more. This feature will allow pro users to post-process photos while still taking advantage of Apple’s Smart HDR3.
For video recording, the 10bit HDR video recording feature is coming in the iPhone Pro and Pro Max models. Both the iPhones are the first in the market to record in Dolby Vision HDR at 4K60fps. Also, it is possible to edit Dolby Vision videos straight from iPhone.
A14 Bionic Chipset Performance
This year Apple introduced the A14 Bionic Chipset in the iPhone 12 series. This system on chip is built on a 5nm technology. This is the first 5nm chip in any smartphone in the market. It consists of 11.8 billion transistors. The 6 core CPU of A14 bionic offers a 40% boost in performance and the 4 core GPU offers a 30% boost in performance. Apple also claims that the A14 Bionic CPU and GPU performance is 50% faster than any mobile processor in the market. The Neural Engine has also gotten a major boost and now boasts of 16 cores making it twice as fast as before. With this performance boost, iPhone 12 lineup again came on the top of the performance list.
5G with Smart Data Mode
Apple introduced 5G compatibility on all four iPhone 12 models. With the 5G iPhone will be able to get faster internet speed and faster download/upload speed. There is also a Smart data mode that will be available on the 5G devices to give users a better internet speed experienced by switching seamlessly between 5G and 4G LTE network. When the user needs more internet speed it will automatically switch to 5G mode otherwise it will give stay on 4G LTE mode, of course, it will help in battery life. While testing Apple has seen the iPhone 12 reach download speeds as high as 4Gbps. All the iPhone 12 models sold in the US will support millimeter wave technology.
MagSafe
One of the interesting features in iPhone 12 series is the MagSafe. It is a technology that allows connecting wireless charges easier to the back of your iPhone. The iPhone 12 series can also charge at up to 15W speeds wirelessly. According to Apple, you can not only use this for wireless charging but also they have new cases and accessories that you can use to connect with your iPhone.
No Charger and Earphones
Apple decided to get rid of the power adapter and the wired earphones from the box for the reduction of carbon emission from the environment. This makes the size of the iPhone 12 lineup so small than previous models of iPhones. While on the other side the whole iPhone 12 lineup is coming with a USB-C to lightning cable.
Price, Availability, and Colors
The iPhone 12 Pro lineup comes in 4 different colors including Gold, Pacific Blue, Graphite, and Silver. They are available for pre-order starting on 16th October 2020 and will be available in stores on the 23rd of October 2020. The devices will be available in three storage options: 128Gb (Base storage), 256GB, and 512GB. The iPhone 12 Pro is starting from $999 while the iPhone 12 Pro Maxis starting from $1099.
Thanks for reading. If you found this article helpful make sure to share it with others.
Finally, the Cupertino Tech giant revealed its 2020 lineup of iPhone models which include the iPhone 12, iPhone 12 Mini, iPhone 12 Pro, and the iPhone 12 Pro Max, at their October 2020 online event.
While a 5G connectivity could be seen coming from a distance already, there are still numerous new features and upgrades. An A14 Bionic Chip will aid the camera with it’s faster image processing(there’s a new night mode on the front-facing camera) and accelerate ML computation tasks by leaps and bounds.
In addition, the re-emergence of a MagSafe charger coupled with the flat design might bring back the nostalgia of the iPhone 4/5 at a time when The fast majority of people were missing it.
But surprisingly, despite the tremendous improvement, Apple’s new iPhone 12 lineup is the most un-apple like in recent years.
5G connectivity, the most hyped iPhone 12 feature is still in nascent stages. More importantly, the four variants not only make the lineup a little fragmented(something that was only seen in Android earlier) but also have some contrasting differences in hardware and camera technology.
Apple’s iPhone 12 Bets On 5G Connectivity Which Is Neither Ready Nor In Their Control
In the lead up to the event, most Apple fans had pinned their hopes for a 120Hz display. While those dreams were quick to perish, yet the oddest thing during the event was the level of significance given to 5G connectivity.
As soon as Tim Cook unveiled the new iPhone 12, the CEO of Verizon was given center stage to give a glimpse of the potential speeds a user can receive with 5G networks.
Letting a third party carrier service steal the show from their launch event was strange on Apple’s part. More so since the Cupertino based brand is well known to draw the customer’s focus towards their in-house innovations(be it by highlighting their camera upgrades or silicon chip hardware).
This makes their decision to market the iPhone 12 based on the next-generation 5G wireless networks(where they already are a late entry) a little weird. The 5G technology is yet to see the light in most place around the globe which is something beyond Apple’s control.
If the disappearance of chargers from the boxes doesn’t pull the trigger, the unavailability of 5G in most places currently might repel some customers from buying. Worse, Apple might face a backslash as the prices would probably remain the same in countries without 5G support capabilities.
It’s fair to say that Apple by highlighting the “super-fast” but absent 5G feature might have missed a trick or two in promoting the new iPhone 12 lineup.
Apple’s iPhone 12 Lineup Has Too Many Variants With Startling Differences
All four variants of the iPhone 12 support 5G capabilities, possess the super-powerful A14 bionic chip and introduce the new Dolby Vision format for recording. But that’s where the similarities end.
The iPhone 12 Mini which is the tiniest of the lot comes with a 5.7 inch OLED display and a dual-camera system much like the iPhone 12. There is a possibility that the mini version is Apple’s attempt to cash in on the success of the much loved iPhone SE 2020. Yet, the iPhone 12 Mini is devoid of the best camera hardware and technology seen in the iPhone 12 Pro models.
Both the iPhone 12 Pro and iPhone 12 Pro Max variants bring the triple camera system with an enhanced lens system and a LiDAR sensor. LiDAR technology helps in better auto-focus and gives fantastic results in Night Mode. Even better, it’s helpful for 3D scanning and will help boost the adoption of Augmented Reality.
Now a user looking for a normal size phone would either have to sacrifice on the camera front or they’ll be compelled to select the Pro models. Even among the Pro and Pro Max models, there’s a contrasting difference in camera technology specifications.
Specifically, the iPhone 12 Pro Max model offers a longer telephoto lens and its wide camera contains a sensor-shift Optical Image Stabilization(OIS). This certainly would give way better image results. But then again, it’s a strict departure from Apple’s earlier lineups wherein the Max variants were meant to emphasize only on the size without any changes in hardware.
Conclusion
Apple’s iPhone 12 series would surely be a breakthrough success. It won’t be surprising to see the sales numbers surge towards the north of a million very rapidly.
Despite that, the diversity amongst the variants with respect to sizes and their astonishingly different camera hardware technologies isn’t something you’d expect from Apple.
Perhaps, the Cupertino tech giant is looking to tap into a wider set of audience by offering a diverse range of models to pick from. But in doing so, the new iPhone 12 lineup stands fragmented. It’s a classic example of too many cooks can spoil the broth — which can easily annoy customers, give them selection headaches, and even alienate a few of them.
That’s it for this one. If you enjoyed reading this article, please share it with others.
Apple watch is more than just a cool, modern accessory. It can get pretty in handy for any college student. Here are great ways you can use Apple watch as a student.
8 Ways Apple Watch Can Make Your College Life Easier
Don’t we all need some help during our years in college? Students’ lives are full of stress, hard work, and new challenges. Of course, these days the technological advances have made our lives as students much easier. All our devices are equipped with so many great features to help us go through the day. Though, we are always in a search for more, aren’t we? Well, fortunately, Apple keeps coming up with numerous new ways to help students with their studies and other daily activities. One of the new players in the world of devices, Apple watch, is here to make our lives as college students much easier. Here are 8 ways Apple watch can achieve that.
1. Mental health helper
Students and young people, in general, are especially vulnerable to many mental health issues. They are yet to learn how to take care of themselves. Thus far, students tend to prioritize all kinds of things over their own physical and mental health. It shouldn’t be like that. Apple watches can help students to put their mental health first. There are great Apple watch apps designed to calm you down, help you gain your inner pieces, and better focus by practicing simple breathing techniques.
2. Phone Finder
Don’t tell me you are one of those who always know where their phone is. I won’t believe you. We all tend to lose our iPhones at the most important moments. Well, the Apple watch can prevent that. They have a simple feature that allows you to detect your own iPhone. Just press the vibrating phone icon and your iPhone will make a loud noise. Just once though, so be all ears. Thus, within a few seconds, you are able to locate your phone with no trouble at all.
3. Remote Camera
This is by far one of my favorite features. You can use your apple watch as a remote camera. Thus, you can use your iPhone to take a picture. You can set your phone wherever you’d like, be on distance, and still see how your shot is going to look like. You can also use a timer to fix things before the photo is taken. This feature is especially great when you want to take a group photo stress-free.
4. Answer phone calls
Your Apple watch can ensure you fast access to your iPhone activities at any time. You don’t have to rush and run for your life every time you hear your ringtone somewhere in the distance. Also, it is especially useful when you have a phone call during a class and you can’t find your iPhone to turn it off. Well, now you can control your incoming calls with your Apple watch. Decline it or answer it from your watch, it’s as easy as never before.
5. Heart check
Perhaps, it’s the easiest way to check the work of your heart. Seriously, all you need to do is to keep on wearing that watch on your wrist. The rest is up to your Apple watch. It will collect the data, analyze it, make a full report. You can see the full information on your heart in the iPhone app. Though, you can see quick updates on your Apple watch at any time. It is especially useful for students who often experience a lot of stress during the day.
6. Music control
I believe all of us love studying with our earphones on. But it really sucks when you get distracted every time you don’t like the song that’s playing. Now you need to go on a search for your phone or reach for your mac computer since you need to switch a song. It takes time and, most importantly, distracts you from your studies. Well, no more of that. You can use your Apple watch for remote music control. Use your MacBook for your studies only, leave your phone in your bag. It’s time to get your homework done.
7. Do Not Disturb feature
Too often, it’s not that we are unable to complete our homework, it’s that we lack the concentration to do so. We are more inclined to be stressed about finishing the homework. The Do Not Disturb feature on your Apple watch can help you to avoid unnecessary messages, phone calls, and notifications altogether. A perfect student helper.
8. Unlock any Mac computer
Your Apple watch can unblock any of your Mac computers as soon as you approach them. No doubts, it is pretty convenient, especially for those who always forget their passwords. Though it is also really cool. It looks like a glimpse into the future where you would be able to control the technologies with the thought of your mind. At least, that’s what it reminds me of. Overall, it’s quite a small detail, but still, it is worth mentioning.
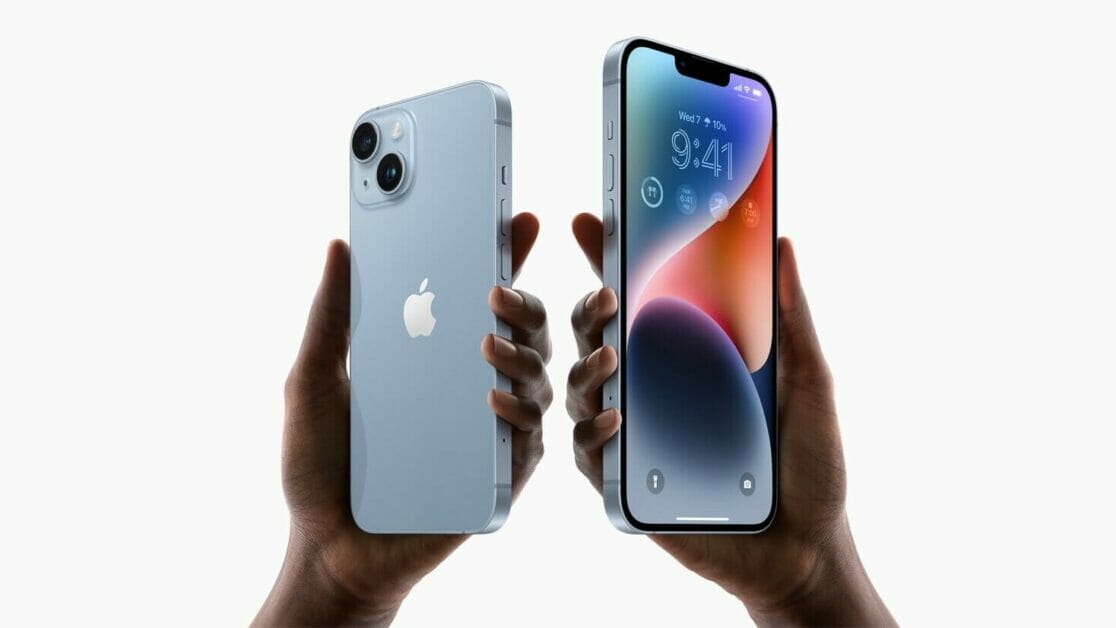
If you’re looking to get the most out of your iPhone 14 or iPhone 14 Pro, you’ve come to the right place. In this article, we’ve compiled a list of the best iPhone 14 and iPhone 14 Pro tips and tricks you should definitely know about!
Most of the tips and tricks highlighted are available for all iPhone 14 models, but there are one or two that are limited to the iPhone 14 Pro and iPhone 14 Pro Max that won’t be applicable to iPhone 14 and iPhone 14 Plus.
If you haven’t heard yet, Dynamic Island and Always-On-Display are two of the big-ticket features on the iPhone 14 Pro and iPhone 14 Pro Max, but those items are just the beginning. You’ll be excited to learn that there are several new hidden iPhone 14 and iPhone 14 Pro tips and tricks that could completely change how you use your phone. Get out your iPhone 14/14 Pro – and work your way through some of our favourite tips and tricks.
## Best iPhone 14 and iPhone 14 Pro tips and tricks
Here is a list of the Best iPhone 14 and iPhone 14 Pro Tips and Tricks you should try first:
1. Use Apple’s Dynamic Island Feature
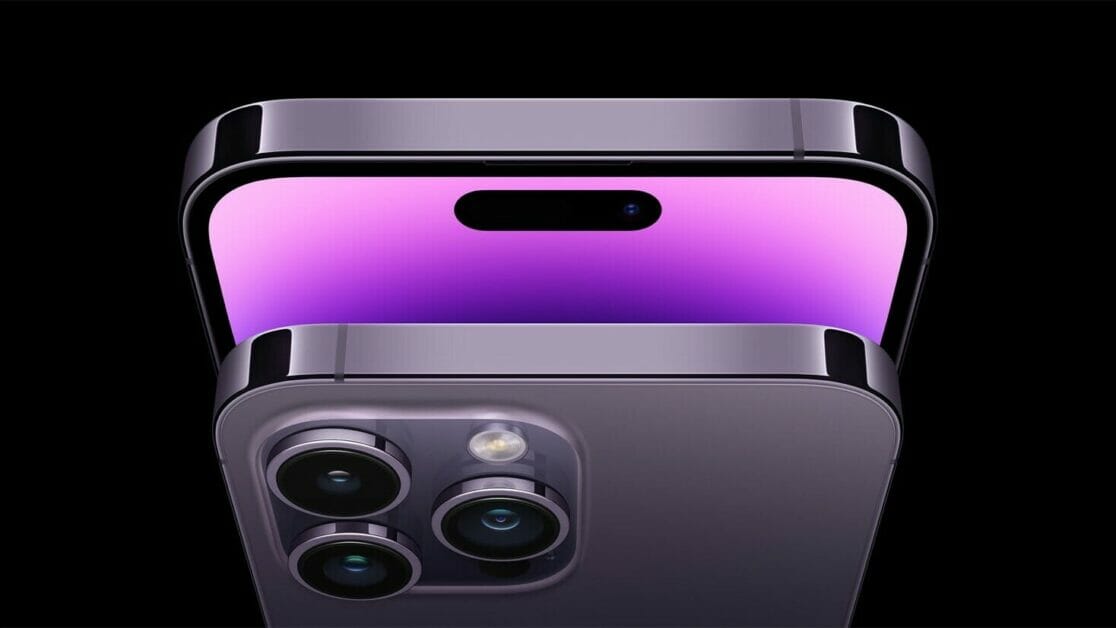
Dynamic Island is Apple’s new “notch” for the iPhone 14 Pro and iPhone 14 Pro Max. Instead of looking like a blacked-out dead space at the top of the screen, it can morph into different shapes and sizes. You can even interact with it. It can change to show you incoming calls, alerts, notifications, Face ID authentication, turn-by-turn navigation, music playing, and so on. You can tap or long press on the area to access different functions or launch apps. Think of it as a multi-tasking shortcut – one that still hides iPhone’s TrueDepth front camera as well as the sensors that enable Face ID.
Dynamic Island isn’t just limited to notifications or alerts, but also ongoing activities such as directions in the Maps app, music that might be playing, or how much is left in your timer. Those remain visible at the top of your phone in Dynamic Island, and they’re interactive, so you can tap, swipe, or long-press. Say you order a Lyft and then proceed to browse the web or play a game. The Dynamic Island will show your Lyft ride’s estimated time of arrival at the top of your screen as you use other apps. At any time if you want to open Lyft, tap Dynamic Island. Or, say you’re in an ongoing call and then minimise it, Dynamic Island will elongate horizontally and show the call duration on the left with a voice waveform on the right.
If you have two apps running in the background, Dynamic Island can split into two sections, so you’ll see a smaller pill on the left for one app and a small circle on the right for another app. For instance, if you have a song playing from the Music app and a timer set on the Clock app, you’ll see the song’s art on the left pill and the timer icon inside the circle on the right. You can only see a maximum of two apps appear on Dynamic Island when they’re running in the background.
The most impressive thing about Apple’s Dynamic Island feature is how it can intuitively morph into different shapes to display all sorts of glanceable info. For instance, when you put your phone on silent, connect your AirPods, access Face ID, or plug your charger, the cutout will expand and display the activity and then immediately go back to normal.
Also, if there’s an ongoing background activity, such as a call, playlist, podcast, or timer, the cutout will stay expanded until it ends. You can tap it to go to the app or long-press it to explore options, allowing for better multitasking.
For instance, if you get a call while scrolling through your Instagram feed, the cutout will expand to show you who’s calling and the option to accept or deny it. Once you pick up the call, the cutout will stay expanded during the duration of the call. You can long-press the cutout to access various options to cut the call, switch to FaceTime, mute yourself, and more.
Similarly, if you’re listening to music while reading an e-book, you can long-press the cutout to see options to pause the song, skip forward or back, or jump to a particular part in the song. And if there are multiple ongoing background activities, the iPhone 14 Pro’s Dynamic Island will form a new circular bubble beside the pill-shaped cutout. All of this without leaving the app you’re in.
2. Use Always-On display with your iPhone 14 Pro or iPhone 14 Pro Max
With Always-On display, your iPhone 14 Pro or iPhone 14 Pro Max dims the Lock Screen while still showing helpful information, like the time, widgets, and wallpaper, all while using new technologies that make the display incredibly power efficient.
This can be useful when you just want to glance at the time or see relevant information from your Lock Screen widgets without unlocking your iPhone and going directly into an app.
The display always remains on by intelligently lowering its brightness and refresh rate to as low as 1Hz to save battery life. Always-On display is on by default on iPhone 14 Pro and iPhone 14 Pro Max. To turn Always-On display off or on, follow these steps:
Go to Settings > Display & Brightness.
Scroll down to Always On and turn Always-On display off or on.
3. Capture steadier video with Action mode
With Action mode on iPhone 14 Pro and iPhone 14 Pro models, you can capture smooth hand-held video even when you’re moving around a lot.
Open the Camera app and swipe to Video mode.
Tap the button to turn on Action mode.
Tap the Shutter button and record your video.
Action mode works best with lots of light, and the Camera will show “More light required” if things are too dark. You can change your settings to use Action mode in lower light.
In the Settings app, tap Camera.
Tap Record Video.
Turn on Action Mode Lower Light.
Action mode can capture video at either 1080p or 2.8k resolution up to 60 frames per second. It supports Dolby Vision HDR or, on iPhone 14 Pro models, Apple ProRes video formats.
4. Manage Crash Detection on your iPhone 14 Pro
When your iPhone 14 Pro detects a severe car crash, it will display an alert and will automatically initiate an emergency phone call after 20 seconds unless you cancel. If you are unresponsive, your iPhone will play an audio message for emergency services, which informs them that you’ve been in a severe crash and gives them your latitudinal and longitudinal coordinates with an approximate search radius.
When a crash is detected, Crash Detection won’t override any existing emergency calls placed by other means.
Crash Detection is on by default. You can turn off alerts and automatic emergency calls from Apple after a severe car crash in Settings > Emergency SOS, then turn off Call After Severe Crash. If you have third-party apps registered to detect crashes on your device, they will still be notified.
5. Use Emergency SOS via satellite on your iPhone 14
With this iPhone 14 trick, you can use Emergency SOS via satellite to text emergency services when you’re out of cellular and Wi-Fi coverage.
Emergency SOS via satellite can help you connect with emergency services under exceptional circumstances when no other means of reaching emergency services are available. If you call or text emergency services and can’t connect because you’re outside the range of cellular and Wi-Fi coverage, your iPhone tries to connect you via satellite to the help that you need.
If you need to contact emergency services, follow these tips to help connect your iPhone to a satellite:
Hold your phone naturally in your hand. You don’t need to raise your arm or hold your phone up, but don’t put it in a pocket or backpack.
Make sure that you’re outside with a clear view of the sky and the horizon.
Be aware that trees with light foliage might slow down the connection, and dense foliage might block it. Hills or mountains, canyons, and tall structures can also block the connection.
In case you need to turn left or right or move to avoid a blocked signal, your iPhone provides guidance—just follow the onscreen instructions.
To text emergency services via satellite
First, try calling emergency services. Even if your normal cellular carrier network isn’t available, you might be able to make the call.
If your call won’t connect, you can text emergency services via satellite:
Tap Emergency Text via Satellite.
You can also go to Messages to text 911 or SOS, then tap Emergency Services.
Tap Report Emergency.
Using simple taps, answer the emergency questions to best describe your situation.
You can also choose to notify your emergency contacts that you contacted emergency services, along with your location and the nature of your emergency.
To connect to a satellite, follow the onscreen instructions.
After you’re connected, continue following the onscreen instructions to stay connected while you send your message to emergency services.
Once you’re connected, your iPhone starts a text conversation with emergency responders by sharing critical information like your Medical ID and emergency contact information (if you have set them up), the emergency questionnaire answers, your location (including elevation), and remaining battery life for your iPhone.
6. Hidden and Recently Deleted albums protection
The Hidden album in the Photos app is clearly not hidden, seeing as you can easily find it, making it impractical for adequately hiding private photos and videos. While Apple does have an option to make the Hidden album “invisible,” anyone with access to your phone can make it visible again and view everything inside.
Thanks to an iPhone 14 trick, you can now lock the Hidden album. You don’t actually need to do anything to toggle this feature on. If you want to check it out, launch the Photos app and go to the Albums tab at the bottom of the screen. If you scroll down, you’ll see a tiny lock next to the Hidden and Recently Deleted albums. To view what’s inside, use Face ID or your passcode.
7. View and share saved Wi-Fi passwords
Apple has allowed iOS users to share Wi-Fi passwords for a while now, but only by placing two Apple devices near each other. And if that feature didn’t automatically work, you couldn’t just dig out the password from your settings. Plus if you wanted to share a saved Wi-Fi password with someone else, like an Android user or someone on a computer, you had to know the password. Until now.
In Settings, go to Wi-Fi and tap the tiny information icon to the right of the network you want the password for. To view the network password, tap the Password section and then use Face ID or enter your passcode to view it. You can then tap Copy to copy the password into your clipboard and share it.
8. Find and remove any duplicate photos and videos
Maybe you’ve saved the same photo multiple times or downloaded a video more than once, and so you’ve got duplicates littered in your photo album. It may not be a problem if you’ve got the storage to spare, but if not, it might be a good idea to go back and remove every single duplicate — which is now easy to do thanks to an iPhone 14 trick.
In Photos > Albums, you should now see a new Duplicates album under Utilities, where Apple scans through all of your photos and shows you any photo or video you’ve saved more than once. From there, you can either delete any duplicates, or simply press Merge, which will keep the photo with the highest quality (and relevant data) and then move the others to the trash.
Although you’ll probably want to go through each set of duplicates, to ensure that they’re actually exact copies and not similar photos, you can also hit Select > Select All > Merge to remove every single photo and video that Apple thinks is a duplicate, all at once.
9. Pin your favorite tabs in Safari
Safari caps your open tabs at 500, and if you’re nearing that limit, it might be pretty darn hard to find the exact tab you’re looking for. You could scroll endlessly, but there’s now an easier way to find the exact tab you’re looking for.
In Safari, if you press down on an open tab, you now have the option to hit Pin Tab. This will move that tab to the top of Safari, where it will exist as a tiny tab preview, permanently pinned there, which you can then tap to view.
If you press down and unpin a tab, it will move to first in your grid of open tabs.
10. Pair Nintendo Switch Joy-Cons with your iPhone
Apple has long allowed you to pair third-party controllers, like the PS5 Sony DualSense and Xbox Core Controller, to your iPhone and iPad, in order to more comfortably play mobile video games like the Apple Arcade library, Minecraft and Call of Duty. And you can add another console controller to that list.
If you own a Nintendo Switch, you can now pair your Joy-Con controllers to your iPhone 14 Pro. To start, hold down the little black pairing button on the Joy-Con, until the green lights start running back and forth. This means the device is in pairing mode. Next, open your iPhone and go to Settings > Bluetooth and select the Joy-Con from the list. Repeat this step with the other Joy-Con.
11. Recover recently Deleted Chats in Message
If you have the habit of deleting messages in the Message app and happen to require them at a later point in time, you can recover the deleted messages on your iPhone 14 Pro. The deleted messages are moved to the Recently Deleted folder in the Message app itself. Here’s how to access the Recently Deleted folder in Message,
Open the Messages app.
Tap the Edit button at the top left.
Select the Recently Deleted folder.
Select the chat you want to Recover the messages from.
Note: Deleted messages will be available in the Recently Deleted folder for 30 days, after which the messages will be deleted permanently.
12. Easily Delete contacts
With previous versions of iOS, deleting a contact on iPhone was a tiresome process. You had to go to the detailed information of the contact, select the Edit option, and then scroll down all the way to finally select the Delete Contact option. Apple has finally heard the requests of its users as it has made the process of deleting a contact easier in iOS 16. You can now simply tap and hold on a particular contact to delete it from your list.
13. Disable ‘Lock to End Call’
One of the quirks that iPhone users (especially the new users who switch from Android) complain about is that pressing the lock button ends the call. You can finally disable the ‘Lock to End Call’ feature with this iPhone 14 trick.
Open the Settings app.
Go to Accessibility.
Select Touch.
Toggle off Lock to End Call.
14. End call using Siri
With iPhone 14, other than tapping the on-screen end call button or side button of the device to end a call, you can have your virtual assistant, Siri, hang up a call for you in a very high-handed way. While you are on a call, just say “Hey Siri, hang up” and the assistant will do it for you.
While this is a convenient and hands-free way to end a call, it is recommended to use it with caution as the caller on the other end will be able to hear your command to Siri.
15. Restart your iPhone 14 with Siri
Another hidden iPhone 14 trick is rebooting your device with Siri. Just wake your assistant up with a “Hey Siri” call and say “reboot ” or “restart”. When Siri asks for confirmation, reply with a “Yes” or “No” and that’s it! You don’t even have to unlock your device to complete the action using Siri, so it can be done entirely remotely.
16. Dictate emojis with Siri
You could previously dictate texts with Siri, but if you’re the type who thinks emojis are worth a thousand words, your iPhone’s digital assistant couldn’t really helped you. Dictate a lovely message to your sweetie that ends with a heart emoji, and Siri will quite literally type “heart emoji” in the text. It really kills the mood.
iOS 16 makes Siri smarter about dictated emojis, and now, telling the assistant “heart emoji” will yield a nice red heart right there in your text message.
17. Skip Siri confirmation
Previously, if you ask Siri to send a message to a contact and dictate the content, it asks for confirmation. The positive side is that you can check if Siri has transcribed your message correctly.
Nonetheless, it is another added step and takes more time. With this iPhone 14 Pro trick, you can turn it off and send messages automatically with Siri. Here’s how,
Open the Settings app.
Go to Siri & Search.
Tap Automatically Send Messages.
Toggle onAutomatically Send Messages.
18. Make Siri listen longer
While we’re on the subject of Siri improvements, let’s talk about an accessibility feature that Apple actually revealed back in May, a month before its iOS 16 preview. Back then, Apple promised a host of accessibility features was coming to the iPhone, and one of the promised additions that caught my eye was the ability to the adjust Siri’s pause time.
Adjusting the pause time will make the digital assistant wait longer before responding to your request. It’s ideal for anyone with impaired speech, but really if you find yourself rushing to complete a Siri command before the assistant leaps into action, you’ll appreciate this iOS 16 addition as well.
Go to Settings.
Tap Accessibility.
Tap Siri.
19. Merge Duplicate Contacts
If your Contacts app is riddled with duplicates that you haven’t been able to fix, then this iPhone 14 Pro trick is for you. The update includes a dedicated feature for merging duplicate contacts, solving problems with multiple contacts once and for all.
In the iOS 16 Contacts app, if you have more than one contact card for the same person, the app will automatically detect the duplicate and let you know that duplicates were found.
The “Duplicates Found” interface is at the top of the app, and if you tap it, the Contacts app is able to merge all of the duplicate contact cards into one.
Prior to now, there was no built-in way to quickly manage duplicate contacts in the iOS Contacts app, so the new iOS 16 feature should be a relief for those dealing with Contacts issues. This feature did previously exist on the Mac, but it was not available on iOS devices.
20. Copy and Paste Photo Edits
Want all of your photos to have the same aesthetic, or have improvements you want to make to an entire batch of images? That’s possible with this iPhone 14 Pro trick, which lets you copy edits from one photo and apply them to another photo with a tap. Here’s how:
Open Photos and select the edited image.
Tap the Three Dots at the top right.
Tap Copy Edits.
Go to the image you want to paste the edit and tap the Three Dots at the top right.
Tap Paste Edits and done.
The same edits are now applied to the selected image too.
21. Sort Playlists in Apple Music
Playlists are great, but in Apple Music, they’re fixed in the order you created them. If you want to change things up, you’ll have to open the editor and do it by hand. Now, with this hidden iPhone 14 Pro trick, you can easily sort Playlists by title, artist, album, or release date.
22. Use Face ID in Landscape Mode
The iPhone 14 Pro models support Face ID in landscape mode, making it easier to unlock the iPhone when it’s not held in the standard portrait orientation.
23. Lock Notes with a Passcode
Rather than creating a new password for a note, you can now simply use your device passcode or Face ID/Touch ID to lock a note, which is much easier.
Open the Notes app.
Tap and Hold the note you want to lock.
Select Lock Note.
Tap Use iPhone Passcode.
24. Enable haptic feedback on the Keyboard
There’s a keyboard setting in iPhone 14 Pro that lets you enable haptic feedback that can be felt when you’re typing. The vibrations are for each key tap, offering users a physical confirmation that a letter has been pressed. Here’s how to enable it:
Go to Settings.
Tap Sounds & Haptics.
Select Keyboard Feedback.
Toggle on Haptic.
25. Add Quick Note to Control Center
Apple introduced Quick Note as one of the best new iPadOS 15 features earlier last year. What makes this a useful feature is its ability to let you start taking notes from anywhere on your device. So whenever an interesting idea strikes, or if you wish to pen down important points in a meeting, you need not open the Apple Notes app and use the Quick Notes instead. Now, with the release of iOS 16, Apple has extended this productivity-centric feature to provide a quick and simplified note-taking experience on iPhone as well. Here’s how to add this tile to your Control Center:
First, open the Settings app on your iPhone and select “Control Center“.
Under the “More Controls” section, find “Quick Note” and tap the green “+” button next to it. That’s it! The Quick Note icon will now show up in the control center.
Note: If you want the Quick Note icon to appear higher in the control center, touch and hold the three horizontal lines next to Quick Note to drag the icon to your desired location in the Control Center.
Once the Quick Note icon is available in your device’s Control Center, taking a Quick Note is merely a tap away. Here’s how it works:
First, bring up the control center on your iPhone.
Then, tap on the Quick Note icon (sticky note with a squiggly line).
Now, a Quick Note window will appear on the iPhone screen to let you jot down your thoughts or anything that you want to take note of. Since it provides all the familiar formatting tools and features, including a document scanner and markup, so you can take notes with the desired efficiency. Make sure to tap “Save” at the top-right corner to save your note.
26. Schedule Emails in the Mail App
Have you ever tried to remember to email someone about something on a particular date in the not-so-distant future, but ended up forgetting to send it when the day eventually came around? If that sounds familiar, scheduling emails could be the perfect way to ensure it doesn’t happen again.
Whether it’s a birthday or other celebration, or maybe something business-related that you need to bring up on a specific future date, This iPhone 14 Pro trick offers you the ability to schedule emails ahead of time. Here’s how to schedule emails in the Mail app,
Open Mail app.
Tap Add New icon located at the bottom right corner and draft your mail.
Press and hold the Upwards Arrow, representing Send.
27. Convert currency through the Camera
Currency conversion is a convenient tool to save your pocket from taking any heavy losses in over-priced deals especially if you travel abroad a lot. Usually, we browse the web to convert currency. Following this method can get hectic, especially if you’re traveling abroad. However, with this hidden iPhone 14 Pro trick, you can convert currency directly from your Camera and no longer need to manually enter the currency values online.
Here’s how to convert currency directly through your iPhone’s camera:
Open the Camera and point it to the text.
Tap the Scan icon at the bottom right corner.
When done, tap the Convert icon at the bottom left.
You can now see the currency value converted!
28. Get Translations Directly From the Camera App
Apple in iOS 16 has brought its system wide translate feature to the Camera app, allowing the iPhone to be used to translate signs, packaging, and more in real time.
Using the translate feature is as simple as opening up the Camera app and pointing it at the text you want to translate. Tap on the text selection button in the app to select the detected text, and then choose the translate option to get an instant translation.
You can pause the view to get translations overlaid on text, and zoom in for a closer look. It’s a useful feature that’s perfect for signs and other wording that you might not understand when you’re traveling.
29. Edit messages in iMessage
I think it’s safe to say that everyone has relied too much on autocorrect when sending an iMessage, leading to potentially embarrassing typos. Prior to iOS 16, you had to own the mistake and accept that it would exist on the recipient’s phone, forever. However, with this iPhone 14 Pro trick, you have the ability to edit a message within 15 minutes after it was sent.
You’ll need to act fast after you realize your mistake. But once you do and you’re still within the 15-minute window, all you need to do is long-press on the message, then select Edit from the list of options.
The text field will show back up, letting you fix your error and then save it.
On the recipient’s end, if they’re using iOS 16 as well, a small “Edited” label will appear below the message that no longer shows any signs of wrongdoing.
For those on older versions of iOS, they’ll receive a second message with the corrected text.
30. Unsend messages in iMessage
The process for completely deleting a message you’ve sent within the last 2 minutes — helpful if you send it to the wrong contact or thread — is nearly identical to editing a message.
Once you realize the error of your ways, long-press on the message until you see a menu pop up. From that menu, tap Undo Send. There’s a small animation that shows the message disappearing, followed by a line of text in the thread letting everyone know a message was removed.
Easy-peasy, right?
31. Create a sticker from images
With this iPhone 14 Pro trick, you can create stickers from images and share these stickers with other applications. It is shared as a sticker in iMessage and as a PNG image in other instant messaging services. Here’s how to do it,
Open the Photos app.
Select the image you want to create as a sticker.
Tap and Hold the image.
You can copy the image and paste it as a sticker in iMessage or any other service you want. Or you can share the image from the same page. You can also save the sticker in notes.
32. Personalize Lock Screen
One of the things you look at the most on your iPhone is the lock screen. iOS 16 brings the most substantial update to the iPhone’s lock screen yet. Press and hold to edit your lock screen. You can swipe to try out several different styles. Each style changes the color filter for the background photo and the font on the lock screen so everything complements each other. This feels a bit like Apple’s take on Google’s Material You, which launched with Android 12.
You can also customize the fonts for the time and date, and add lock screen widgets like temperature, activity rings and a calendar. The widgets are akin to complications on the Apple Watch lock screen.
You can even set up multiple customized lock screens with different widgets and easily swipe to switch between them. There’s also a photo shuffle option that automatically changes the pictures on your lock screen.
33. Skip CAPTCHAs using Private Access Tokens
The CAPTCHA — which stands for Completely Automated Public Turing test to tell Computers and Humans Apart — has been a necessary evil across the internet. CAPTCHAs are designed to make sure that a person is accessing a website or service, and not a bot. I find them annoying, as they often involve reading strangely written letters or having to find all the images that have a truck. Tapping on images of traffic lights or deciphering squiggly text to prove you are human is now a much less common nuisance for iPhone users, as this iPhone 14 Pro trick lets you bypass CAPTCHAs in supported apps and websites.
This cool iPhone 14 Pro trick can be found in the Settings app under Apple ID > Password & Security > Automatic Verification. When enabled, Apple says iCloud will automatically and privately verify your device and Apple ID account in the background, eliminating the need for apps and websites to present you with a CAPTCHA verification prompt.
34. Transfer an eSIM Between iPhones via Bluetooth
This iOS 16 trick allows an eSIM to be transferred between iPhones via Bluetooth while setting up cellular service.
In the Settings app on an iPhone running iOS 16, tapping on ”Set up eSIM” brings up an option to transfer an eSIM and its associated phone number from another iPhone via Bluetooth. To transfer an eSIM from another iPhone, Apple says to make sure the other iPhone is nearby, unlocked, has Bluetooth turned on, and is running iOS 16 or later.
Open the Settings app on your new iPhone.
Tap Cellular.
Above the Cellular Data section, tap the Set Up eSIM button.
When prompted, tap the Transfer From Another iPhone button.
From there, you’ll be prompted to the next screen which provides the following message: “To transfer a phone number from another iPhone, make sure your other iPhone is passcode protected, nearby, unlocked, has Bluetooth turned on, and is running iOS 16 or later.
35. Use Spotlight on the Home Screen
This hidden iPhone 14 Pro trick lets you access Spotlight search from the Home Screen without swiping down or left. You’ll find it right above the dock, which makes it easier to search for apps, contacts, documents, images, and more. Spotlight can fetch results using the information from images stored in Messages, Notes, and Files, like text, objects, people, and so on.
36. Set a Reminder to Check Emails Later
At times, you might want to check an important email later. With this iPhone 14 Pro trick, you can add a reminder to check messages in the future. Simply swipe right on an email and select Later. Ask the Mail app to remind in an hour, tonight, tomorrow, or later.
37. Drag and Drop Subjects With Visual Lookup
Apple’s updated Visual Lookup feature in iOS 16 can separate subjects from the background of an image with a simple long-press action. You can use it to grab an object from a picture and drop it as a sticker into the Messages app, for example. Thanks to machine learning, you no longer need to spend time drawing outlines using third-party apps to get a sticker you want.
38. Use Live Text in video
Live Text was already great with iOS 15. You could grab information from a photo by selecting the text available, a telephone or address, for example.
Now, with Live Text in videos, text is completely interactive in paused video frames, so you can use functions like copy and paste, lookup, and translate.
In addition, Live Text with iOS 16 adds recognition of Japanese, Korean, and Ukrainian text. Last but not least, data detected in photos and videos is actionable with a single tap. Track flights or shipments, translate foreign languages, convert currencies, and more.
Here’s how to use Live Text in a video:
Open the Photos app and open the preferred video.
Scroll the video to the point where you want to extract the text.
Pause the video, tap and hold on to the text on video.
Live Text will automatically recognize text and show you the following options copy, select all, look up, translate, search web and more.
Tap on the desired option to use the text as needed.
Also, the Live Text feature can be used over Map to copy the address.
39. Add the battery percentage to the status bar
With this iPhone 14 Pro trick, you can add the battery percentage back to the status bar. Simply go into Settings, then choose Battery, then toggle on the new Battery Percentage option. It might even be enabled by default, but that only appears to be the case for some users.
40. Track your orders in Apple Pay
Let’s wrap up by highlighting some features in Apple’s existing apps that have gotten overshadowed by other changes. For instance, in the Wallet app, the big change brought about by iOS 16 is Apple Pay Later, in which you can divvy up your purchase into four installment payments. But that’s not the only new capability available when you buy things with Apple Pay in iOS 16.
You’ll also be able to track orders of your Apple Pay purchases directly from within the Wallet app. The feature only works with participating merchants, but considering how widespread Apple Pay has become since Apple introduced it in 2014, you’d imagine that there will be a lot of retailers providing order tracking info to you via Wallet.
Your favorite iPhone 14 and iPhone 14 Pro tips and tricks
So these were some of the best iPhone 14 Pro and iPhone 14 Pro tips and tricks you would love to try today. My favorite iPhone 14 and iPhone 14 Pro tips and tricks include ability to edit/delete messages, ability to end calls with Siri, and ability to schedule emails in Mail. There’s surely plenty more hidden iPhone 14 Pro and iPhone 14 Pro Max tips and tricks to discover, so I’ll keep tapping, swiping and noting anything I find. Did we miss out on something important that needs to be added to the list? Which are your favorite iPhone 14 and iPhone 14 Pro tips and tricks? Share your thoughts in the comment section below.
The orange dot is an indicator that an app is using your iPhone’s microphone. The green dot means an app is accessing the camera on your iPhone.
If you have updated your iPhone or iPad to iOS 14 or iPadOS 14, you may have noticed something new pop up on the top right of the display every now and then. Just above where the mobile network, Wi-Fi and battery indicators are located. These new pop-ups that you may occasionally see may include an orange dot or a green dot. Don’t worry: These dots don’t signal some sort of malicious SpyWare, nor are they proof that Apple engineers are spying on you. Instead, these dots are meant to warn you about some app behavior on your iPhone, known or unknown.
With the new iOS 14 software update, Apple has integrated these notifications for when an app on your iPhone is accessing the microphone or the camera, front or back. Often, you may actually be using an app for video calls, posting a photo on social media and more, but there may be times when app may misbehave or there may be malicious apps trying to access your iPhone’s camera or microphone. You will immediately receive a warning, that something is amiss.
When that green or orange dot pops up, Apple is simply giving you more information about how the app is accessing the sensors on your iPhone. From there, it’s up to you to decide whether you want to keep those permissions on, or keep the mic and camera to yourself. The orange dot is an indicator that an app is using your iPhone’s microphone. These could be apps that you may be using at the moment, like WhatsApp for voice calls, Zoom for audio calls or even recording something using the Voice Memos app. These are just some examples. A green dot is an indicator that an app is accessing the camera on your iPhone. The dot may appear when you are making a FaceTime video call, a Skype call, trying to post something on Instagram or taking a photo. The thing is, you will not see the orange and green notification dots simultaneously. If you are using your iPhone to record a video, for instance, you will only see the green notification for camera access.
“An orange indicator means the microphone is being used by an app on your iPhone,” is what Apple says in the support documentation, and adds, “A green indicator means either the camera or the camera and the microphone are being used by an app on your iPhone”.
These are features that should help you figure out if an app installed on your iPhone is trying to access the microphone (to possibly snoop on you) or the iPhone’s camera (to photograph or video graph you or the place you are at) without your consent. That would be a significant brach of privacy, and if it wasn’t for these colorful dots, there really wouldn’t be any way of knowing about app behaviour, particularly in the background. At this point, Bring up the control center by swiping down from near the top right of the iPhone Display to see the details on which app is trying to access your iPhone’s camera or microphone. This is indeed a fantastic way to know if an app is behaving suspiciously or trying to snoop on you.
Many people use their phones without even knowing all the features they offer. Some basics features are easy to find while others require a little bit of research. Talking about the iPhone and iPad users, there are so many different areas where Apple put special restrictions for their users. Yes, there are various ways to bypass those restrictions but many people don’t even know that a method exists. In this post, I have compiled 10 useful iPhone/iPad tricks and hidden features you should check out. These 10 useful iPhone/iPad tricks will surely make your work easier. Let’s get started.
iPhone/iPad tricks and hidden features you probably didn’t know
1. How to transfer files wirelessly across iPhone and PC
The vast majority of people are looking for an easy method to transfer their files from PC to iPhone and from iPhone to PC but since the launch of the iPhone 2G, the only method that Apple offered to transfer files between iPhone and PC is iTunes. Which I trust is a very cumbersome method especially if you want to transfer only one or two files. Thankfully, there is an easy and quick method to transfer files between PC and iPhone via your Wi-Fi network. All you have to do is to connect your iPhone and your PC to the same Wi-Fi network so you can access them wirelessly. The name of the app is Air Transfer. You can check the full instructions here.
2. How to lock Apps on Your iPhone
There are numerous reasons why you might want to restrict access to your iPhone apps. Maybe you let your child use your phone and want to keep them out of messaging and productivity apps. Or perhaps you’d just like a little more privacy in general. There’s nothing wrong with that! Locking apps on your iPhone is easier than you realize. You can either use Screen Time or Guided Access if you want a built-in option. You can check the full instructions here
3. How to download videos on iPhone/iPad — Any iOS version
As we already know How strict Apple is in giving features like downloading files from all over the internet. Apple allows its users to download data only from secure applications such as App Store, Apple Music, iTunes, etc. basically all the Apple iOS stock apps. In iOS 13, Apple gave users the permission to download any kind of file on Safari Browser. You can download any type of file from Safari but there are so many people who don’t know the right place to download files especially video/audio files.
Here is a very simple method to download any video from Google, Instagram, Twitter, Facebook, YouTube, or anywhere from the internet. In addition, you can export downloaded videos to your photos app or if you want to just run the video on the background you can do that as well. You can check the full instructions here
4. Read YouTube Videos as Articles on Your Phone Instead of Watching Them
Looking to read YouTube videos instead of just watching them? Well. Check out free Videoticle service! With the power of the Shortcuts app on your iPhone, you can turn any video you’re watching into a Medium –style article that you can browse, read, and follow along with, complete with screenshots.
Converting YouTube videos into written articles can especially come in handy if you want to watch something but don’t want others to see that you’re watching it, like when you’re at work or school. After converting the YouTube video into an article, you can read it quietly without anyone taking notice (unless they’re right behind you, of course). You can check the full instructions here
5. How to Scan documents with your iPhone
Having the world at your fingertips has never been easier thanks to the modern technology. Unfortunately, you can’t always do everything with your smartphone. Sometimes you’re forced to use clunky old technology, such as printers and scanners. How boring.
Thankfully, when you need a document scanned, you can ignore that grumpy old scanner altogether. You can scan a document right from your iPhone or iPad using a few different apps. We show you how. You can check the full instructions here
6. How to hide photos on iPhone/iPad — iOS 14 Only
I know most of you already know how to hide your photos inside the iOS photos app but with the release of iOS 14, iPad OS, and macOS Big Sur, Apple deeply focused on the privacy side of things and enable so many new privacy features for its users. Apple released iOS 14 with a bunch of new features including the feature to completely hide photos from the photos app. I know all of you are curious to know the trick to hide your private photos inside your photos app. You can check the full instructions here
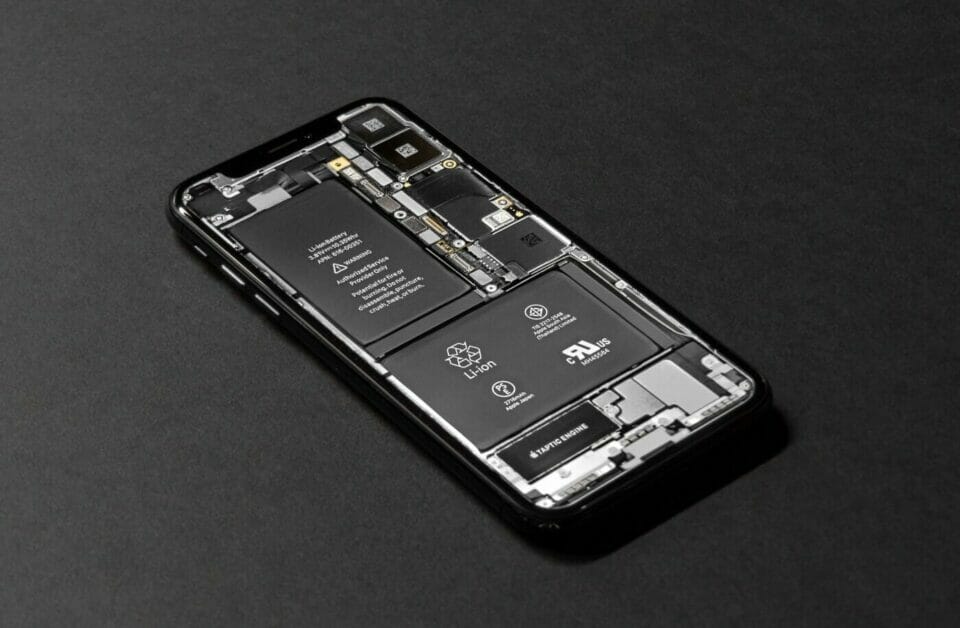
7. Turn On Low Power Mode at any % in iOS 14
Apple is not providing large capacity batteries on the iPhone. That is why most of the people enable Low Power Mode on their iPhone all the time. The only drawback with Low Power Mode is that it disables a lot of activities on the background including display brightness, push mail, and background downloads. It helps you to give some more battery to get you to the rest of the day. What if you want it to automatically enable at any percentage and you don’t need to activate it. There is a nifty trick that is available in iOS 14 which allows you to TURN ON low power mode at any battery percentage. You can check the full instructions here
8. How to make iPhone music louder
NOT happy with your iPhone’s loudness? It’s very easy to crank up the volume with settings tweaks – and some real-world tricks. And yes, one way to make iPhone speaker louder involves putting your device in a bowl. You can check the full instructions here
9. How to Change the Default Apps on iPhone — iOS 14
In iOS 12, Apple introduced a feature to delete default applications from iPhone and iPad. But for browser and mail apps, Apple forced its users to use the default apps. In iOS 14, the Cupertino based brand has removed the restriction of using default applications. Giving this option to change default apps like mail and safari is not because they are not good to use, actually, they are perfect for those who love to live inside the Apple Eco System. But there are so many other people who prefer to use other apps. For example, many people prefer to use Google Chrome and for mailing app, many people prefer to use Gmail. If you happen to have a Windows laptop or Android tablet then there is no way to enjoy the same email experience or sync browsing history on those devices if you use Safari on your iPhone. The good news is that, in iOS 14, Apple gave this option to its users to change the default apps. Please follow these steps if you want to change your default apps in iOS14. You can check the full instructions here
10. How to Customise Homescreen App Icons
Apple gave its users the ability to automate different tasks in iOS. This can be done using Apple’s Shortcut app. Through this shortcut app, people found a new way to change the theme of homescreen icons in iOS 14. There is an easy and more quick method which helps you to customize your homescreen icons in any iOS version from iOS 12 to iOS 14. Also, this method removes the app shift issue that I have already discussed above. Here are the instructions to theme your homescreen icons. You can check the full instructions here
These are ten of my favorite useful tips and tricks for the iPhone/iPad. If you found this article helpful, make sure to share it with others. Which trick did you find so useful? Please let us know in the comments section below.
I’m pretty sure most people are looking for an easy method to transfer their files from PC to iPhone and from iPhone to PC but since the beginning of iPhone 2G the only method that Apple offered to transfer files between iPhone and PC is iTunes. Which I believe is a very cumbersome method especially if you want to transfer only one or two files.
In the last couple of years, I tried various methods to transfer files between PC and iPhone. Some of them are much better and easy to use than iTunes but at the same time, they required additional software to install on PC. But I found an easy and quick method to transfer files between iPhone and PC that I want to share with you.
As we know since the launch of iOS 12 Apple gave their users so much freedom to run different type of file format on their iPhone by giving the option of files app. But the problem with files app you can only access files from one drive or by using iTunes. Thankfully, I found an easy and quick method to transfer files between PC and iPhone via the Wi-Fi network. All you have to do is to connect your iPhone and your PC on same Wi-Fi network so you can access them wirelessly. The name of the app is Air Transfer.
The first thing you need to do is to download the Air Transfer app on the App Store.
Once you have downloaded the app to your iOS device, Make sure your iPhone/iPad is connected on the same Wi-Fi as your computer.
Now launch the Air Transferapp and you will be presented with different kind of file types such as (“Text Memos”, “Bookmarks”, “Images”, “Music”, “Movies”, “Documents”, and more).
You will see a small wi-fi symbol at the bottom of the display. Click on it and you will find an IP Address)
Next, copy that IP Address and paste it on your computer browser.
A page will load where you can drag and drop any file. Simply Drag the file from your computer and drop it on drag files area and it will automatically appear on your iPhone app.
In my example, I dropped a PDF file and the file appeared immediately on my iPhone.
You can open and read files on Air Transfer app they have a wide variety of supported formats and also you can open that file to any other app on your iPhone.
You can also transfer Photos, Videos or any type of file from iPhone to computer.
If you liked this article please share it with others and if you need any help regarding this method of transferring files feel free to drop me a line in the comments section below.