Got a tip for us?

iPad

The iPad is a tablet computer from Apple that runs the iOS mobile operating system. Similar in functionality to the iPhone, the iPads purpose is often quite different, sometimes even serving as a general desktop computer replacement.

View collections of tips in the Tips app that help you get the most from your iPad. You can also get notifications every once in a while so you can keep learning new things over time.

In the Tips app, you can learn things like how to access your passwords. New tips are added regularly, and if you’d like, you can get notified when they arrive, save tips to your Saved tips collection, or share a tip.

Get tips

The Tips app teaches you how to personalize your Lock Screen, how to access your passwords, how to use Calculator to solve math problems, and much more, with new tips added regularly.

To start learning, go to the Tips app, tap a collection, then tap a tip.

Get notified when new tips arrive

  1. Open the Settings app on your iPad.
  2. Tap Notifications, tap Tips below Notification Style, and turn on Allow Notifications.
  3. Choose options for the style of notifications you want to receive, how they should appear, and more.

Save tips

You can add tips to your Saved tips collection to quickly find them later.

  1. Open the Tips app on your iPad.
  2. Tap a tip. Tap the Save button to add it to your collection. To remove the tip from your Saved tips collection, tap the Save button again.

To view all the tips you saved, tap the Show Sidebar button or the Back button until you return to the list of collections, then tap “Saved tips.”

Share a tip

Share a tip with a friend over Messages and Mail, or send it to someone nearby with AirDrop. Tips can also go into documents like Notes and Freeform boards.

  1. Open the Tips app on your iPad.
  2. Open the tip you want to share.
  3. Tap the Share button and then choose how to send the tip.

See also

Tag: Tips

You can log your state of mind in the Journal app. The time you spend journaling can even be added automatically as mindful minutes in the Health app.

As you reflect on how you’re feeling, you can log your momentary emotions, and your state of mind is added to Health, where you can review its history over time. And the Health app can access your state of mind and mindful minutes, too, if you allow it.

Here’s how to journal for your wellbeing on iPad.

A screen in the Journal app showing a tile where you can log your state of mind.

Log your state of mind

You can reflect on how you’re feeling and log your momentary emotions in your journal.

  1. Open the Journal app on your iPad.
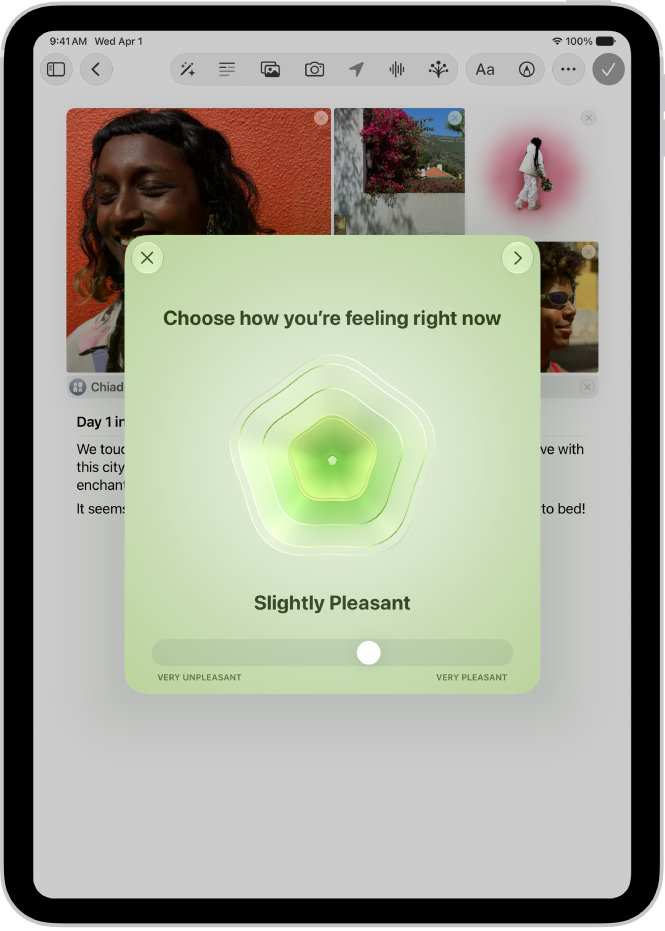
  2. While composing an entry, tap the Add State of Mind button.

    If you don’t see the Add State of Mind button, tap the More button, then tap Add State of Mind.

    You may be asked to turn on Health access.

  3. Drag the slider to indicate how you’re feeling and then tap the Next button.
  4. Tap any words that describe how you’re feeling and tap the Next button.
  5. Tap any words that describe what’s having the biggest impact on you. Then tap the Done button.

Your state of mind goes into Health, where you can review its history over time. Read our guide, Log your state of mind in Health.

Allow the Health app to access your state of mind and mindful minutes

You can automatically add the time you spent journaling as mindful minutes in the Health app.

  1. Open the Settings app on your iPad.
  2. Tap Apps and tap Journal.
  3. Tap Health Access and then turn on Mindful Minutes and State of Mind.

See also

With the Journal app, you can keep track of your journaling goals and build new habits.

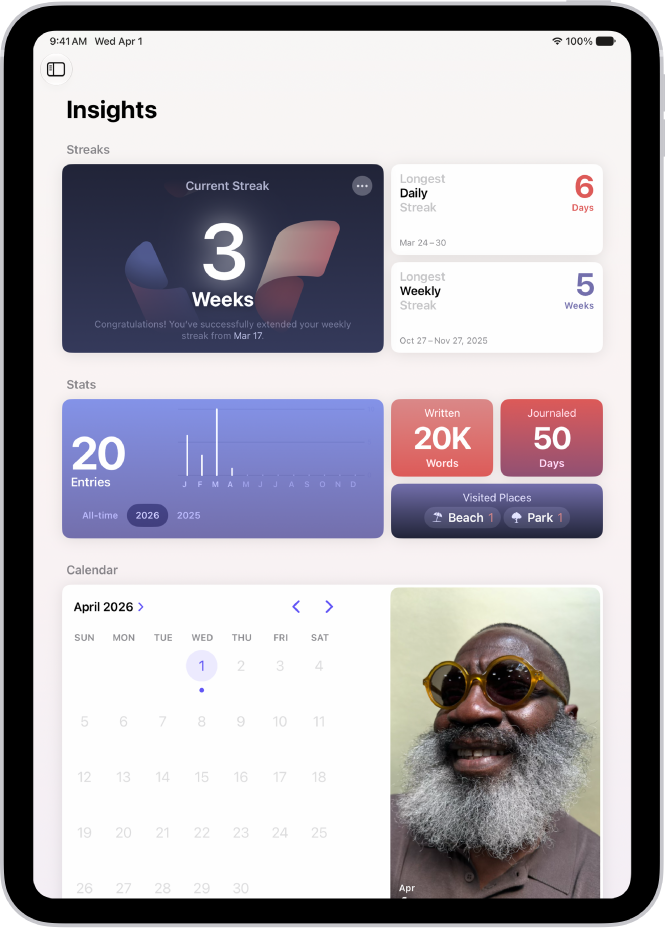
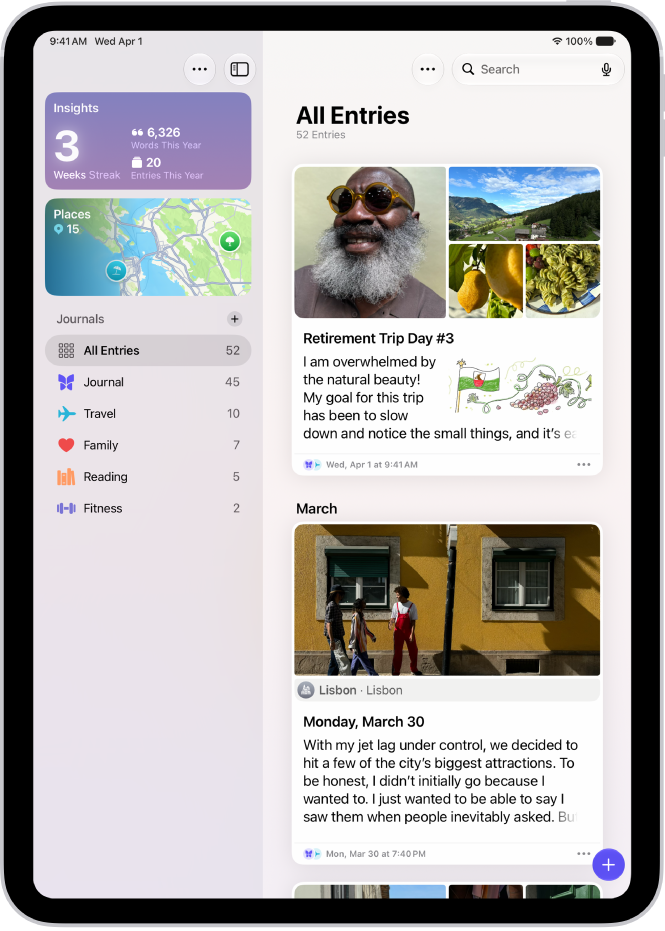
The sidebar shows your current streak, which is the number of consecutive days or weeks you’ve journaled, plus other insights. You can set a journaling schedule to be reminded to write, and add a Journal widget to your Home Screen or Lock Screen with your streak or writing prompts that change throughout the day.

Here’s how to build a habit with Journal on iPad.

Track journaling goals with Insights

  1. Open the Journal app on your iPad.

    Your current streak—the number of consecutive days or weeks you’ve journaled—and other insights are in the sidebar.

  2. Tap Insights. Then tap any tile to see more details.

    Tip: Tap the Toggle Sidebar button to open and close the sidebar.

    A screen in the Journal app showing the current streak and metrics, like number of words written.

Set a journaling schedule

You can be reminded to write with journaling notifications.

  1. Open the Journal app on your iPad.
  2. In the sidebar, tap the More button, then tap Notifications.
  3. Tap Custom and then set a weekly schedule.

Use the Journal widget

A widget on your Home Screen or Lock Screen can show your current streak or writing prompts that change throughout the day, helping you reflect on what’s going on in the moment.

  1. On the iPad Home Screen or Lock Screen, add a Journal widget.
  2. To change the widget, touch and hold the widget and then tap Edit Widget.
  3. Tap the widget to select from different writing prompts, start a new entry, or see details about your current streak.

See also

Tag: Journal

You can edit a journal entry, add the same entry to multiple journals, and remove or add a title. You can also edit the entry date, or delete multiple entries at once. Deleted entries are saved for 30 days, so you can recover them.

Edit a journal entry

  1. Go to the Journal app on your iPad.
  2. Choose a journal or tap All Entries.
  3. Swipe left on an entry and then tap Edit.

Add the same entry to multiple journals

  1. Open the Journal app on your iPad.
  2. Choose a journal or tap All Entries.
  3. Tap the More button below the entry, then tap Choose Journals.

Remove or add a title

  1. Open the Journal app on your iPad.
  2. While composing an entry, tap the More button. Then tap Remove Title or Add Title.

    If you don’t see the More button, tap the More button, then tap Remove Title or Add Title.

Edit the entry date

  1. Open the Journal app on your iPad.
  2. While composing an entry, swipe down to show the entry date and tap the date to edit it.

Delete journal entries

  1. Open the Journal app on your iPad.
  2. Choose a journal or tap All Entries.
  3. Swipe left on an entry and tap Delete.

    Deleted entries are saved for 30 days.

  4. To delete multiple entries, tap the More button at the top of the screen, tap Select Entries, select the entries you want to delete, and then tap the Delete button.

Recover journal entries

  1. Open the Journal app on your iPad.
  2. Tap Recently Deleted. You may need to tap the Toggle Sidebar button to open the sidebar.
  3. Tap the More button below the entry and then tap Recover.
  4. To recover multiple entries, tap Select, tap the entries you want to recover, and tap the Recover button.

See also

Tag: Journal

The Journal app makes it easy to capture your thoughts on everyday moments and special events. You can also get suggestions for topics to write about.

Journaling Suggestions group your outings, photos, workouts, and more, to help you remember and reflect. You can handwrite your entries with Apple Pencil, create multiple journals, start a journal entry from another app, and with Apple Intelligence, get customized writing prompts based on what you write.

Create a journal entry

  1. Open the Journal app on your iPad.
  2. Tap the Create an Entry button at the bottom of the screen.
  3. Start typing or tap the Add Drawing button and use Apple Pencil to create a handwritten entry.

Use Journaling Suggestions

To help you remember and reflect on your experiences, Journaling Suggestions intelligently group outings, workouts, photos, and more. When you’re signed in to the same Apple Account, journaling suggestions can sync from iPhone to iPad.
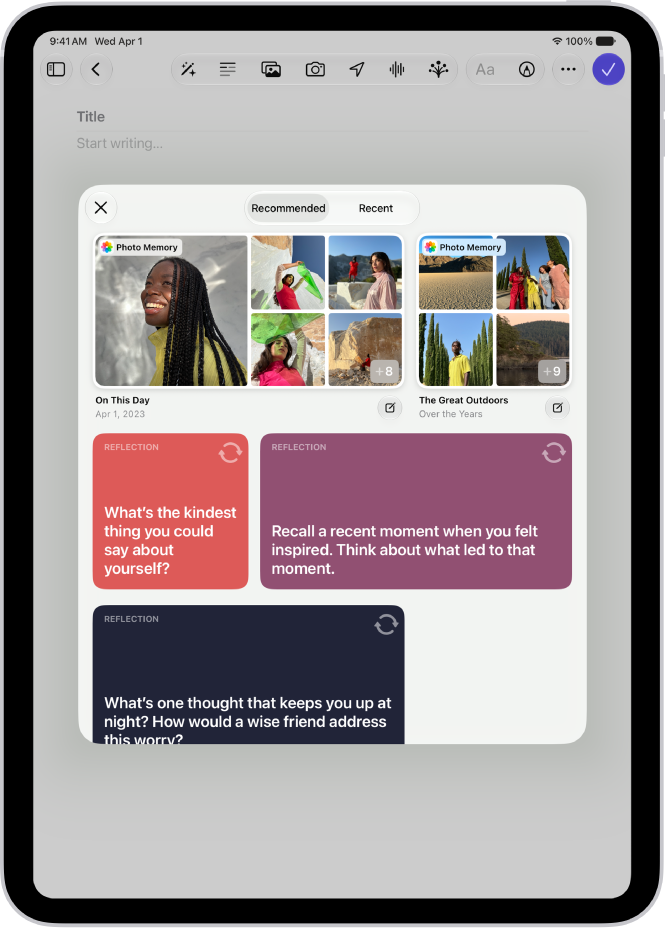
A screen in the Journal app showing Journaling Suggestions.

  1. Open the Journal app on your iPad.
  2. Tap the Create an Entry button at the bottom of the screen.
  3. Tap the Journaling Suggestions button.
  4. Browse the recommended suggestions or tap Recent to see suggestions sorted by date.
  5. To start a new entry with all the suggested attachments, tap the Journal Now button at the bottom-right corner of the suggestion.
  6. To preview the attachments before creating the entry, tap the suggestion. Do any of the following:
    • Browse the attachments: Swipe through the attachments.
    • Change to list view: To see the details for all attachments, tap the List View button.
    • Choose the attachments you want: Tap an attachment to select or deselect it.
  7. Tap Add to Entry to start writing or the Back button to return to the suggestions list.

To delete a suggestion, touch and hold the suggestion, then tap Remove.

Use Apple Pencil to handwrite your entries

  1. Open the Journal app on your iPad.
  2. Create a journal entry, then tap the Add Drawing button.
  3. Start writing with Apple Pencil and then do any of the following:
    • Select a different color: Tap a color on the palette.
    • Select a different tool: Swipe through the toolbar to see other tools and then tap the one you want. Tap any tool a second time to change its qualities, like the thickness or opacity of a stroke.
    • Select and transform text: Tap the Lasso button and outline the text you want to select. Drag the text to a new location or tap the More button and choose Cut, Copy, Paste, Duplicate, Refine, Copy as Text, Translate, or Straighten.
    • Change spacing between words: Select a writing tool, touch and hold between two words, and drag left or right.
    • Refine your handwriting: Tap the More button in the toolbar and turn on Auto-Refine Handwriting.
    • See spelling suggestions: Tap an underlined word to see the spelling suggestion. To use the suggestion, tap it.
    • Transcribe your handwriting into typed text as you write: Tap the Scribble tool, then start writing.

Use Writing Prompts while you write

Journal can use Apple Intelligence to suggest customized writing prompts that draw on what you write, plus any photos or drawings you add to your entry; read our guide, Turn Writing Prompts on or off.

Note: Apple Intelligence on iPadOS 27 or later is available on an Apple Intelligence-enabled iPad mini (A17 Pro) and iPad models with M1 or later. Apple Intelligence is not available in all languages or regions. Usage limits may apply.* You must be an adult to use this feature.

  1. Open the Journal app on your iPad.
  2. While composing an entry, tap the Show Writing Prompts button in the toolbar.
  3. Swipe through the prompts. Then tap a prompt to add it to your entry. You can add up to three prompts to an entry.

Create multiple journals

  1. Open the Journal app on your iPad.
  2. Tap the New Journal button in the sidebar above All Entries. Name the new journal.
  3. To reorder journals, touch and hold the journal name and drag up or down.
  4. To edit the journal name, color, or icon, touch and hold the journal. Choose Edit Journal.

Take action from the Home Screen

  1. On the iPad Home Screen, touch and hold the Journal app.
  2. Choose Record Audio, Add Photos, View Suggestions, or New Entry.

Start a journal entry from another app

Even while you’re doing something in another app, like listening to a song in Music or reading an article in News, a new journal entry can quickly capture your thoughts.

  1. In the app you’re using, tap the Share button or Share. Tap Journal.

    If you don’t see Journal, you may need to customize the app’s sharing options.

  2. Enter your thoughts, then tap the Done button.

Later, in the Journal app, you can review your entry and add more details. See our article, Edit a journal entry.

*Apple Intelligence is available with Siri and device language set to Chinese (Simplified), Chinese (Traditional), Danish, Dutch, English, French, German, Italian, Japanese, Korean, Norwegian, Portuguese, Spanish, Swedish, Turkish, or Vietnamese. Some features may not be available in all regions or languages. Some devices may not be available in all regions. Siri AI is available in beta in iOS 27, iPadOS 27, macOS 27, watchOS 27, and visionOS 27 and requires an Apple Intelligence–enabled device set to a supported language. Available in English to start. Siri AI will not be initially available in the EU on iOS, iPadOS, and watchOS. Certain Apple Intelligence features that rely on server-side models are subject to daily usage limits, including but not limited to Siri AI, Intelligent Photo Editing Tools, Image Playground, and AFM 3 Cloud models in Shortcuts. Daily limits may vary by feature, request complexity, system demand, system policies, and other factors. Expanded access to such features will be available for a fee in the future. Use of these features is subject to the Apple Intelligence Terms and Conditions.

See also

Learn how to use the Journal app on iPad to record your experiences. You can add photos, music, drawings, audio recordings, and even your current state of mind, and you can sketch or handwrite your entries with Apple Pencil (see compatibility) or your finger. Later, you can look back through your previous entries, or see only certain types of entries.

You can sync journaling suggestions from iPhone to iPad when you’re signed in to the same Apple Account, and protect your journal with Face ID, Touch ID, or your passcode, so only you can access it.

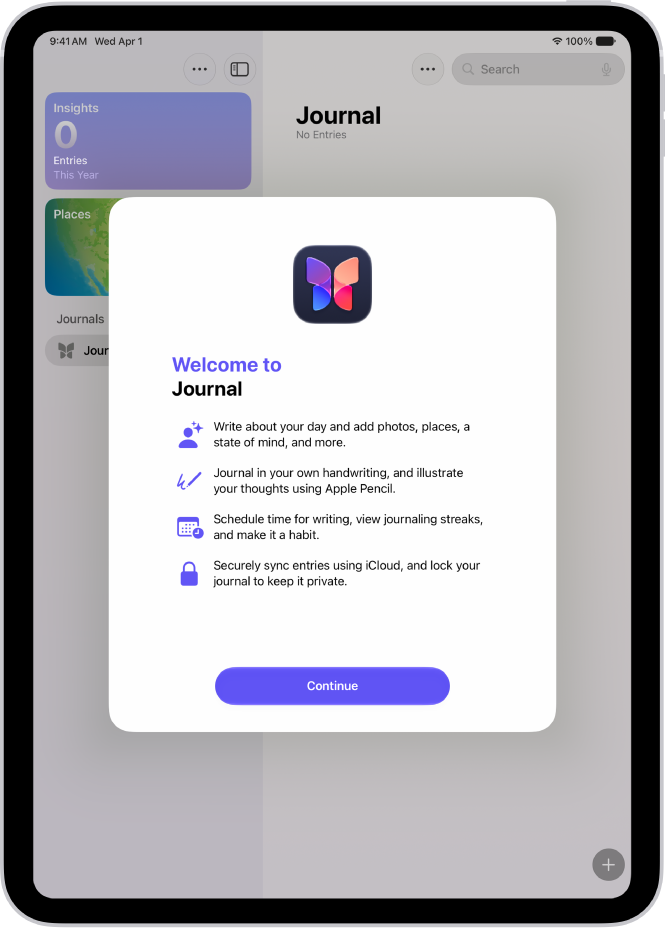
The welcome screen for the Journal app.

Set up Journal

The first time you open Journal, follow the onscreen instructions to set up. When you’re signed in to the same Apple Account, you can sync journaling suggestions from iPhone to iPad. Go to Settings, then tap Privacy & Security. Tap Journaling Suggestions, tap Turn On Journaling Suggestions, then turn on Allow Sync to iPad.

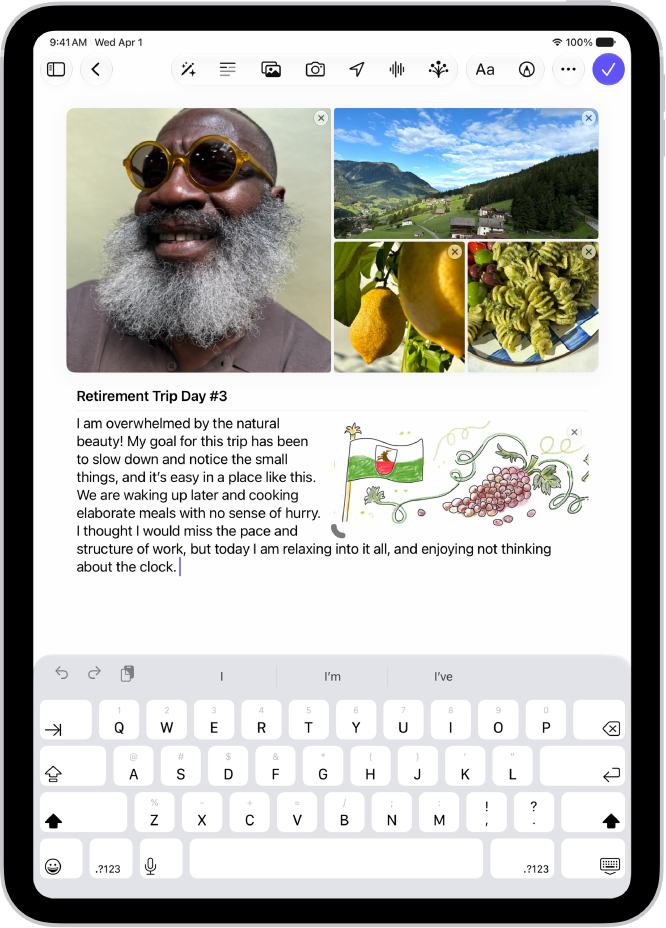
A screen in the Journal app for composing an entry.

Create a journal entry

Tap the Create an Entry button at the bottom of the screen, then start writing. Tap the Add Drawing button to add a drawing.

A screen in the Journal app showing journal entries with the Search button at the top right.

Review your journal entries

Scroll through your journal to see previous entries. To see only certain types of entries, tap the Search button, then either choose a category such as Photos or Drawings, or type the text you’re looking for.

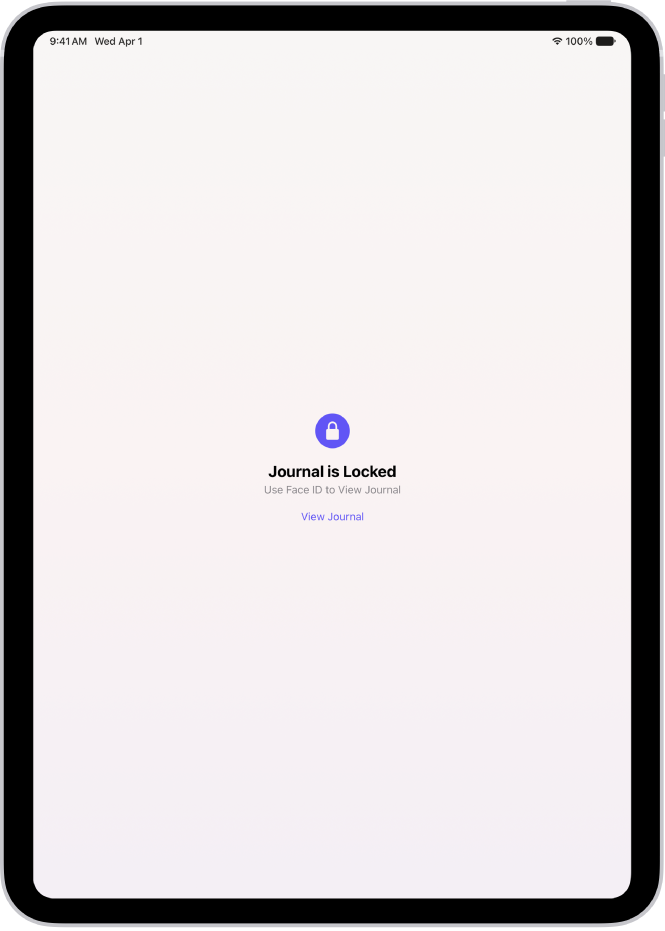
A screen in the Journal app that prompts you to use Touch ID to unlock your journal.

Keep your journal private

Protect your journal so only you can access it with Face ID, Touch ID, or your passcode.

To do more with Journal, try these guides next:

Tag: Journal

In the Journal app, you can create multimedia entries by adding photos, drawings, videos, audio, and more.

You can format the entry text, add a map location, and place a drawing inline with text, then resize and rearrange it. Photos and videos can go in the grid or inline with text, too, and you can adjust the color and style of the text.

Here’s how to add formatting, photos, and more in Journal on iPad.

A screen in the Journal app showing photos and an entry in progress.

Format text

You can adjust the color, style, formatting of the entry text.

  1. Open the Journal app on your iPad.
  2. While composing an entry, tap the Format button.
  3. Apply bold text, italics, underline, strikethrough, bulleted or numbered lists, block quote, or font color.

Add a drawing

  1. Open the Journal app on your iPad.
  2. While composing an entry, tap the Add Drawing button and then start drawing.

    Tip: To place a drawing inline with text, touch and hold where you want the drawing to go, then choose Insert Drawing.

  3. To see other tools, such as Crayon, Reed Pen, or Watercolor Brush, swipe through the toolbar. Tap the one you want.

    Tap any tool a second time to change its qualities, like the thickness or opacity of a stroke.

  4. When you’re finished drawing, tap the Add Drawing button.

    You can resize and rearrange inline drawings. To resize, drag the handle on the bottom left. To rearrange, touch and hold the drawing, then drag it to a new location.

Add photos or videos to the grid or inline with text

  1. Open the Journal app on your iPad.
  2. While composing an entry, do any of the following:

    • Choose photos and videos from your library: Tap the Choose Photo or Video button.

      If you don’t see the Choose Photo or Video button, tap the More button, then tap Choose Photo or Video.

    • Take a new photo or video: Tap the Take a Photo or Video button.

      If you don’t see the Take a Photo or Video button, tap the More button, then tap Take Photo or Video.

  3. To place photos and videos inline with entry text, touch and hold the photo or video and then drag it from the grid to the entry.

    You can resize inline media by dragging the handle on the frame.

Add a map location

  1. Open the Journal app on your iPad.
  2. While composing an entry, tap the Locations button.

    If you don’t see the Locations button, tap the More button, then tap Locations.

    When you add a location, the entry is visible in Places.

Work with attachments

All attachments—photos, drawings, videos, locations, recordings, and State of Mind tiles—can be reordered, placed inline with entry text, and more.

  1. Open the Journal app on your iPad.
  2. While composing an entry, do any of the following:
    • Place attachments inline with text: Touch and hold the attachment and drag it from the grid to the entry.
    • Resize inline attachments: Drag the handle on the frame.
    • Move inline attachments to the grid: Touch and hold the attachment, then drag it up to the grid.
    • View an attachment in full screen: Tap the thumbnail.
    • Reorder attachments: Touch and hold a thumbnail, then drag it to a different position.
    • Remove an attachment: Tap the Delete button in the top-right corner of the thumbnail.

Record and transcribe audio

Record audio in a journal entry and have your words transcribed. This works in English only (excluding Singapore and India locales).

  1. Open the Journal app on your iPad.
  2. While composing an entry, tap the Record Audio button.

    If you don’t see the Record Audio button, tap the More button, then tap Record Audio.

  3. Tap the Record button, then start speaking.
  4. When you’re done, tap the Pause button, then tap Done.
  5. Tap the audio recording, then tap the Transcription button to review the transcription.
  6. To add the text to the entry, tap the More button and tap Add Transcript to Entry.

See also

In the Journal app, you can search for text in your entries and filter for details such as photos, drawings, and locations. You can also bookmark entries to revisit later.

You can sort entries by Entry Date or Moment Date, and see your entries based on their location with the map view. Any entry with a location, or with photos that have location information, shows up on the map. You can bookmark several entries at once, too.

A screen in the Journal app showing journal entries with the Search button at the top right.

Search your journal entries

  1. Open the Journal app on your iPad.
  2. Choose a journal or tap All Entries.
  3. Do any of the following:
    • Find specific entries: Tap the Search button and choose a category such as Photos or Drawings or type the text you’re looking for.
    • Sort entries: On the top right of your screen, tap the More button and tap Sort By. Then choose Entry Date or Moment Date.
    • Find entries for a specific day: In the sidebar, tap Insights. Then tap a date on the calendar.

View entries by location

You can see your entries based on their location with the map view.

  1. Open the Journal app on your iPad.
  2. Tap Places in the sidebar.
  3. Tap All Entries to return to your journal.

    Tip: Tap the Toggle Sidebar button to open and close the sidebar.

The map shows entries that include a location, along with photos that have location information; see our guide, Add formatting, photos, and more.

Bookmark important journal entries

  1. Open the Journal app on your iPad.
  2. Choose a journal or tap All Entries.
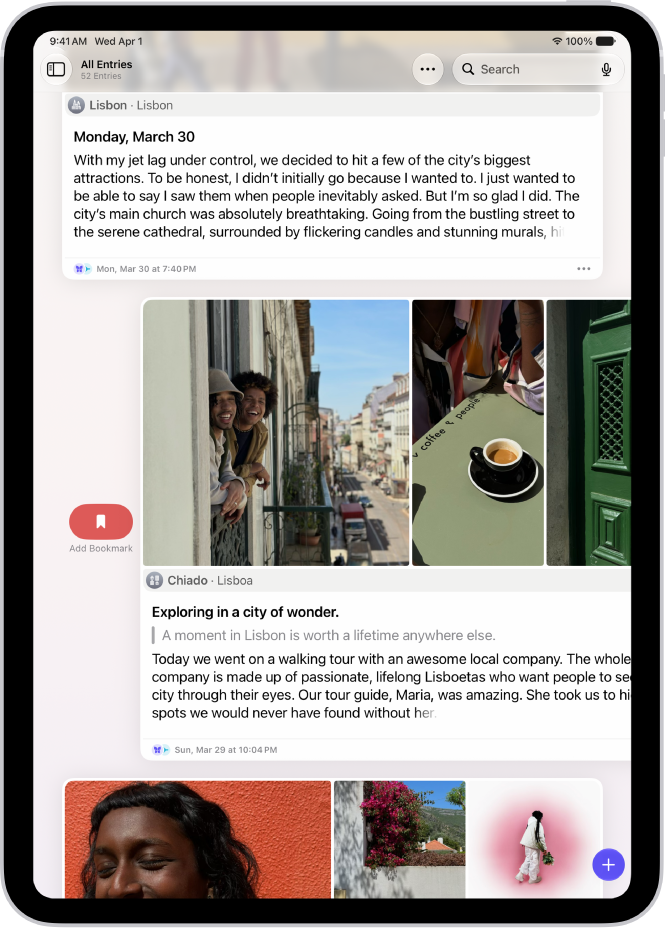
  3. Swipe right on an entry. Then tap the Bookmark button.

    To bookmark multiple entries, tap the More button at the top of the screen, tap Select Entries, tap entries to select them, then tap the Bookmark button.

    Tip: To see only bookmarked entries, tap the Search button, then tap Bookmarked.

    A screen in the Journal app showing journal entries. One entry is swiped right and shows the Bookmark button.

See also

Tag: Journal

You can customize the settings for the Journal app; for example, allow journaling suggestions to sync from iPhone, lock your journal, set a schedule for journaling, and more.

Journaling suggestions sync from iPhone when you’re signed in to the same Apple Account. With Apple Intelligence, Journal can even suggest writing prompts based on what you write. You can add a title, date, or current location to new entries, too.

Here’s how to change your Journal settings on iPad.

Sync journaling suggestions from iPhone

When you’re signed in to the same Apple Account, journaling suggestions can sync from iPhone to iPad.

  1. Turn on iPhone Journaling Suggestions.
  2. On your iPad, open the Settings app and tap Privacy & Security.
  3. Tap Journaling Suggestions and then tap Turn On Journaling Suggestions.
  4. Turn on Allow Sync to iPad.

Turn Writing Prompts on or off

Journal can use Apple Intelligence to suggest customized writing prompts, drawing on what you write plus the photos or drawings in your entry.

Note: Apple Intelligence on iPadOS 27 or later is available on an Apple Intelligence-enabled iPad mini (A17 Pro) and iPad models with M1 or later. Apple Intelligence is not available in all languages or regions. Usage limits may apply.* You must be an adult to use this feature.

  1. Start the Settings app on your iPad.
  2. Tap Apps and tap Journal. Tap Get Writing Prompts.

Add a title, date, or current location to new journal entries

  1. Start the Settings app on your iPad.
  2. Tap Apps, tap Journal, and do any of the following:
    • Add location to new entries: Turn on Add Current Location.
    • Add a title to new entries: Tap Add Entry Title and then choose Always, Only for Moments, or Never.
    • Use the date from the moment as the entry date: Turn on Always Use Moment Date.

Save photos and videos taken in Journal to the Photos app

  1. Start the Settings app on your iPad.
  2. Tap Apps and tap Journal.
  3. Turn on Save to Photos.

*Apple Intelligence is available with Siri and device language set to Chinese (Simplified), Chinese (Traditional), Danish, Dutch, English, French, German, Italian, Japanese, Korean, Norwegian, Portuguese, Spanish, Swedish, Turkish, or Vietnamese. Some features may not be available in all regions or languages. Some devices may not be available in all regions. Siri AI is available in beta in iOS 27, iPadOS 27, macOS 27, watchOS 27, and visionOS 27 and requires an Apple Intelligence–enabled device set to a supported language. Available in English to start. Siri AI will not be initially available in the EU on iOS, iPadOS, and watchOS. Certain Apple Intelligence features that rely on server-side models are subject to daily usage limits, including but not limited to Siri AI, Intelligent Photo Editing Tools, Image Playground, and AFM 3 Cloud models in Shortcuts. Daily limits may vary by feature, request complexity, system demand, system policies, and other factors. Expanded access to such features will be available for a fee in the future. Use of these features is subject to the Apple Intelligence Terms and Conditions.

See also

Tag: Journal

With VoiceOver, you can connect a Bluetooth® wireless refreshable braille display and use it to control and navigate iPad and read what’s on the screen. The braille you type on the display is automatically translated into text, and the display shows what you’re typing in context. You can read and type using contracted or uncontracted braille, with support for many international braille tables.

You can also output closed captions in braille during media playback, and use a 2D braille display.

Connect a braille display and learn commands to control iPad

  1. Turn on the braille display.
  2. On iPad, open Settings, tap Bluetooth, turn on Bluetooth, and then choose the display.
  3. On iPad, open Settings, tap Accessibility, tap VoiceOver, tap Braille, and then choose the display.
  4. To see the braille commands for controlling iPad, tap More Info. Tap Braille Commands.

Change the braille display settings

  1. On iPad, open Settings, tap Accessibility, tap VoiceOver, and then tap Braille.
  2. Set any of the following:

    Setting Description
    Match Input and Output Tables Set the braille display to use the same method for both the input and read output.
    Input and Output Choose the braille table you want to use to type braille input and output. You can choose from tables for additional languages as well as six-dot or eight-dot and contracted or uncontracted braille.
    Braille Screen Input Choose the input method for entering braille using the screen. See Type braille directly on the iPad screen with VoiceOver.
    Braille Tables Add tables to the braille table rotors.
    Braille Access Quickly access braille notes, BRF files, and more using a braille display. See Change the braille display settings.
    Item Overview Adjust the number of cells displayed per item. Press dots 6, 7, and 8 at the same time to turn Item Overview on or off.
    Automatic Translation Turn this option on to automatically translate the braille you type into text soon after you stop typing.
    Status Cells Turn on the general and text status cells and choose their location.
    Equations use Nemeth Code Turn on Nemeth Code for mathematical equations.
    Show Onscreen Keyboard Display the keyboard on the screen.
    Turn Pages when Panning Automatically turn pages when panning.
    Word Wrap Wrap words to the next line.
    Text Formatting Display text formatting attributes like bold and italics.
    Use Underline Cursor Display the cursor as an underline.
    Braille Alert Messages When turned on, your braille display shows an alert message for the specified duration.
    Ignore Chord Duration Adjust the amount of time required before subsequent key presses are recognized as braille chords.
    Auto Advance Duration Adjust this setting to your preferred reading speed.
    Sound Curtain When a braille display is connected to iPad, mute most sounds. Emergency alerts will still play sounds.
    Enable Bluetooth on Start Automatically turn on Bluetooth when you turn on VoiceOver so that braille displays can connect to iPad.

Output closed captions in braille during media playback

  1. On iPad, open Settings, tap Accessibility, tap VoiceOver, and then tap Verbosity.
  2. Choose Braille or Speech and Braille.

Use a 2D braille display

If you use a supported 2D braille display, the rotor switches between different output modes, like one mode for displaying images and another for reading text on multiple lines.

  1. Connect your braille display to iPad.
  2. With VoiceOver turned on, use the Braille Text Mode rotor to switch between output modes. See Control VoiceOver using the rotor.

See also