Got a tip for us?

iPad

The iPad is a tablet computer from Apple that runs the iOS mobile operating system. Similar in functionality to the iPhone, the iPads purpose is often quite different, sometimes even serving as a general desktop computer replacement.

If you subscribe to Apple Music, you can add music you’ve saved and playlists you’ve created in third-party music services to your Apple Music library.

You need iPadOS 18.4 or later, and you must be signed in to your Apple Account with Sync Library turned on. Depending on the service, you may be able to transfer all your music or only certain items, like playlists you’ve created, and when the transfer finishes, you see a summary of the music added to your library.

Note: Transferring music to Apple Music is provided by a third party. Apple Music and transferring music from third-party music services aren’t available in all countries or regions.

Before you begin

You’ll need all of the following in place before you begin:

  • You’re using iPadOS 18.4 or later and are signed in to your Apple Account.
  • Sync Library is turned on in Settings to transfer music. Go to Settings > Apps > Music, then turn on Sync Library if it’s not already on.

Transfer music from third-party music services

  1. Open the Music app on your iPad.
  2. Tap your profile icon in the lower-left corner of the sidebar.
  3. Tap Transfer Music from Other Services.

    If you don’t see this option, you need to sign in to your Apple Account.

  4. Select a music service. Sign in to the service.
  5. Select what you want to transfer (all or selected items) and then tap Add to Library.

    Note: Depending on the third-party music service, you may be able to transfer all music or only certain items (for example, only playlists you’ve created).

  6. When the transfer finishes, one of the following messages appears at the top of the screen:

    • Transfer Complete: The transfer finished successfully and you see a summary of the music that’s been added to your library. Tap OK.
    • Some Music Needs Review: The transfer finished, but some music wasn’t transferred. You can review and choose alternate versions, if available (for example, a live version of a song from the third-party music service wasn’t found in the Apple Music catalog, but a deluxe version was). See Review the transfer.

Review the transfer

During the transfer, music from the third-party music service is matched with the same music offered in the Apple Music catalog. (Nothing is removed from the other music service.)

The Apple Music catalog doesn’t always have a match for every song, music video, or album from the third-party music service. As you review matches, choose from the alternates provided, or ignore suggestions.

  1. On your iPad, do one of the following:

    • Go to the Music app, then at the top of the Library tab, tap Review Now in the Some Music Needs Review message.
    • Go to Settings > Apps > Music, then tap Review Current Transfer.
  2. In the Review Alternates screen, do any of the following for each of the items that need review:

    • Choose an alternate version: Select one of the items shown as a potential match with the original song from the third-party music service. To preview the song, tap the Play button on the album cover.
    • Don’t transfer the item: Tap Ignore [item] if you don’t want to transfer an alternate version into your Apple Music library. You can also tap Ignore All to finalize the transfer and start a new transfer.

      Music that doesn’t have alternate suggestions is listed in the Not Available section at the bottom of the Review Alternates screen.

  3. Repeat step 2 until you’ve reviewed all the alternates for each item and tap Add [items] to Library.

    Note: If you can’t finish reviewing your alternate matches in one session, tap Add [items] to Library at any time to accept the matches you selected so far. You can come back to the initial transfer and complete it within 30 days, but you need to finish reviewing all alternates in that transfer before you can start a new transfer. If you see Review Current Transfer in Music settings, it means that you have music that needs to be reviewed from an earlier transfer.

See also
Tag: Music

You can easily check the day’s top and trending stories from the News app, as well as stories about a topic of your choosing, with the Today or Topic widget. A story headline in the widget opens the story in News. You can also add, edit, and remove widgets.

Access stories from News widgets

In the Today or Topic widget, tap a story headline to open the story in News.

To add a News widget, see our article, Add, edit, and remove widgets.

See also

Tag: News

With Apple Intelligence in the Home app, you can automatically generate video descriptions for recorded clips from compatible Home cameras. You can then search your recordings using natural language, and related notifications are grouped together so you get fewer alerts.

Apple Intelligence analyzes your Home camera footage to make the descriptions searchable, and you can turn video descriptions on or off for each camera. Similar Home notifications get grouped, too, like a door locking and unlocking repeatedly.

Note: Requires a home hub such as HomePod (2nd generation), HomePod mini, or Apple TV 4K with the latest operating system software. The owner of the home must have an Apple Intelligence–enabled iPad,* have Apple Intelligence enabled in the Home app, and subscribe to a 2TB iCloud+ plan.

Apple Intelligence on iPadOS 27 or later is available on an Apple Intelligence-enabled iPad mini (A17 Pro) and iPad models with M1 or later, Apple says. Apple Intelligence is not available in all languages or regions. Usage limits may apply.*

Generate Home camera video descriptions on iPad

Apple Intelligence can generate searchable video descriptions when it analyzes your Home camera footage.

  1. Open the Home app on your iPad.
  2. On the Home tab, tap the More button and then tap Home Settings.
  3. Turn on Apple Intelligence. Enable or disable video descriptions for each camera.

Reduce notifications from the Home app

To reduce notifications, Apple Intelligence can combine similar Home notifications, such as a door locking and unlocking repeatedly.

  1. Open the Home app on your iPad.
  2. On the Home tab, tap the More button and then tap Home Settings.
  3. Tap Apple Intelligence, then enable or disable Reduce Notifications.

*Apple Intelligence is available with Siri and device language set to Chinese (Simplified), Chinese (Traditional), Danish, Dutch, English, French, German, Italian, Japanese, Korean, Norwegian, Portuguese, Spanish, Swedish, Turkish, or Vietnamese. Some features may not be available in all regions or languages. Some devices may not be available in all regions. Siri AI is available in beta in iOS 27, iPadOS 27, macOS 27, watchOS 27, and visionOS 27 and requires an Apple Intelligence–enabled device set to a supported language. Available in English to start. Siri AI will not be initially available in the EU on iOS, iPadOS, and watchOS. Certain Apple Intelligence features that rely on server-side models are subject to daily usage limits, including but not limited to Siri AI, Intelligent Photo Editing Tools, Image Playground, and AFM 3 Cloud models in Shortcuts. Daily limits may vary by feature, request complexity, system demand, system policies, and other factors. Expanded access to such features will be available for a fee in the future. Use of these features is subject to the Apple Intelligence Terms and Conditions.

See also

You can have iPad play Background Sounds—such as ocean waves or rain—to help you focus or rest.

You can choose a sound and adjust the volume, use Background Sounds when other media is playing, and adjust the frequency ranges with the equalizer to hear wider frequency ranges with a richer sound. You can also set a timer, or turn off Background Sounds when iPad locks. They’re in Control Center, too.

You can also play ambient music through the Ambient Music widget on your iPad. See Add a widget to your Home Screen.

  1. Open the Settings app on your iPad.

    Tip: Control Background Sounds with the click of a button or from Control Center. See Quickly turn accessibility features on or off.

  2. Tap Accessibility, tap Audio & Visual, tap Background Sounds, and then turn on Background Sounds.
  3. Set any of the following:

    • Choose a sound: Tap a sound. Select the name of a sound.
    • Adjust the volume: Drag the slider to increase or decrease the volume of the background sound.
    • Use Background Sounds when other media is playing: Turn on Use When Media is Playing.
    • Adjust the Background Sounds volume when other media is playing: Drag the Volume with Media slider to increase or decrease the volume of Background Sounds.
    • Adjust the frequency ranges: Tap Equalizer and then turn on Equalizer.

      Adjust the tone: Drag your finger across the grid to select specific frequency ranges. Select Broad to hear wider frequency ranges with a richer sound or select Focused to hear specific frequency ranges with less audio distraction.

      Adjust the sound balance: Drag the Balance slider left or right to adjust the sound balance.

      Note: You’ll see settings for Tone and Balance after you turn on Equalizer.

    • Set a timer: Tap Stop Sound with a Timer and then turn on Timer. Select At a specific time or After an amount of time and then choose an option.

      Tip: Turn on “Always use these settings” if you plan to use the settings you selected in your daily routine—like during downtime or focus time.

    • Turn off Background Sounds when iPad locks: Turn on Stop Sounds When Locked.

See also

There are a few ways to streamline the workflow on iPad. You can learn how to quickly switch between apps, resize and arrange multiple app windows on your screen, and more. You can also use multiple apps at the same time, find commands in the menu bar, and access your folders from the Dock.

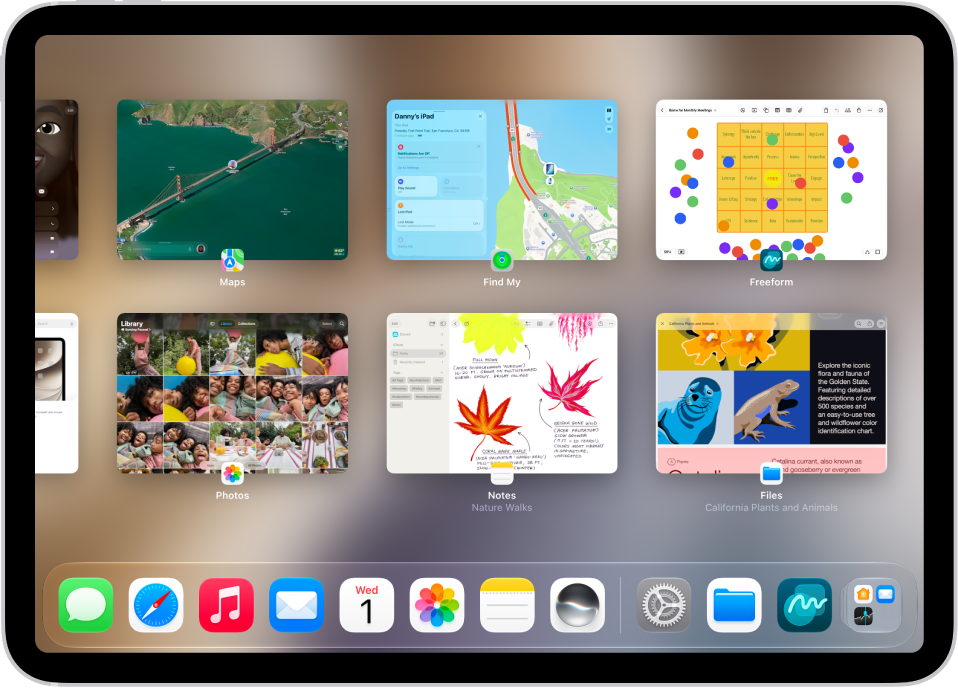
The App Switcher showing multiple recently used apps.

Switch between apps on iPad

To see all your open windows and apps, swipe up from the bottom of the screen, then pause in the middle. Tap a window to bring it to the front. Or, swipe up from the bottom of the screen, just far enough to reveal the Dock, then tap the app you want to use.

To quickly switch between open apps, swipe left or right along the bottom edge of the screen.

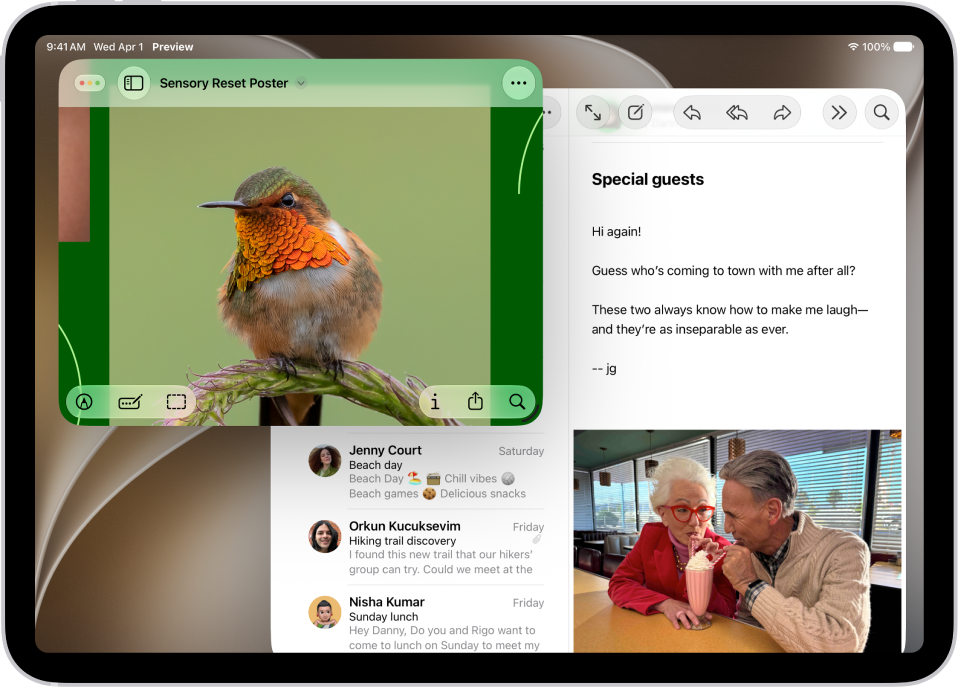
An iPad screen with three apps open and a selected window layout that arranges them in thirds on the screen.

Use multiple apps at the same time

First, go to the Settings app, tap Multitasking & Gestures, then choose Windowed Apps.

To resize an app window, drag from either of the bottom corners. Or touch and hold Multitasking Menu, then select one of the window layouts. To open another app window, use the Dock. To move your open windows to the side—so you can access the Home Screen, swipe up from the bottom of the screen.

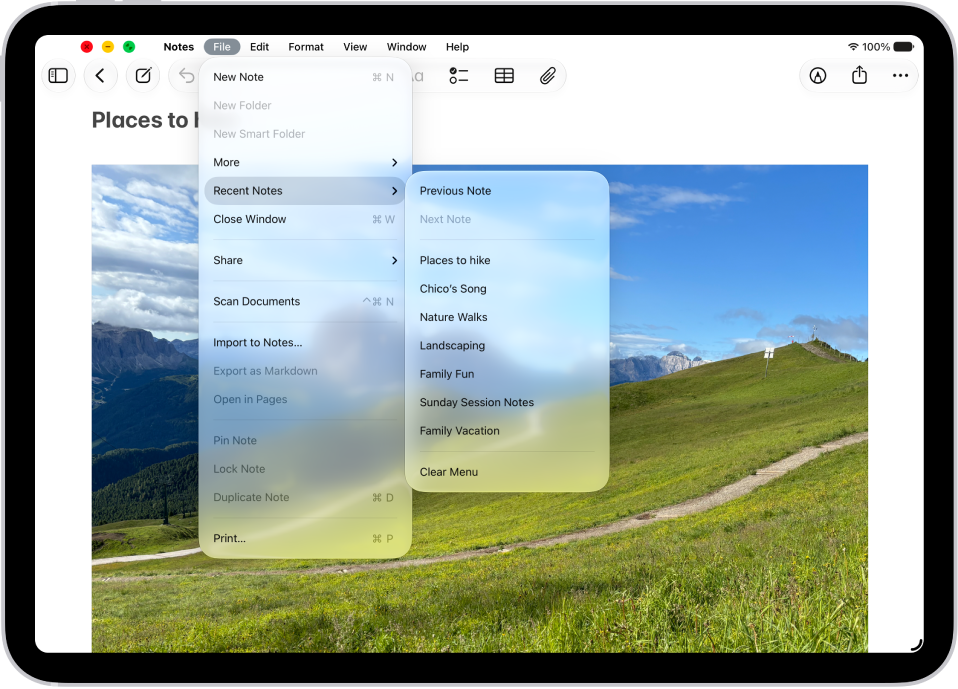
The Notes app open, with the menu bar showing at the top of the screen. The Edit menu on the menu bar is open, showing a list of actions you can perform—including Select All, Find, Duplicate, and so on.

Find commands in the menu bar

On iPad, apps have a menu bar you can use to quickly take action. To view the menu bar, tap a window from the open app, then tap the app’s name in the status bar in the top-left corner. If you’re using a mouse or a trackpad, move the pointer over the app’s name instead.

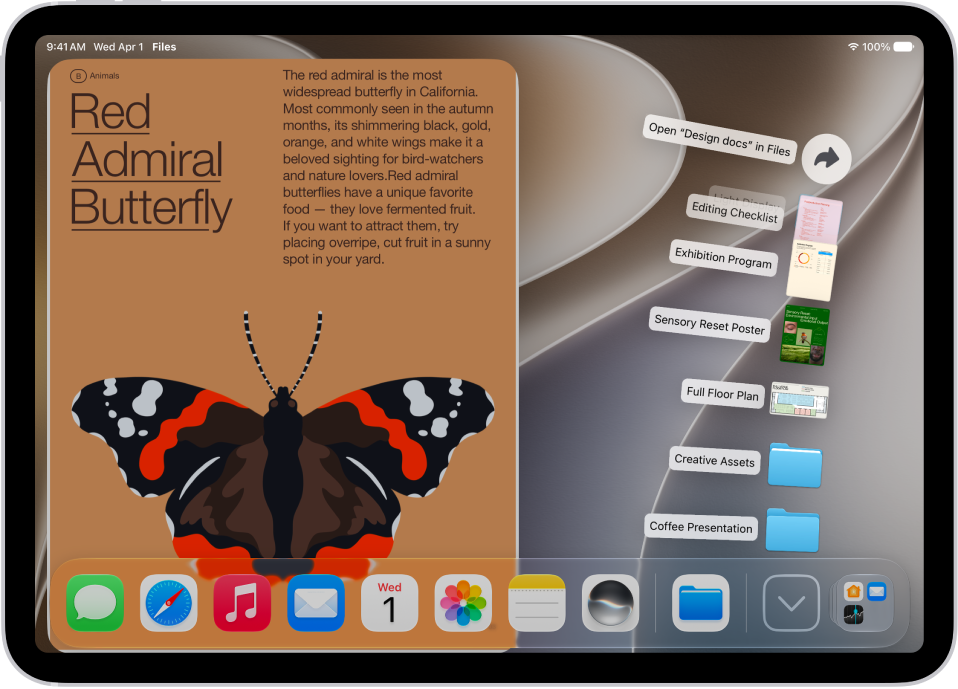
The iPad Home Screen showing files that can be opened from the Dock.

Access your folders from the Dock

To more easily find and open folders you access frequently, you can add them to the Dock. In the Files app, touch and hold the folder you want to move. When a menu opens, choose Add To, then tap Dock.

For more ways to speed up your work on iPad, see these guides:

Your iPad can continuously listen for certain sounds—such as a doorbell, siren, or crying baby—and notify you when it recognizes these sounds. With Sound Recognition, iPad can also recognize a custom alarm, appliance, or doorbell you set up, if it isn’t recognized automatically.

Once it’s on, iPad may need a moment to download the available sounds on your device. You can turn Sound Recognition on or off quickly from Control Center, too, and even use iPad as a remote microphone with Live Listen.

Note: Don’t rely on your iPad to recognize sounds in circumstances where you may be harmed or injured, in high-risk or emergency situations, or for navigation.

Set up Sound Recognition

  1. Start the Settings app on your iPad.
  2. Tap Accessibility, tap Sound & Name Recognition, tap Sound Recognition, and turn on Sound Recognition.

    Note: After you turn on Sound Recognition, you may need to wait for iPad to download the available sounds on your device.

  3. Tap Sounds, then turn on the sounds you want iPad to recognize.

Quick tip: Add Sound Recognition to Control Center to quickly turn it on or off.

Add a custom alarm, appliance, or doorbell

When a custom alarm, appliance, or doorbell isn’t recognized automatically, you can set up iPad to recognize it.

  1. Start the Settings app on your iPad.
  2. Tap Accessibility, tap Sound & Name Recognition and tap Sound Recognition. Tap Sounds.
  3. Tap Custom Alarm or Custom Appliance or Doorbell and enter a name.
  4. When your alarm, appliance, or doorbell is ready, place iPad near the sound and minimize background noise.
  5. Tap Start Listening, then follow the onscreen instructions.

See also

You can stream sound from the microphone on iPad to your MFi hearing devices, AirPods or supported Beats headphones. This can help you hear better in some situations—for example, when having a conversation in a noisy environment.

With iPad near the sound source, sounds around you become louder. During a Live Listen session, you can view Live Captions in real time, go back 10 seconds to catch something you missed, or skip back to the live audio.

Note: Live Captions in Live Listen isn’t available in all languages, countries, or regions. The accuracy of Live Captions may vary and shouldn’t be relied upon in high-risk or emergency situations. To use Live Listen with your AirPods, AirPods Pro, AirPods Max, Powerbeats Pro, Beats Fit Pro, or Powerbeats Fit, you need an iPad with iPadOS 14.3 or later. To use Live Captions with Live Listen, you need an iPad with iPadOS 26 or later.

Use iPad as a remote microphone with Live Listen

  1. Do one of the following:

  2. To turn on Live Listen, do one of the following:

    • Go to Settings > Accessibility > Audio & Visual > Live Listen, then tap Start Live Listen.
    • Open Control Center, then tap the Live Listen button.

      If you don’t see the Live Listen button, add it to Control Center. See Customize controls.

    • Open Control Center, tap the Hearing Devices button, tap your hearing device or AirPods, then tap Live Listen.

      If you don’t see the Hearing Devices button, add it to Control Center. See Customize controls.

    • If you’ve set up the Accessibility Shortcut, triple-click the top button or Home button, tap Hearing Devices, then tap Live Listen.
    • If you’re using hearing aids, go to Settings > Accessibility > Hearing Devices, then turn on Live Listen.
  3. Position iPad near the sound source. Sounds around you will become louder.
  4. In Control Center, tap the Live Listen button and tap Live Listen. Then do any of the following:

    • View Live Captions: View captions of the Live Listen session in real time.
    • Rewind: Tap the Go Back 10 Seconds button to go back to something that may have been missed.
    • Skip forward: Tap the Skip Back to Live button to go back to the live audio.
    • Stop Live Listen: Tap the Live Listen switch button to stop the Live Listen session.

Control a Live Listen session with another nearby device

From another nearby Apple device signed in to the same Apple Account, such as another iPhone or iPad, you’re able to remotely start, stop, or jump back in on a Live Listen session on your iPad. The text appears on that device in real time as your iPad picks up audio, so you can follow along on either one.

To use Live Listen on multiple devices, start a Live Listen session, then start a session on your second device.

See also

You can save a frame from a video as a photo. In the Photos app, you pause a video on the frame you want, and Save Video Frame as Photo adds it to your library. If your library is sorted by Captured, the new photo appears next to the original video.

  1. Open the Photos app on your iPad.
  2. Open a video, then play it.
  3. Pause the video on the frame you want to save.
  4. Tap the More button and tap Save Video Frame as Photo.

The new photo is saved to your photo library. If the library is sorted by Added, it’s at the bottom, and if it’s sorted by Captured, it appears next to the original video. See our guide, Sort the library.

See also

Tag: Photos

You can report a problem with a game that you downloaded from the Apple Games app on your iPad, and you can also request a refund. The Report a Problem website is where you do both, after signing in with your Apple Account.

You can also see your purchases and subscriptions in the App Store, and change game-related settings on iPad. And if you’re new to it, you can get started with the Apple Games app, too.

  1. On your iPad, go to the Report a Problem website. Sign in to your Apple Account.
  2. Tap I’d like to and then choose an option from the pop-up menu.
  3. Follow the onscreen instructions.

See also

You can import passwords that you’ve exported to a CSV file from another password manager. You just choose the CSV or ZIP file to import, and for security, you delete the file you imported from afterward. You can also export passwords to another password manager.

WARNING: Your imported passwords might not be encrypted and could be visible to anyone who can access the file.

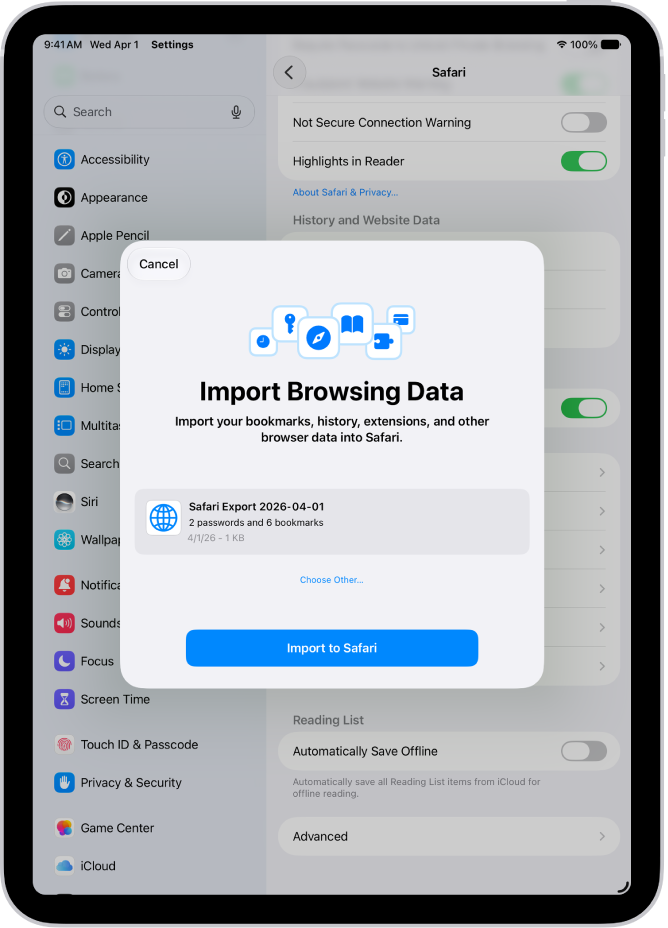
The Import Browsing Data screen, showing the CSV file of passwords from another password manager to be imported.

  1. Start the Settings app on your iPad.
  2. Tap Apps, then tap Safari.
  3. Below History and Website Data, tap Import.
  4. Tap Choose File. Then choose the CSV file (or ZIP file) you exported from your other password manager.
  5. Tap Import to Safari.
  6. Tap Done.

    WARNING: For security, delete the file you imported from.

See also