Got a tip for us?

Wondering how you can reduce data usage on a wi-fi network while using your iPhone or iPad? You have come to the right place.

Depending on where you live, Internet may or may not be costly. If you live in US, there’s a possibility you’re paying a higher bill for your broadband connection and cellular data compared to one of your friends living in Europe or Asia. If internet bills are hurting your pocket, you might want to reduce your data usage. With the launch of iOS 13, Apple included a nifty feature called “Low Data Mode” that claims to reduce Wi-Fi data use when enabled, and a similar feature exist for cellular data users. Most people have limited data when they’re using their home internet use (or a cellular network) to browse the internet, so this feature is very useful when you’re about to hit your data limit, or you just want to reduce the bandwidth used by iPhone or iPad on a wi-fi network.

If you want to enable low data mode for Wi-Fi networks on iPhone or iPad to conserve your monthly data usage while on a wireless network, there are a few simple steps which you need to follow.
Here is the step-by-step guide which will show you how you can turn the low data mode feature on for Wi-Fi networks.

Part of how this feature works is that it aims to limit your data use by preventing automatic updates as well as other background tasks, hence reducing the amount of data used on the iPhone or iPad. Simply follow these steps.

How to Enable Low Data Mode for Wi-Fi Networks on iPhone & iPad

If your problem isn’t cellular data usage but rather skyrocketing broadband bills, you may need to use as less data as possible over Wi-Fi. Don’t worry, simply follow these simple steps to turn on low-data mode for a wireless network:

  1. Start the “Settings” app on your iPhone or iPad and tap on “Wi-Fi”.
  2. Next, tap on the “i” icon next to the Wi-Fi network name that you’re incurring high charges on, as you can see in the screenshot below.
    How to enable low data mode on iPhone
  3. you’ll see the option to enable Low Data Mode. Just tap once on the switch to turn it on.

There you have it. You have configured your iPhone or iPad to use less data.

As you can see, it takes just a few taps to enable or disable the feature.

This mode is very useful if you have a low data cap on your broadband connection, in addition to lowering your bills. By restricting background activities on your iPhone or iPad from consuming your internet data while you’re not using your device, you could use the spare data to do more important stuff at the full bandwidth.

Keep in mind, this method applies to using Low Data Mode on wi-fi, whereas you have a separate setting for using low data mode on iPhone with cellular data, which is what you’d want to use when you’re out roaming around.

While the benefits are numerous, Low Data mode has a couple of drawbacks. Since it prevents automatic updates and background activities as mentioned earlier, your iPhone and iPad data wouldn’t be automatically backed up to the cloud. If you aren’t aware, when your iPhone or iPad is powered on and plugged to a power source, iOS automatically backs up documents, photos, contacts and other files to iCloud. So, you may need to perform a manual backup to iCloud or you may risk losing data permanently.

Well, what’s your take on the new Low Data Mode features on iOS 13? Did it help you save a lot of valuable data and consequently save some cash? We’d love to know your thoughts and experiences in The comment section below.

What are haptics? Haptics are a tactile way for your iPhone to respond to touch, pressure, or both, in the form of a small vibration. In case you are wondering how to turn off haptic touch on your iPhone or iPad, you have come to the right place.
Haptic Touch uses the Taptic Engine and delivers haptic feedback when the screen is pressed on latest Apple devices. . A Haptic Touch is a touch and
hold gesture, and it can be used across the
iOS 13
operating system.

What’s the difference between haptic touch and 3D touch?

The difference between Haptic Touch and3D touch is that 3D touch responds to different levels of pressure with different responses and features while haptic touch does not have various level of pressure
but rather the length of a finger press. This call and response is determined by the pressure sensitivity built into the iPhone screen, so depending on which
iPhone model you own, you will get one or the other or both. 3D Touch is a hardware-based feature because it is paired with pressure-sensitive screens.
Haptic Touch is software-based.
For example, the new
iPhone 11
and
iPhone 11 Pro
substitute 3D Touch with Haptic Touch. As on the iPhone XR, the haptic feedback consists of a subtle vibration in response to the long press. Older models
with touch-sensitive glass may still retain the original 3D Touch feature.
Regardless of whether the touch response is 3D or haptic, some people hate both equally, and could never find or get the hang of the feature’s light-medium-firm
press subtlety, or did not find the results edifying. If you want to turn off haptic touch, there are a few simple steps which you need to follow.
Here are the step-by-step instructions for how to disable haptic touch on iPhone and iPad running iOS 13 and iPadOS 13.

How to turn off Haptic Touch:

Follow these steps to turn off Haptic Touch:

  1. Start the Settings app on your iPhone.
  2. Tap Sounds and Haptics.
  3. Scroll down and toggle off system haptics.
    Turn off haptic touch on iPhone system haptics

That’s pretty much it. You have disabled haptic touch on your iPhone or iPad. For step-by-step instructions on how to turn off 3D Touch on your iPhone, check out our step by step guide How to turn off 3D Touch on an iPhone

Signing off

In case you have been wondering how can haptic touch be turned off on iPhone and iPad running iOS 13, there you have it.
Questions?
Let us know in the comment section below. We also have plenty of other articles that I suggest you check right now.

Earlier this year, Apple came under some criticism following a report by The Guardian that detailed how Apple hired third-party contractors to listen to a select number of Siri recordings. Although the recordings were technically anonymized, contractors picked up on voice recordings that captured data such as private medical information, drug deals, and couples in the bedroom. This was particularly noticed when Siri was inadvertently triggered by something in the environment that sounded enough like the Siri wake word for the microphone to start listening.


In response to this revelation, Apple suspended the program and promised that it would introduce options in a forthcoming update that would allow users to opt out of sharing their audio recordings and Protect their privacyWith the release of iOS and iPadOS 13.2 and macOS 10.15.1, it is now possible to delete your Siri audio history from Apple’s servers, as well as opt out of future analytics of your Siri interactions.


When you installed the updates, you should’ve been presented with a prompt that gave you the choice of whether or not you would like to help improve Siri and Dictation by sharing your interactions with the assistant. If you chose to allow this, you can opt out later using the following steps.

iOS and iPadOS

Note: if you’re usingVoiceOver,whenever this guide says to, “Tap,” perform a one-finger double tap instead.


To delete your Siri audio history from an iOS or iPadOS device, go to Settings > Siri & Search and tap Siri & Dictation history. Tap delete Siri & Dictation history and tap once again in the confirmation screen. As your device states, a request will then be sent to Apple to remove existing audio recordings from their servers.


To opt out of analytics of future Siri interactions, go to Settings > Privacy > Analytics and improvements, and, if it is on, toggle, “Improve Siri & Dictation,” off.

macOS

Note: if you’re using VoiceOver, whenever this guide says to, “Click,” press VO Space instead.


To delete your Siri audio history on a Mac, go to System Preferences > Siri, and click delete Siri & Dictation history. Click delete in the confirmation dialog, and a request will be sent to Apple’s servers.


To opt out of future analytics of Siri interactions, go to System Preferences > Security & Privacy, and click the privacy tab. Select analytics and improvements in the table, and if it is checked, uncheck the, “Improve Siri & Dictation,” checkbox.


Note: if you’re using VoiceOver, you may need to interact with the table cell using VO Shift Down Arrow to focus on and deselect the checkbox.


If you have any questions or suggestions for future tips, sound off in the comments.

It’s difficult to read on the websites that have a smaller font size. To get rid of this, apple has added a new feature on Safari in
iOS 13
. You can easily make text
larger in Safari on your iPhone or iPad. If you want to increase the font size of text on any webpage in Safari on iPhone or iPad, there are a few simple steps which you need to follow.
Here is the step-by-step guide which can help you to adjust web text size with any iPhone or iPad running iOS 13 or iPadOS 13 or later.
Increase font size in safari on iPhone
In the previous version of iOS, you could use the Safari feature “pinch-to-zoom” to increase the font size of a website on iPhone or iPad. With the latest features of iOS 13, Safari has dedicated zoom controls to complement its pinch-to-zoom feature, making web browsing even more convenient.
In iOS 13, Safari has gotten much better Beginning from
managing your downloads
to
closing Safari tabs automatically
it just became easier to brouse in Safari. And now, to make the text bigger on Safari is no longer a pinch-to-zoom!
While you can still read an article by simply zooming in or zooming out, you are required to scroll either way as it doesn’t fit on your screen. But with the latest
Features added in Safari, you do not require to scroll or zoom in to increase the font size of a given website on the iPhone or iPad.

How to Increase the Font Size in Safari on iPhone & iPad

Make Text Bigger in Safari on iPhone and iPad

Follow these steps to make the text bigger on Safari on iPhone and iPad.

  1. Launch Safari app on your iPhone and navigate to a website of your choice, we suggest
    geeksmodo.com
  2. Tap the “aA” icon in the upper left corner of the screen.
  3. Now tap on the larger “A” that appears on the right side to increase the percentage and keep tapping on it until you get the desired text size. It can zoom in up
    to 300%.
  4. You can also decrease the percentage of font size of the web page by tapping on smaller “A” located on the left side. It can zoom-out up to 50%.

It’s that simple to increase and decrease the font size in Safari on your iPhone and iPad running on iOS 13 and iPadOS 13 respectively.

In case you don’t want to repeat the same steps for all the websites, you can just specify a permanent zoom percentage for all the websites you want to read
regularly.

How to Set a Bigger or Smaller Text Size for All Websites in iOS 13 Safari App

You don’t have to use the above method every time to make a text smaller or bigger in Safari. You can set a permanent zoom percentage for all the websites by simply
changing a couple of settings outlined below. Here is how to do it!

  1. Launch Settings App and navigate to Safari.
  2. Scroll down to “Settings for Websites” section and tap on Page Zoom option.
  3. You will find a list of websites under “Page Zoom ON” that you have previously increased or reduced the font size. Tap on that website to set font size of your choice.

You can also move to “Other Websites” section and change the font size depending on your preference

Selecting a smaller font size could render the text difficult to read. Therefore, it’s recommended to keep the font size above 100% for a better reading experience on your iPhone or iPad in Safari.

Final Thoughts!

This is so far my favorite feature in Safari as it improves my overall experience upon selecting my preferred font size. Have you tried this feature
on your iPhone or iPad? If not, give it a shot now by following the above-given steps.

Questions?

Let us know in the comments section below. We also have plenty of other articles that I suggest you check right now.

Tag: Safari

The new AirPods look and sound familiar, but have little more tricks.

Of the many cool products that Apple unveiled earlier this year, none have been more grately anticipated than the

second-generation AirPods.

The second generation AirPods look so identical to the first-generation version announced almost three years ago that they are almost indistinguishable. The design,

fit, and sound quality are exactly the same as the

first generation AirPods

Wearing the new AirPods

isn’t any more of a flex

than the first-generation because nobody seeing you will be able to tell the difference.

But there are a couple of improvements here — some outstanding, some less so — that make the new AirPods even great than the previous model. Apple hasn’t solved many of the

long-lasting complaints leveled at the AirPods, such as their fit and ability to work in noisy surroundings, but it has added some things that improve

the experience, without much ulteration.
With AirPods Pro, Apple may have solved a major wireless earbuds design flaw. The newly designed, noise-canceling AirPods might also stay in your ears now. AirPods Pro features active noise cancellation, water and sweat-resistant, an all new lightweight in-ear design, as well as a transparency mode to keep you aware of the world around you. You can read more about AirPods Pro

Here

The Good

  • Outstanding wireless performance and reliability
  • Great ease of use and setup
  • Improved battery life
  • Can effortlessly recharge battery case with wireless mat

The Bad

  • Won’t stay in everyone’s ears
  • “Hey Siri” voice response is sluggish
  • Doesn’t block outside noise well
  • Cannot connect to two devices simultaneously

The ugly

  • What is weird, is actually talking to Siri in public. When I am listening to music and I can’t really hear my own voice, I was worried I would say “Hey Siri” out loud in public and everyone would look at me like a weirdo. And to be honest, I just tried to get Siri to activate with a quiet voice at first and getting louder slowly to finally get Siri to listen to me. Again, it’s a learning curve that you get used to quickly.

The major adjustment from the first-generation AirPods is the ability to recharge the case on a wireless pad. The second-gen AirPods are either sold

with the new wireless charging case for $199 or with the standard case for the same $159 as before. In case you have the first-gen AirPods and would like to buy the wireless charging case, you can purchase it separately for $79 and it will work just the same as it does with the new AirPods.

The wireless charging case uses the Qi standard — just like the iPhone and most Android devices on the market — so, you can use the same charging pad

as your phone to charge your AirPods case. Put the case on the charger and the little charging light on the front of the case will turn orange and begin

charging. The light will go off after a few seconds, but the case will still be getting the juice as long as it’s resting on the mat.

THE NEW WIRELESS CHARGING functionality IS CONVENIENT, BUT THEN SLUGGISH

Charging the case wirelessly is slow — Apple indicates the case charges at 5 watts, which is slower than the iPhone is able to, and it can take up to

three and a half hours to completely fill up the case wirelessly, compared to the roughly two hours it takes over the Lightning cable, which is also an option

on the new case. Also, if you’re using a stand-style charger for your phone, that perhaps won’t work because the coils won’t line up — as desire

using a flat pad charger for the AirPods. I tried charging the case on a few flat pads I have at home and had no problems charging with any of

them.

If you’re the kind of person that puts your AirPods case in another case, wireless charging should still work, but perhaps the

indicator light will not show at all. Finally, if you have Samsung’s Galaxy S10 or a recent Huawei flagship phone, you can use your Android device to wirelessly charge

your AirPods, which is never not funny. And yes, you can use the new AirPods with an Android device and they will work perfectly with it as the first-generation

models. The main functionality you’ll lose are the double-tap controls and the ability to automatically pause music when you take off an AirPod from one of your ear, though

that

can be enabled with a third-party app.

Generally, the wireless charging ability is a pleasant convenience, however, it doesn’t drastically change the AirPods experience. If you’re already charging your

phone on a wireless pad or have one that can charge multiple devices simultaneously (but sadly, isn’t Apple’s

cancelled AirPower mat),

it’s pleasant to be able to charge your AirPods case in the same manner.

The other great thing with the AirPods is the new H1 chip that replaces the W1 chip of the first generation AirPods. Apple states the H1 chip has been explicitly designed

for headphones and facilitates most of the AirPods’ new features, such as faster switching between devices; always-listening, hands-free Siri access; improved

call quality in windy environments; lower latency when playing games; and longer battery life for calls.

Rather than having to double-tap one of the AirPods to launch Siri, you can now say “Hey Siri” to launch it, just like you can on an iPhone or new

Mac. This not only does this provide easier access to Siri, but it also allows me to configure the double-tap gesture to another action, such as play / pause or skipping

tracks.

But even with the new chip and hands-free ability, there’s still a significant delay from when I say “Hey Siri” to getting a response in my ear. Different

From the iPhone, there’s no bell or ding to indicate that the AirPods actually heard my command, and there’s obviously no visual indicator unless my phone is

out and I’m looking at the screen. As a result, I often end up repeating myself because there is no way to tell if Siri heard my command and is just being slow to

respond, or if my command wasn’t registered at all. It’s a frustrating experience that could be greatly improved with an audible ding to confirm that Siri

heard my command.

Apple says the H1 chip enables the AirPods switch between your devices up to two times faster than before, so if you use an iPhone and an iPad or a Mac, you

can swiftly switch between them. Maybe it is technically faster, but it never feels faster in use because switching devices still requires going into the

Bluetooth settings panel or Control Center on the device I want to switch to, selecting the AirPods, and then still waiting a few beats for them to

connect.

THE AIRPODS STILL CANNOT BE CONNECTED TO TWO DEVICES AT THE SAME TIME

I really wish Apple had improved this area. I love how Apple simplifies the process of pairing AirPods to my iCloud account and have them automatically ready

on every device I use, but I also just wish they could be connected to more than one device simultaneously. The Bose QC35s as well as the Sennheiser HD1s, and

many of other Bluetooth headsets are capable of this already. With those other headphones, if I want to switch from my iPhone to my iPad, I simply tab

play on the device I want to use instead of getting my hands dirty with audio source settings. If you are a Mac user, the

ToothFairy app

makes this a slightly better one-click process with the AirPods and is absolutely worth the $3.

The new chip apparently improves voice quality on calls in windy environments, too, but I haven’t really seen much of a difference in my testing. That

isn’t really a knock — I use the first-gen AirPods for taking calls all the time because they are already outstanding for it. Additionally, I haven’t noticed much

of a difference in latency or lag while playing games or watching video, mostly because I didn’t ever experience significant lag with the previous generation. Of

all the truly wireless headsets I’ve used in years,the first-generation AirPods have the tiniest amount of lag or video syncing issues and the second generation

is just as good.

Finally, the H1 chip also prolongs the battery life for talk time to a claimed three hours, a complete hour more than the first model. The battery life for

Music playback or audio remains at five hours, which, while no longer the longest battery life you can get in a truly wireless headphone, is still

Above average and very good. The charging case extends that to up to 24 hours; a 15-minute charge will offer three hours of listening or two hours

of call time.

Besides that, the new AirPods are still AirPods, which means they are truly great wireless earbuds if they fit in your ears. Apple is quick

to claim how last year the AirPods became the most popular wireless headphones on the market, so they evidently work for so many people. But

they don’t fit everyone

and the new generation doesn’t do anything to solve that. They also aren’t great in noisy environments like a plane or subway car because they don’t

have either passive or active noise cancellation abilities.

Just like I mentioned earlier, the sound quality of the new AirPods is precisely the same as the previous generation, with no material modifications. The sound is clear, full, and surprisingly

detailed, without overwhelming bass or fatiguing highs. The lack of any seal or noise-blocking capacity is annoying especially while I’m on the subway, which

makes the AirPods saturate into my environment, like I’m not even wearing headsets whatsoever.

Final thoughts

So should you buy them? If you have the first-gen AirPods and they are still working perfectly, then no, you’re obviously not gaining anything here. If you so desire

wireless charging, you can buy the case separately without having to spend $200 on a whole new set. However, if your first-gen AirPods can hardly hold a juice

any longer because you’ve been using them for a long time, then buying the new AirPods makes sense, since it’s ultimately impossible to repair these or replace the

batteries in them. You’re getting the same basic experience, with little more conveniences. (The fact that a nearly $200 device has a usage lifetime

of less than three years, nonetheless.)

THE NEW AIRPODS ARE JUST AS OUTSTANDING AS THE Previous versions

If you haven’t yet jumped on the AirPods boat and you know they’ll fit in your ears (if the wired EarPods that come with every iPhone fit you, the AirPods

will, fit you as well), they are still among the best truly wireless headphones on the market, with great battery life, solid connectivity, great ease of use, and

pretty good sound quality. They work great for Android users, just like the first model as well. The new wireless charging convenience comes at an higher

price, but for a great number of people, the AirPods are still tough to beat. Read

The 17 Best Tips and Tricks For AirPods Pro

Tag: AirPods

Taking screenshots on your Iphone, Mac, Windows PC, or an Android device, is a quick and simple process.

Screenshots are great. You can use them to share moments from your favorite videos, high scores from your games, conversations on popular social networks such as
Twitter or Facebook, errors you want to report, and virtually anything and everything that is displayed on your screen. In this guide, I’ll walk you through step by step on How you can take screenshots on your Iphone, Mac, Windows PC, or an Android device. To learn how to record screen of your iPhone, check out GeeksModo’s article How To Screen Record On iPhone
Each of the major operating systems — Windows, macOS, Android, and iOS — offers one or more methods to take screenshots. Here’s a quick and easy guide
to taking screenshots in all four devices.

HOW TO TAKE SCREENSHOTS ON A MAC

If you are runningmacOS Mojave or later,you can use the Screenshot app, which can be accessed by pressing Shift-Command (⌘)-5 to take screenshot. To learn more about Mac Keyboard shortcuts, checkthis guide

You’ll get a command bar that provides you with various controls. You can take a screenshot of the screen, a window, or a specific selection; you can also take
a video of a section or entire screen. There is an “Options” button that allows you to select where you would like to store your screenshot, and you can set
a short delay as well. When you are all set, click on the “Snap” button located on the right end of the command bar.

In case you haven’t updated to Mac OS Mojave or Catalina, you have an option to save screenshots to your desktop as PNG files.

  • To take a screenshot of the whole screen, press Shift-Command-3.
  • To take a screenshot of a selected portion of a screen, press Shift-Command-4 and then drag the cursor to highlight the portion you want to capture.
  • In case you intent to snap a given window, hit Shift-Command-4. Press the spacebar. The pointer will change into a camera. Hover the pointer over the window
    you want to capture so it highlights, and then click on it.

HOW TO TAKE SCREENSHOTS ON A WINDOWS 10 PC

InWindows 10 you can snap the entire — or just portion — of your screen with a few keystrokes. To learn more about windows PC keyboard shortcuts, checkthis guide

Depending on your specific system, you should be able to take a screenshot by pressing the Windows logo key simultaneously with the PrtScrn (or PrtSc)
key (which is normally located on the right end of the function key row). If that doesn’t work, you can try adding the Ctrl or Fn key to the combination. The image
will be saved in the “Pictures” > “Screenshots” folder as a PNG file.

If that doesn’t work for you (I found that half the time I tried it, the system declined to take the screenshot), another, more reliable method is to hit
Windows + Shift + S, which will reveal a Windows app called “Snip & Sketch.” You can also access the app through your Windows app menu.) Your pointer will
Change into a plus sign, and you will be presented with a small toolbar at the top of the screen that allows you to select a rectangular clip, a freeform clip, or just snap a
screenshot of the whole screen. The clip (or “snip,” as Windows calls it) will be saved to the clipboard and a thumbnail will show up at the bottom right corner
of your screen. You can hit on that to edit the image, save it (as a PNG, JPG, or GIF file), or share it.

There are several other ways to reveal the snipping tool, such as hitting the Windows key and starting to type “snip” (which will reveal the
tool in your Start menu), or typing “snip” into the Cortana search box.

If you like, you can make the PrtSc key reveal Snip & Sketch when you press it.

  • navigate to your computer’s settings by choosing the Start button located in the bottom left corner, and then the gear icon that shows up on top of it.
  • In the search box just below the “Windows Settings” page name, type “prtscn.” Somewhere around the “t,” the drop-down menu will display a selection
    reading “Use the Print Screen key to open screen snipping.” Select it.
  • You’ll find yourself on the “Keyboard” area. Find “Print Screen shortcut” and toggle it to on.

HOW TO TAKE SCREENSHOTS ON AN ANDROID PHONE

There are two quick and easy methods to take a screenshot on your Android screen (if you are running Android 9 or 10):

  • Press and hold your power button. a pop-out window will appear on the right hand side of your screen with options to power off, restart, call an emergency
    line, or take a screenshot. Alternatively, you can …
  • Press and hold down the power button and press the volume-down button at the same time

In both methods, after taking the screenshot, it will appear temporarily as a smaller version and then disappear, and you will receive a notification at the top with options
to share, edit, or erase it.Something to watch out for: in some Android devices (such as , certain models of Samsung and Huawei phones) allows you to take “long” screenshots, where you can scroll the screen
down and snap the entire page. Check your phone’s support pages if you think you might have that — it can be handy.In case you want to locate all the screenshots you have snapd in the past::

  • Launch your Photos app on your android device.
  • Tap on the three parallel lines located at the top left hand corner of your screen.
  • Select “Device folders” > “Screenshots.”

How to take a screenshot on iPhone X, iPhone XS, iPhone XS Max, iPhone XR, iPhone 11, iPhone 11 Pro, and iPhone 11 Pro Max

Taking a screenshot on an iPhone is quick, easy and straightforward. You just need to push two buttons.

Because iPhones with Face ID do not have a Home button, you are required to use the Side button to take a screenshot instead.

  1. Navigate to the screen or application you want to snap.
  2. Prepare everything precisely the way you want it for the shot.
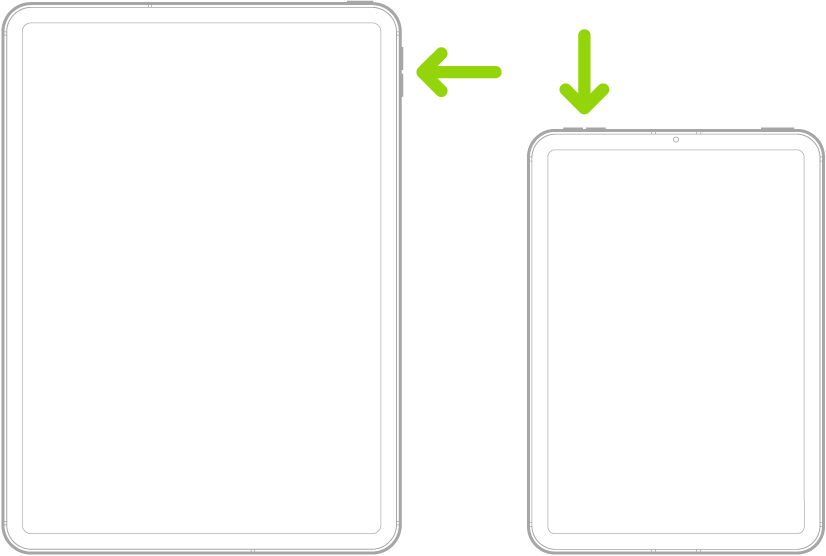
  3. Press and hold the Side button located on the top right-hand side of your iPhone.
  4. Quickly Press the Volume Up button while still holding the side button then release both buttons immediately.
  5. The screen will briefly flash white and the camera will make a shutter noise (if your iPhone is not on silent mode).
  6. , your iPhone will automatically save the screenshot snapd directly to thePhotos App.
  7. From here, you can share your screenshot through services such as: whatsapp, email, AirDrop, Facebook, instagram, Twitter, and other services.

Screenshot iPhone 8 or earlier

  1. Navigate to the screen you want to capture on your iphone.
  2. Press and hold the “Sleep/Wake button” as well as the “Home” button.
  3. A white flash will appear on your screen and you will hear the camera shutter noise which signifies that the screenshot was taken successfully. You can find captured image in your camera roll.

Want to show your non-tech-savvy relative how to set up their email without actually having to do it for them? Apple makes it easy to record screen of your iPhone 12 without installing third party Apps.
Screen recording is handy for recording short demos or documenting a glitch with your iPhone 12. The recording can be done in silent or include audio captured by your iPhone’s internal microphone.

Taking a screenshot of your iPhone screen is a quick and easy process, and most people are aware of the two buttons to push to capture a screenshot of their iPhone’s screen and save the image in the Photos app. However, most people do not know how to record a video of their iPhone’s screen.

Fortunately, the process of capturing iPhone’s screen is quick and straight forward. During recording, you can launch various Apps on your iPhone , make selections, and essentially do anything with your phone that you would basically do. The recording is saved as a video on your iPhones camera roll and you can share it on social media, email, or upload just like you would with any other file.

There are two things to remember. First, before you can record the screen of your iPhone 12, you need to enable the feature by adding it to your Control Center. Second: The steps for accessing the record button is determined by the version of iOS you are running, therefore, keep in mind to follow the correct steps outlined below.

To demonstrate the quickest and easiest way to do it, I took a screen recording of my iPhone 12. As it turns out, most people do not know exactly how to do it.

So here’s how to screen record on iPhone 12.

Setting up screen recording on iPhone 12

Although screen recording is a simple and straight forward process, you need to add the screen recording icon to the Control Center on your iPhone.  To enable screen recording, navigate to Settings > Control Center > Customize Controls. Tap the plus icon (+) next to Screen Recording. A Screen Record icon should now be available in the Control Center, and you can find it by swiping down from the top right edge of your iPhone screen.

The steps given in this guide will also work for iPhone 12 mini, iPhone 12 Pro, and iPhone 12 pro max.

Now you’re ready to start recording.

Recording your iPhone 12 screen

Here is how to record screen on iPhone 12

  1. Navigate to the screen where you want to start recording.
  2. Swipe down from the upper right corner of the screen to find the recording icon.
  3. Now, tap on the Record icon.
  4. After a three second countdown, the Record icon will change to red and it will start recording your iPhones screen, even if you navigate away from the Control Center. You’ll know Recording is still in progress because the icon , displayed in the upper left hand corner, will be red.
  5. When you are finished recording, tap the red icon at the top left of the screen and then tap “Stop.”to stop recording. The recording will be saved in the photos app.

Locating and editing your recording

Once you are through with recording, you may want to edit the captured video. Apple’s Photos app makes it pretty simple to edit video. Your new recording will be saved in the Camera App on your iPhone. To view it, launch the Photos app and the recorded video will be the most recent item.
Editing a screen recording is the same as editing any other video in the Photos app.
You can edit the beginning or end part of your recording. You can trim the video and save it as a different clip. It won’t have any effect on the original video, however, you will get an fine tuned version that you can send anywhere you want.
To edit a screen recording, do the following:

  1. Locate the video in the camera roll of your iPhone and tap on it.
  2. Tap “ Edit.”
  3. Tap and drag the arrow at the beginning of the video to the right. It will turn into a yellow frame.
  4. Size the frame to trim the video down to just the section you want to retain. You can hit play at any given point to make sure you are satisfied with the output.
  5. Hit “Done” and then tap “Save as New Clip.”

That’s pretty much it! Happy recording.

So, today we are going to show you how you can get iMessage on PC.
iMessage is certainly the best messaging platform around the world. Unfortunately, the service is only available to Apple users.
Though there are numerous messaging apps such as instagram andFacebook Messenger, for Apple fans, iMessage is undoubtedly the best choice. Unfortunately, there is no iMessage app for windows.
For those who do not have apple devices and would like to use iMessage on PC, it’s quite a difficult task to achieve. Fortunately, in this step-by-step guide, we are going to show you simple tricks on how you can get iMessage for PC.
The most common question I get from windows users is: Is it possible to get iMessage on PC?
The answer is yes, and in this article, I’ll show you how. If you want to get iMessage on PC, there are a few simple steps which you need to follow.

Whether you are using Windows 10, windows 8 or windows 7, here is the step-by-step guide which will help you get iMessage on PC.

So, let’s dive into it!

Method #1: Get iMessage on Windows using Chrome Remote Desktop

In this first method, you need to have Mac in order to download and install Apple Messages for PC. Use of Chrome Remote Desktop extension makes it quick and easy to download and start using iMessage on PC.
This method is the quickest and easiest way to get iMessage on PC.

Chrome Remote Desktop allows users to remotely gain access to another computer through Chrome browser or Chromebook. You can gain full access to your files, documents, emails, apps ETC.
Note: In this method, you need Both Mac and windows computer to get iMessage on PC

How to Use iMessage on Windows PC

  1. Prepare your Mac with iMessage and your windows PC.
  2. , download and install Chrome and Chrome Remote Desktop on both Mac and Windows PC.
  3. Now, run the above apps on your two devices.
  4. Download Chrome Remote Desktop Host Installer on Your Mac
  5. Launch the installer and follow onscreen prompts to complete installation.
  6. Connect your Mac and Windows computer via the security code of Chrome Remote Desktop, and start using iMessage on
    Windows PC.

Get iMessage for windows using Chrome Remote DesktopYou are now a step away from becoming a master at using iMessage on windows PC!

Method #2: Get imessage on pc using ios emulators

Another way to get iMessage on PC is through the use of Emulators.

IOS emulators are third party software which creates a virtual iOS ecosystem on PC allowing users to install and enjoy iOS Apps on their Windows computer.

This method applies to folks who don’t have a Mac and would like to use iMessage on Windows computer.

Here is the idea. You simply need to download and install iPadian

This will allow you to easily download and use iMessage on Windows.

The following are some of iOS emulators available:

  • Mobione Studio
  • APP.IO
  • SmartFace
  • iPhone simulator
  • iPadian

Get iMessage for PC using iPadian emulatoriPadian 2 is an iPad simulator which lets users transform Windows computer and lets you send iMessage from PC.

. The emulator includes Standalone Adobe air application. It is a very useful tool for folks who want to enjoy iOS apps on their Windows computer.

Note: some of these emulators may introduce malware to your computer. Therefore , be extra cautious while using them on your device.

How to Install Apple’s Messages App on Windows PC Using iPadian 2

  1. On your PC, download the iPadian emulator.
  2. Next, run the emulator.
  3. Next on, Read and accept terms and conditions.
  4. After the installation process is complete, open the iPadian software on your computer.
  5. Now, search for “iMessage” in the search bar and download the iMessages app on your computer.
  6. Finally, open the iMessage app and start enjoying iMessage on your PC.

That’s pretty much it on how to get iMessage on PC.

You are now a master at using iMessage on Windows computer!
Now take a moment to check our article about 30 Plus Windows Keyboard Shortcuts To Boost Your ProductivityFinal thoughts:
If you are looking for how to use iMessage on PC, there you go! Now you can enjoy messaging on Windows PC. If you know any other method to get iMessage on a PC, tell us in the comments section below. we also have plenty of other articles that I suggest you check right now.

Wondering how to set up iMessage on your Mac? Here’s how!
The Messages app in macOS allows users to get in touch with friends, family, and colleagues across various Apple devices including iPhone, iPad, or, iPod touch. Fortunately. setting up iMessage on Mac is a quick and easy process.
With Messages for Mac, you can send infinite messages to any Mac, iPhone, iPad, or iPod touch that supports iMessage, Apple’s secure-messaging service.
iPhone users can send and receive SMS texts as well. If you have Windows PC
this guide explains how you can set up iMessage on

Windows PC.
In this guide, I’ll show you how to set up iMessage on Mac, as well as how to set up Messages iniCloud,
which keeps your messages in sync across all your Apple devices.
In case you’re new to the world of Mac or have just never set up Messages before, you may be wondering how to go about it. No worries, follow the steps below, and you’ll be chatting with your friends in no time.

Set up iMessage on Mac

How to Set up iMessage on Mac

  1. Open Messages App on your Mac. You can find it on the desktop, dock, Applications folder or by searching for it with Command+Space.
  2. Log in with your Apple ID and password. If you don’t have an Apple ID, you can click “Create new Apple ID” at the bottom to create one.
  3. Login iMessage on Mac

  4. Iftwo-step or two-factor authentication is enabled for your Apple ID, enter your verification
    Code sent to the other device.
  5. In the Menu bar, click on Messages and choose Preferences. Alternatively, you can press Command+Comma.
  6. Click the iMessage tab.
  7. Check the box next to Enable Messages in ‌iCloud‌ (this will sync your messages across all your apple devices)
  8. Next, select the phone number and email addresses that you prefer people to reach you at.
  9. Next on, select the phone number or email address you’d like people to see when you start a new conversation.
  10. Finally, click the red traffic light located at the top-left hand corner of the screen to close Messages preferences.

In case your phone number does not appear in the Messages preferences, you need to enable iMessage on your iOS device. To add a phone number to iMessage on mac:
On your iPhone, navigate to Settings > Messages and turn on iMessage. If it isn’t, you’ll see “Use your Apple ID for iMessage,” which you should click and sign in with the
account you’re using on your Mac.
After everything is set up, your phone number should appear in the Messages preferences on your Mac and you’ll be able to
Enjoy using iMessage.

Finally, if you enabled Messages in iCloud, you’ll also want to enable it on your iPhone or iPad‌ so that your messages can sync across all your Apple devices. Here’s how.

How to Set up Messages in iCloud in iOS

  1. Open Settings app on your iPhone or iPad‌.
  2. Tap your name.
  3. Tap iCloud‌.
  4. Toggle the switch next to Messages to ON position if it is not already

Thats pretty much it on how to set up messages on Mac.
Questions?

Let us know in the comments below!

You might not have sat to think about it but Music has become an important asset to those of us who enjoy drowning out the sounds of the environment with sensational melodies, lyrics, and beats.

Whenever you’re on the move and most likely away from a Wi-Fi, you may not want to stream music and podcasts with your mobile data and that is why I have created this list of the best music download apps for iPhone and iPad.

Music keeps me rocking and rolling! From keeping me happy during working hours to revitalizing my spirit during the long traffic to revving up the party time, it’s a fundamental part of my life. To ensure my romance with awesome songs never has any interruption, I have created a gigantic playlist of my favorite songs. I’m not just a melomaniac, I’m also producing my own music – with my acoustic guitar, and even an arranger keyboard, sometimes. Thankfully, downloading free songs on iPhone and iPad is dead simple!

There is nothing better than free music, and you’re no doubt on the lookout for ways to listen to music for free on your iPhone.

Apple used to give away a free song every week on iTunes, however, That’s now a thing of the past. But that’s perfectly fine; there are a couple of other ways to get music on your iPhone for free. A number of free music apps makes it easy for users to download and listen to music on their iPhone, iPad or iPod Touch without having to connect to Internet.

It’s very easy to download free music on your iPhone or iPad. If you are an audio junkie like me, I’ll show you how to download free music on iPhone and iPad.

Here are our favorite music download apps for iPhone and iPad that won’t cost you a penny.

Best iPhone and iPad Apps to Download Free Music in 2025

Here are our top picks for free music apps for iPhone:

1. Spotify Music

boasting more than 80 million subscribers and access to over 40 million tracks, Spotify is undoubtedly the most popular music platform in the world. I find it to be an incredible platform especially when it comes to managing playlists, creating different channels as well as daily mix. Spotify free offers clean sound quality and in spite of there being ads they are not destructive and do not linger for a long time.

There is also personal recommendations and collection of premade playlists which perfectly suits your exclusive taste. And if you want to improve your listening experience, you can buy Spotify Premium subscription for $10 a month to ditch those ads. You will also be able to create custom playlist and download music for offline listening.
Price: Free
Check out the Spotify App for iPhone.

2. SoundCloud

Boasting over 175 million monthly listeners, “SoundCloud” needs no bells and whistles, does it? the app has got everything you would ever need as far as music is concern. SoundCloud has got a huge library of songs to listen to including hip-hop, RnB, rock, classical, Reggae, jazz, podcasts and great audiobooks. SoundCloud offers a great way to discover new artist. Once you spot an artist you like on SoundCloud, you can … get lost in a rabbit hole of music awesomeness.
SoundCloud also recommends tracks for you based on your likes.

To enjoy every features this App has to offer, You can subscribe to the SoundCloud Go for $5.99/month or SoundCloud Go+$12.99/month. This will allow you to download music for offline listening.
Price: Free
Check out SoundCloud for iOS

3. TIDAL

Though Spotify and Apple Music still largely dominate the music streaming market, Tidal offers sound quality that you simply can’t find on other music platform. Its high fidelity sound quality, high definition music videos, tailor-made suggestions, as well as the curated editorial by artists and experts makes it worth a serious look in itself.
The app provides you with unlimited access to over 60 million tracks that you can listen on your iPhone, iPad, iPod Touch and Mac.
Tidal also offers over 130,000 high-fidelity music videos. Music articles, features, and interviews are also incorporated within the platform to enhance your experience. You can also download songs, albums and playlists, to listen to them offline!
Price: Free
Download Tidal for iOS

4. Google Play Music

Boasting over 40 million tracks, “Google Play Music” is one of the most adored music streaming platform for consuming tunes.

Just like spotify and SoundCloud, the app also recommends you tracks based on your liking. It offers storage and streaming for up to 50,000 songs from your personal collection for free. You can purchase premium subscription for $10 a month to listen to music free from ads. The premium version also include the option to download songs for offline listening as well as YouTube Red membership without incurring any extra cost. Overall, the app has a clean design, lined with hand-picked playlists and custom radio stations that further enhances your listening experience.
Price: Free
Check out Google Play Music for iOS

5. Deezer

I have always found “Deezer” to be quite impressive. The platform features awesome playlists, smooth interface, as well as the ability to search, stream and listen to top radio hits and new releases. Moreover, you can create unlimited number of playlists and quickly access them from anywhere.
You can upgrade to the premium version to enhance your listening experience. With the pro version, you can skip unlimited number of tracks. Moreover, you can Download your favorite songs, albums and playlists to listen to them even without Wi-Fi or 4G.
Price: Free
Check out Deezer for iOS

6. Napster – Top Music & Radio

Boasting a gigantic library of more than 60 million songs, the app allows you to stream and download your favorite music for offline listening. Moreover, you can create playlists of your favorite songs and share them with your friends. Napster also provides users with awesome suggestions Based on their liking. So, you can quickly access the songs that rocks you the most!

With a monthly subscription of $9.99, the app will allow you to enjoy all the premium features without any limitation.
Price: Free
Download Napster for iOS

7. Evermusic – offline music

For those of you who have your treasured music collection saved in the cloud services such as Google Drive, Dropbox, OneDrive, Box, MEGA, Yandex.Disk and WebDAV and want a better way to manage it and use it, Evermusic is a fantastic music player and a must-have app.

The app syncs with your cloud selections and you can stream your songs from there, or download your favorite tracks so you can listen to them , anytime and anywhere.

Evermusic supports multiple audio formats including MP3, AAC, M4A, WAV, AIFF and M4R.

You can also use it as an audiobook player. The app allows you to set multiple audio bookmarks as well as setting timer which is useful after you’ve fallen asleep.

You can save media position and even control playback speed. Moreover, you can organize Your music by artist, album and genre to allow you identify your music quickly..
Price: Free
Download Evermusic for iOS

8. MyMP3

What sets “MyMP3” apart from other music apps is it’s ability to allow users to convert any videos into MP3 without difficulty. You can also edit the metadata of any song. For example, you can easily edit the song and artist titles. Organize your songs properly and Sync them with the cloud to keep them safe and secure. Yap, keep in mind to share them with your friends to win a lot of hearts and likes!
Price: Free
Download MyMP3 for iOS

9. Free Song Notifier for iTunes

Every now and then, iTunes offers free music from some of the best artists in the world to its users. If you don’t want to miss out on this great deal, download Free Song Notifier, that is tailored to help you grab these free music Files straight on your iPhone and iPad free of charge. the app notifies you As soon as a free song is available to download in iTunes, therefore. You can download free iTunes song right from this app. The app provides you with a complete list of 15 songs that are trending in your country. Moreover, you can preview them for 30-second before hitting download button.
Besides Access to 15 trending songs in your country, the app has impressive interface that is very easy to navigate and use.
Another great benefit of this app ubsent in other music apps, is that users are kept abreast of the top 100 hit tracks on YouTube along with links that you can click on to view and download them.
Price: Free
Download Free Song Notifier for iTunes iOS

10. FMA

FMA is directed by the radio station WFMU. The app lets you listen and download all the music in the library free of charge.
The music is organized into genres including Blues, Classical, Country, Electronic, Folk, RnB, Hip-Hop, Instrumental, International, Jazz, Old-Time/Historic, Pop, Rock, Soul, and more. Moreover, the app allows users to listen to their favorite tracks and share them on social media platform such as Twitter, Facebook, as well as email.
Price: Free
Download FMA for iOS

Other Ways to Download Free Music on Your iPhone/iPod Touch

If we’re talking about free music on the iPhone, the options could be limited. However, the internet has a superfluity of sources where you can download music for free. Finally, don’t neglect your own collection of CDs and MP3s. You can easily copy any songs that are stored on your computer to your iPhone. You will need to save them in your Dropbox folder, launch the Dropbox app on your iPhone and enjoy the music playback.

That’s pretty much it on how to download free music on iPhone!