Got a tip for us?

Apple Watch

Personalize your Apple Watch face so it looks the way you want and provides the functions you need. Choose a design, adjust colors and features, then add it to your collection. Switch faces at any time to see the right timekeeping tools—or to shake things up.

The Face Gallery in the Apple Watch app is the easiest way to see all of the available watch faces, customize one, and add it to your collection. But if your iPhone isn’t handy, you can customize the face right on your watch. You can delete a face from your collection, too. For more, see Apple Watch faces and their features.

Add a watch face in the Face Gallery

From the Face Gallery, you can customize any watch face that looks interesting, choose complications, and add the face to your collection.
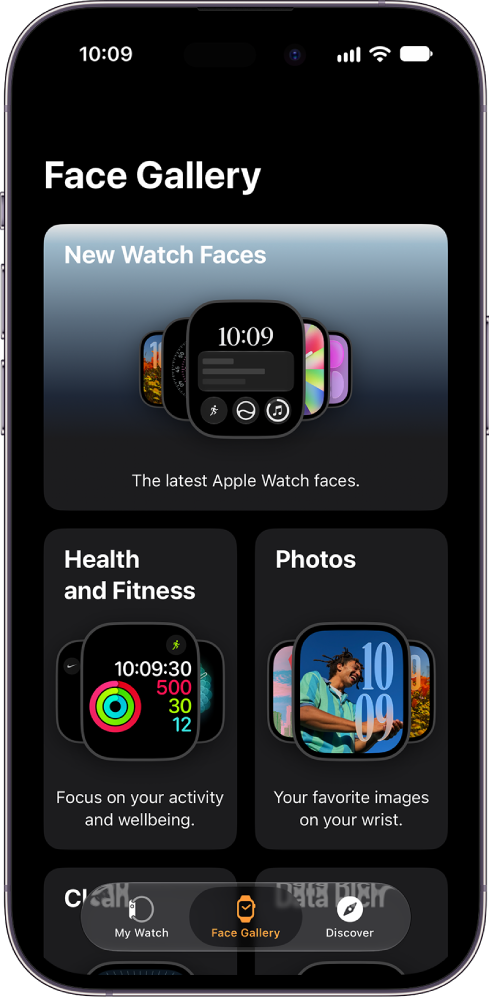
Apple Watch app open to the Face Gallery. The top row shows faces that are new, the next rows show watch faces grouped by type—Health and Fitness, and Photos. You can scroll to see more faces grouped by type.

  1. Start the Apple Watch app on your iPhone.
  2. Tap Face Gallery and then tap a category like Health and Fitness, Photos, or Data Rich.

    To view all watch faces, scroll down, then tap See All Watch Faces.

  3. Scroll to a face and tap Get. Tap an option.
  4. To customize the watch face, do any of the following:

    • Choose features for a face: Tap a feature such as color or style.

      As you play with different options, the face at the top changes so you can make sure the design is just right.

    • Add complications: Tap a complication position (such as Top Left, Top Right, or Bottom), swipe to see which complications are available for that position, and tap the one you want.

      If you decide you don’t want a complication in that position, scroll to the top of the list and tap Off.

  5. When you’re finished customizing your watch face, tap Add to Watch.

    The face is added to your collection and becomes the current face on your Apple Watch.

Add a watch face to your Apple Watch

Your own collection of custom faces can even include variations of the same design.

  1. With the current watch face showing, touch and hold the display.
  2. Swipe left all the way to the end and tap the Add button.
  3. Tap a collection, such as New Watch Faces or Data Rich, to browse a specific category of watch faces.

    Tip: To view all watch faces, scroll down, then tap All Watch Faces.

  4. Tap Get next to the watch face you want and tap Add.

    After you add the watch face, you can customize it.
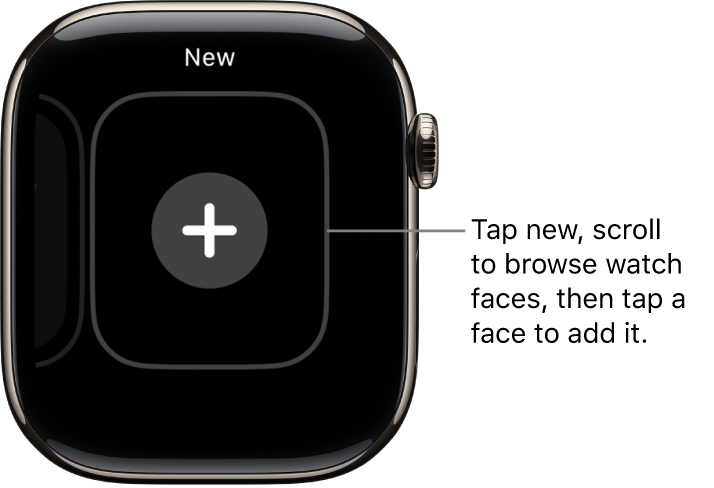
New watch face screen, with a plus button in the middle. Tap to add a new watch face.

Choose a different watch face

  1. With the current watch face showing, touch and hold the display.
  2. Swipe to the watch face you want and tap it.

    Tip: You can also swipe from one watch face to another. Go to the Settings app on your Apple Watch, tap Clock, then turn on Swipe to Switch Watch Face.
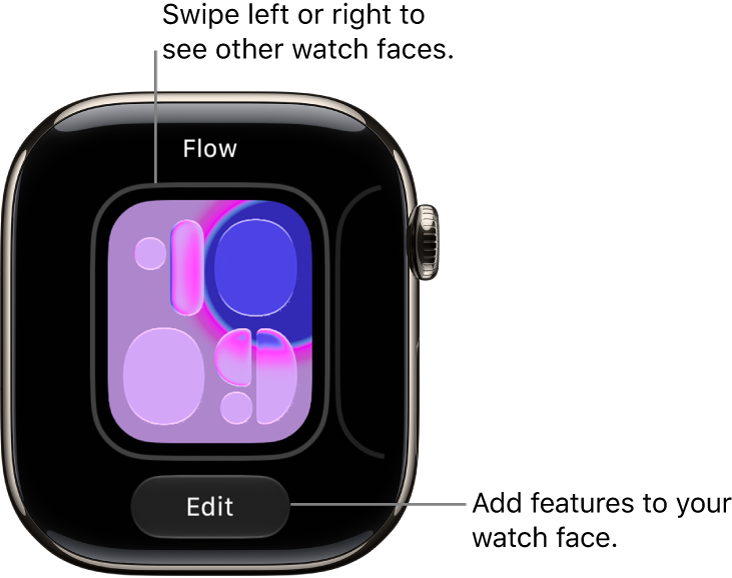
A watch face showing the Edit button, which appears after you touch and hold the watch face. The name of the watch face is at the top. Swipe left or right to see other watch face options.

View your collection

All your watch faces are visible at a glance.

  1. Start the Apple Watch app on your iPhone.
  2. Tap My Watch. Swipe through your collection below My Faces.

To rearrange the order of your collection, tap Edit in My Faces, then drag the Reorder icon next to a watch face up or down.

You can also rearrange the order of your collection on Apple Watch. With the current watch face showing, touch and hold the display, touch and hold again, then drag the selected watch face left or right.

Delete a face from your collection

  1. With the current watch face showing, touch and hold the display.
  2. Swipe to the face you don’t want, swipe up, and tap Remove.

Or, on your iPhone, go to the Apple Watch app, tap My Watch, then tap Edit in the My Faces area. Tap the Delete button next to the watch faces you want to delete, then tap Remove.

The watch face can always be added again later.
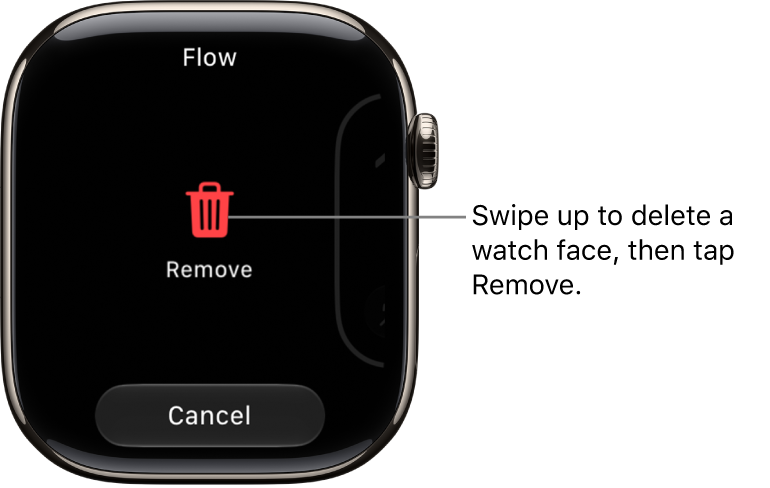
The Apple Watch screen showing Remove and Cancel buttons, which appear after you swipe to a watch face, then swipe up on it to delete it.

Set the watch ahead

  1. Start the Settings app on your Apple Watch.
  2. Tap Clock.
  3. Tap +0 min and then turn the Digital Crown to set the watch ahead by as much as 59 minutes.

Only the time shown on the watch face changes with this setting. Alarms, times in notifications, and any other times, like World Clock, aren’t affected.
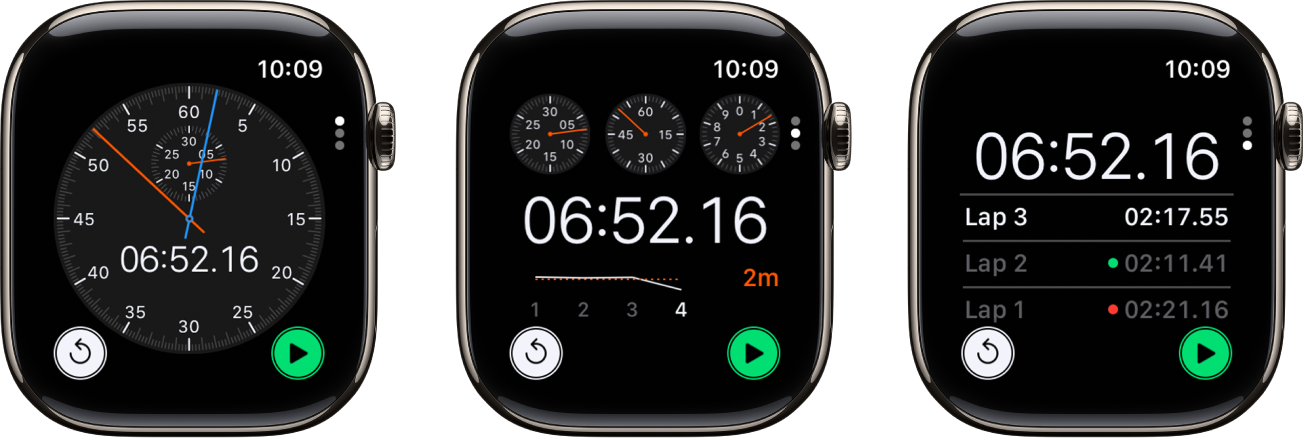
Time events with accuracy and ease. Apple Watch can time full events and keep track of lap or split times, then show the results as a list, a graph, or live on your watch face. The Chronograph Pro watch face has the stopwatch built in.

The stopwatch keeps timing even when you switch to the watch face or open other apps.

Here’s how to time events with a stopwatch on Apple Watch.

Open and choose a stopwatch

  1. Open the Stopwatch app on your Apple Watch.
  2. To choose a different format, turn the Digital Crown.

    You can choose Analog, Hybrid, or Digital.

Three kinds of stopwatches in the Stopwatch app: An analog stopwatch, a hybrid stopwatch that shows time in both analog and digital forms, and a digital stopwatch with a lap counter. Each watch has start and reset buttons.

Start, stop, and reset the stopwatch

  1. Open the Stopwatch app on your Apple Watch.
  2. Turn the Digital Crown to choose a format and then do any of the following:
    • Start: Tap the Start button.
    • Record a lap: Tap the Lap button.
    • Record the final time: Tap the Stop button.
    • Reset the stopwatch: With the stopwatch stopped, tap the Reset button.

Open other apps or switch back to the watch face, and the timing continues.

Note: If you turn on Always On Display on a supported model, the stopwatch updates once a second even while your wrist is down. You can turn on Always On Display in the Settings app: Go to Settings, tap Display & Brightness, then turn on Always On Display.

You can review results on the display you used for timing, or switch displays to analyze your lap times in the format you prefer, including your fastest/slowest laps, marked with green and red.

See also

Tag: Clock

The Timers app on Apple Watch can help you keep track of time. You can set multiple timers that track time for up to 24 hours.

When a timer goes off, you can start a timer of the same duration. On supported models, timers update once a second when your wrist is down, as long as Always On Display is on. And if you want a timer with a label, like “Pizza,” you can create it with Siri.

Here’s how to set timers on Apple Watch.

Siri: Ask Siri something like, “Set a timer for 20 minutes.” See Use Siri for your daily routine.

Quickly set a timer

  1. Open the Timers app on your Apple Watch.
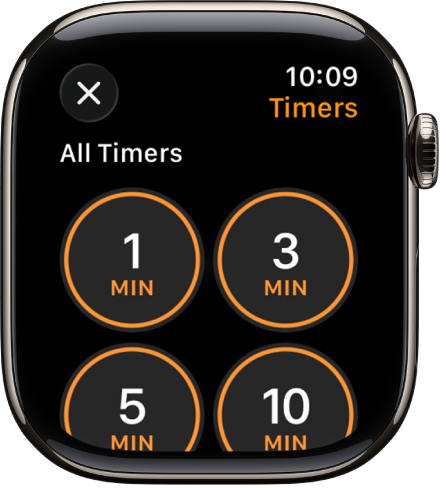
  2. To quickly start a timer, tap a duration (like 1, 3, or 5 minutes) or tap a timer you’ve recently used.

When a timer goes off, you can tap the Repeat Timer button to start a timer of the same duration.

Note: On supported models, timers update once a second while your wrist is down if you turn on Always On Display. To turn on Always On Display, go to the Settings app and tap Display & Brightness, and then turn on Always On Display.

The Timer app screen, showing the add button to create a new timer, and quick timers for 1, 3, 5, or 10 minutes.

Create a custom timer

  1. Open the Timers app on your Apple Watch.
  2. Scroll down, then tap the Add button.
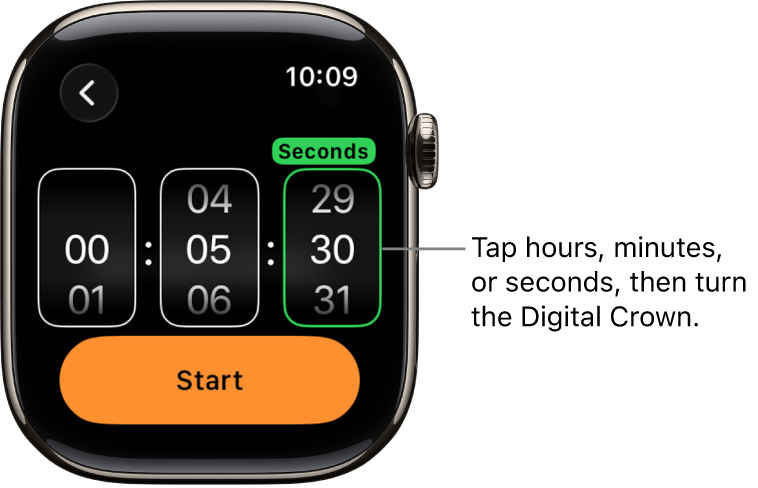
  3. Tap hours, minutes, or seconds and then turn the Digital Crown to adjust.
  4. Tap Start.

    Settings for creating a custom timer, with the hour on the left, the minutes in the middle, and seconds on the right. The Start button is below.

Pause or end a timer

  1. With a timer running, open the Timers app on your Apple Watch.
  2. Tap the Pause button to pause, tap the Play button to resume, or tap the End button to end.

Create multiple timers

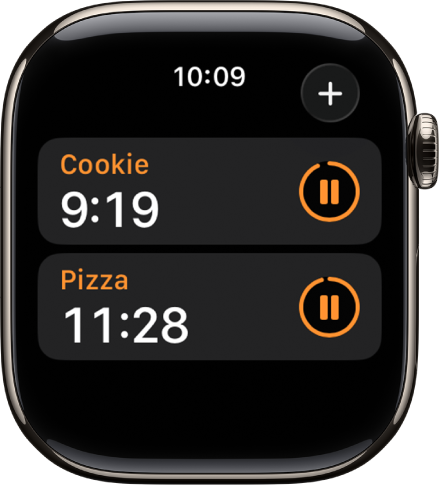
Two timers in the Timers app. Each timer shows the remaining time below the timer’s name and a pause button to the right. An Add button is at the top right.

  1. Open the Timers app on your Apple Watch.
  2. Create and start a timer.

    Tip: To assign a label such as “Pizza” to a timer, use Siri to create the timer. Raise your Apple Watch, then say something like “Set a 12-minute pizza timer.”

  3. Tap the Add button to return to the Timers screen. Create and start another timer.

Tap the Back button to display your running timers on the Timers screen. Tap the Pause button to pause a timer, and tap the Play button to resume.

To delete a running or paused timer that appears on the Timers screen, swipe left, then tap the Delete button.

Edit the Timers screen

From the Timers screen, you can pin your favorite timers and delete custom timers.

  1. Open the Timers app on your Apple Watch.
  2. Scroll down, then tap Edit.
  3. Do any of the following:
    • Pin a timer: Tap the Pin button.
    • Unpin a timer: Tap the Unpin button.
    • Delete a timer: Tap the Delete button.
  4. When you’re finished, tap Done.

See also

Tag: Clock

Use the World Clock app on your Apple Watch to check the time in cities around the globe.

Cities you add on your iPhone show up in World Clock on your watch, too, and you can add and remove cities right on Apple Watch. And for a city you always want to see, there’s a World Clock complication for your watch face.

Here’s how to use World Clock on Apple Watch to check the time in other locations.

Siri: Ask Siri something like, “What time is it in Auckland?” See Ask Siri to get information.

Add and remove cities in World Clock

  1. Start the World Clock app on your Apple Watch.
  2. Tap the List button, then tap the Add button.
  3. Enter the city name and tap Search.
  4. Tap the city name to add it to World Clock.

To remove a city, swipe left on its name in the city list, then tap the Delete button.

The cities you add on your iPhone also appear in World Clock on your Apple Watch.

Check the time in another city

  1. Start the World Clock app on your Apple Watch.
  2. Tap the List button and then turn the Digital Crown or swipe to scroll through the list.
  3. Tap a city to see more information, like the time of sunrise and sunset.
  4. To change the time in a city and compare it to your current location, turn the Digital Crown.
  5. When you’re finished, tap the List button to return to the city list.

To always see the time in a particular city, you can add a World Clock complication to your watch face and choose that city to display.

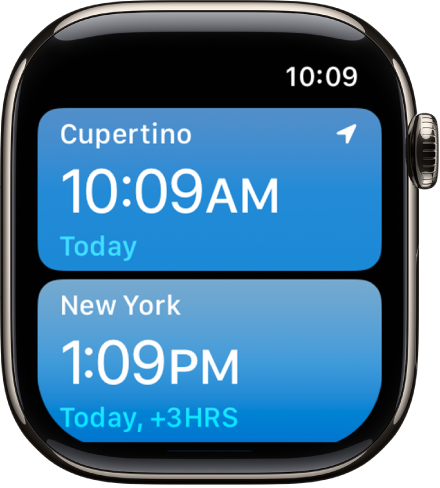
The World Clock app with a list of cities.

Change city abbreviations

You can change a city abbreviation used on your Apple Watch.

  1. Start the Apple Watch app on your iPhone.
  2. Tap My Watch and tap Clock. Tap City Abbreviations.
  3. Tap any city to change its abbreviation.

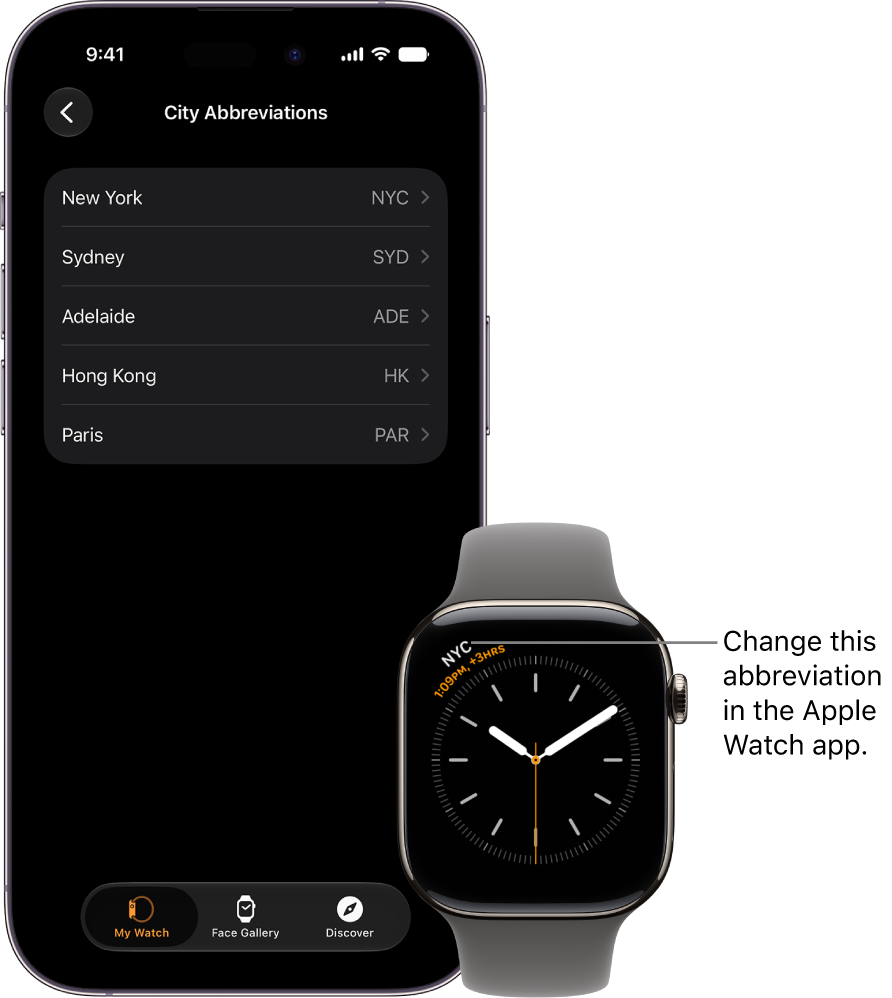
    An iPhone and Apple Watch, side by side. The Apple Watch screen shows the time in New York City, using the abbreviation NYC. The iPhone screen shows the list of cities in Clock settings in the Apple Watch app.

See also

Tag: Clock

Use the Alarms app to play a sound or vibrate your Apple Watch at a set time. It’s flexible. You can set, edit, and delete alarms, skip a wake-up alarm, choose the days of the week you want an alarm to repeat, and even stop yourself from snoozing.

And if you want, you can receive alarms on both iPhone and Apple Watch.

Here’s how to add an alarm on Apple Watch.

Siri: Ask Siri something like, “Set repeating alarm for 6 a.m.” See Use Siri for your daily routine.

Set an alarm on Apple Watch

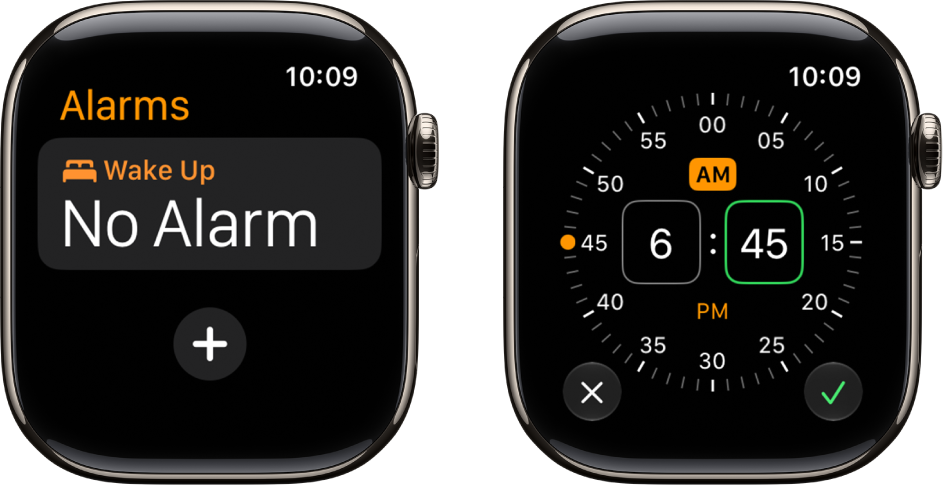
  1. Start the Alarms app on your Apple Watch.
  2. Tap the Add button.
  3. Tap AM or PM. Tap the hours or minutes.
  4. Turn the Digital Crown to adjust. Then tap the Check button.

To turn the alarm on or off, tap its switch.

Two watch screens showing the process for adding an alarm: Tap Add Alarm, tap AM or PM, turn Digital Crown to adjust the time, then tap the check button.

Edit an alarm

  1. Start the Alarms app on your Apple Watch.
  2. Tap the alarm time. Then tap any of the following options to edit your alarm:

    • Change time: Change the alarm time.
    • Repeat: Choose the days of the week you want the alarm to repeat.
    • Label: Give the alarm a name, like “Water the plants.”
    • Snooze: Turn on to see a Snooze button with your alarm.
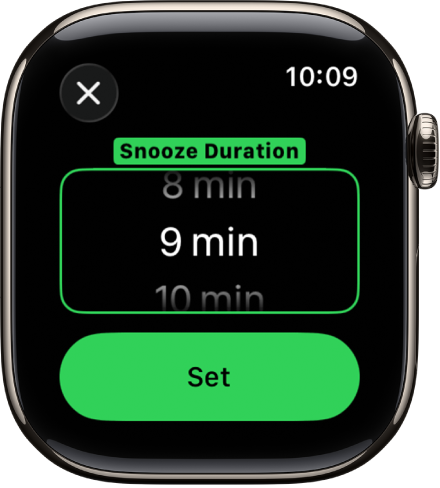
    • Snooze Duration: Choose how long to pause the alarm.
    • Break Through Silent Mode: Turn on to have sound always play while wearing Apple Watch.

    Tip: To create an alarm that taps your wrist, but doesn’t make a sound, turn on Silent Mode.

A watch screen showing options to set the Snooze Duration in the Alarms app.

Don’t let yourself snooze

When an alarm sounds, you can tap Snooze to wait several minutes before the alarm sounds again. If you don’t want to allow snooze, follow these steps:

  1. Start the Alarms app on your Apple Watch.
  2. Tap the alarm in the list of alarms. Turn off Snooze.

Delete an alarm

  1. Start the Alarms app on your Apple Watch.
  2. Swipe left on an alarm. Then tap the Delete button.

Skip a wake-up alarm

You can skip a wake-up alarm that’s part of your sleep schedule for just that evening.

  1. Start the Alarms app on your Apple Watch.
  2. Tap the alarm that appears below Alarms and tap Skip for Tonight.

If you’d like a sleep schedule with wake-up alarms, read our guide, Set up your first recurring sleep schedule on Apple Watch.

Receive alarms on both iPhone and Apple Watch

  1. Set the alarm on your iPhone.
  2. Start the Apple Watch app on your iPhone.
  3. Tap My Watch and tap Clock. Turn on Push Alerts from iPhone.

Your Apple Watch alerts you when an alarm goes off so you can snooze or dismiss the alarm. (You aren’t alerted on your iPhone when your Apple Watch alarms go off.)

Set up Apple Watch as a nightstand clock with alarm

  1. Start the Settings app on your Apple Watch.
  2. Tap General and tap Nightstand Mode. Turn on Nightstand Mode.

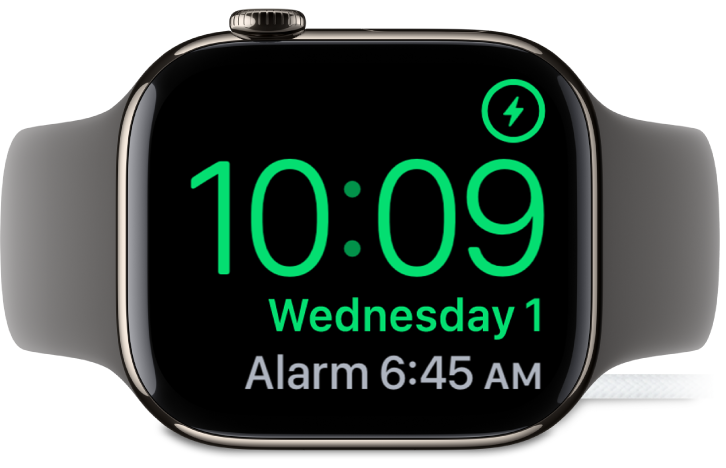
When you connect your Apple Watch to its charger facing up with nightstand mode turned on, it displays charging status, the current time and date, and the time of any alarm you’ve set. To see the time, tap the display or lightly nudge your Apple Watch. Even nudging or tapping the table might work.

An Apple Watch placed on its side and connected to the charger, with the screen showing the charging symbol in the top-right corner, the current time below that, and the time of the next alarm.

If you’ve set an alarm in the Alarms app, your Apple Watch gently wakes you in nightstand mode with a unique alarm sound.

When the alarm sounds, press the side button to turn it off, or press the Digital Crown to snooze.

See also

Tag: Clock

Use Find My to share your location with friends and family, view the location of your Apple devices, locate items you’ve attached an AirTag to, and keep track of Find My network accessories.

Before you can see the locations of people, devices, and items, you need to add them to Find My. If your Apple Watch is paired with your iPhone, it’s set up automatically once Find My iPhone is on.

Add people to Find My

(You see the same people in Find My on Apple Watch as on iPhone.)

To share your location with someone new, do the following:

  1. Open the Find My app on your Apple Watch.
  2. Tap the button at the top left and tap People.
  3. Swipe up from the bottom of the screen, then tap Share Location.
  4. Choose a recipient and a sharing duration and tap OK.

The recipient gets a notification that you’ve shared your location and can choose to share their location with you too. If they agree, their location shows in Find My.

Turn on Find My for your Apple Watch

If your Apple Watch is paired with your iPhone, turning on Find My iPhone gets it set up automatically. Finding your watch also requires the Find My network.

  1. Open the Settings app on your Apple Watch.
  2. Tap your name and scroll down until you see your Apple Watch.
  3. Tap your watch name, then tap Find My Watch.
  4. Turn on Find My network if it isn’t on.

Add your other devices to Find My

Before an Apple device such as iPhone, iPad, Mac, or AirPods is lost, set up Find My on it and turn on location sharing for the device.

Add your AirTag and other items to Find My

When you register an AirTag or Find My network accessory to your Apple Account, the item is added to Find My. (You do this on iPhone or iPad.)

See also

Tag: Find My

Use Find My to locate items you’ve attached an AirTag to, and keep track of Find My network accessories.

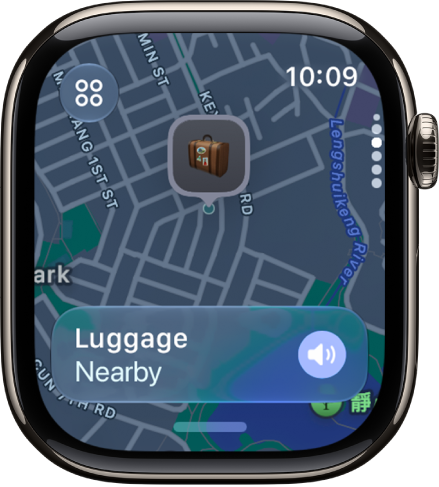
You can ping the item, get directions to the item’s location in the Maps app, or locate the item nearby with Precision Finding on AirTag (2nd Generation). You can also receive a notification when you’ve left an item behind. If an item can’t be located, you see its last known location.

A Find My screen showing the location of a suitcase on a map.

Find the location of an item

  1. Open the Find My app on your Apple Watch.
  2. Tap the button at the top left, then tap Items.
  3. Turn the Digital Crown to scroll through your items and see their locations on a map.

    (If an item can’t be located, its last known location is shown.)

  4. Tap the name of the item you’re looking for and then do any of the following:

    • Ping the item: Tap Play Sound.
    • Get directions to the item’s location: Tap Directions to navigate in the Maps app.
    • Locate the item nearby with Precision Finding: Tap Find, then follow the onscreen instructions.

      Note: Precision Finding is available on AirTag (2nd Generation) and requires Apple Watch Series 9, Apple Watch Ultra 2, or later—excluding Apple Watch SE 3. Precision Finding isn’t available in all countries and regions.

Receive a notification when you’ve left an item behind

To keep from misplacing your items, you can receive a notification when you leave them behind. Setting Trusted Locations lets you leave an item somewhere without receiving a notification.

  1. Open the Find My app on your Apple Watch.
  2. Tap the button at the top left, then tap Items.
  3. Turn the Digital Crown until you see the item. Tap its name.
  4. Scroll down to Notify Me and turn on When Left Behind.
  5. Set a trusted location—such as home.

See also

Tag: Find My

Use Find My to locate Apple devices you’ve lost or misplaced, or get notified if you leave a device behind.

If your device is online, you can see its location, and for supported devices, Find My can locate it even if it’s powered off or in Low Power Mode. You can also get directions to it in the Maps app.

Here’s how to locate devices in Find My on Apple Watch.

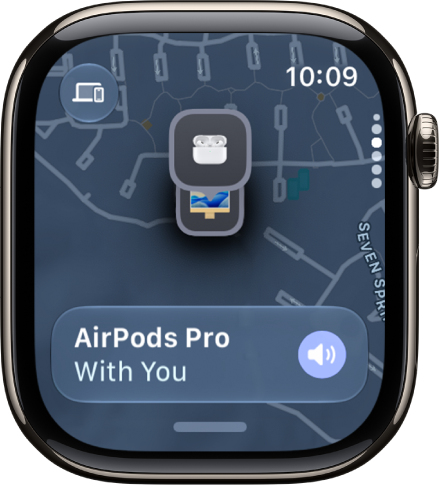
A Find My screen showing the location of AirPods Pro on a map.

Find the location of a device

When your device is online, the Find My app shows its location. Find My can even locate a supported device that’s powered off, in Low Power Mode, or in Airplane Mode.

  1. Start the Find My app on your Apple Watch.
  2. Tap the button at the top left and then tap Devices.
  3. Turn the Digital Crown to scroll through your devices and see their locations on a map.

    (If a device can’t be located, its last known location is shown.)

  4. Tap the name of the device you’re looking for. Do any of the following:

    • Ping the device: Tap Play Sound.
    • Get directions to the device’s location: Tap Directions to navigate in the Maps app.

Receive a notification when you’ve left a device behind

You can receive a notification when you’ve left your device behind, which helps keep you from misplacing it. Trusted Locations, which you can also set, are places where you can leave your device without receiving a notification.

  1. Start the Find My app on your Apple Watch.
  2. Tap the button at the top left and then tap Devices.
  3. Turn the Digital Crown until you see the device. Then tap its name.
  4. Scroll down to Notify Me and turn on When Left Behind.
  5. Set a trusted location—such as home.

See also

Tag: Find My

Apple Watch can help you find your iPhone nearby by playing a sound. With certain Apple Watch models, you can also use Precision Finding and see a general heading and distance to your iPhone.

In the dark? Your iPhone can flash as well as play a sound, so you can track it down. And if your iPhone isn’t in range of Apple Watch, you can try Find My on iCloud.com.

Here’s how to ping your iPhone with Apple Watch.

Ping your iPhone with sound

  1. Press the side button to open Control Center on Apple Watch.
  2. Tap the Ping iPhone button.
  3. Your iPhone plays a sound so you can track it down.

    Tip: In the dark? Touch and hold the Ping iPhone button, and your iPhone flashes as well.

Try Find My from iCloud.com when your iPhone isn’t in range of Apple Watch.

Ping and locate your iPhone with Precision Finding

Precision Finding helps your Apple Watch locate your iPhone, playing sound and showing a heading and distance.

Note: Precision Finding is supported on Apple Watch Series 9, Apple Watch Ultra 2, and iPhone 15 and later, excluding iPhone 16e and iPhone 17e. Precision Finding isn’t available in all countries and regions.

  1. Press the side button to open Control Center on Apple Watch.
  2. Tap the Ping iPhone button.

    Your iPhone plays a sound, and if your iPhone is within range, Apple Watch displays a general heading and distance to your iPhone—50 feet, for example.

  3. To play a sound on your iPhone as you track it down, tap the Ping iPhone button in the bottom-right corner.

    Tip: In the dark? Touch and hold the Ping iPhone button so your iPhone flashes.

  4. Follow the heading shown on the screen, making adjustments as the heading moves.

    When you’re close to your iPhone, the watch screen turns green and iPhone pings twice.

If your iPhone isn’t in range of Apple Watch, use Find Devices on iCloud.com.

See also

Tag: Find My

Use your Apple Watch to control media playback on your other Apple devices such as iPhone, iPad, and HomePod.

You can control playback and adjust the volume. And when HomePod or another AirPlay device is playing, you can switch to or add more AirPlay devices, like the HomePod speakers in the kitchen and bedroom. When more than one device is playing, you’ll see the device’s icon in the top-right corner.

Here’s how to control media playback on other devices using your Apple Watch.

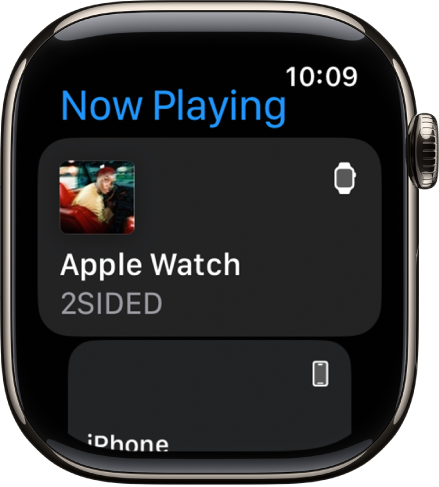
The Now Playing screen showing media on Apple Watch and on iPhone.

Control media on other devices

  1. Open the Now Playing app on your Apple Watch.

    If more than one device is playing, the device’s icon appears in the top-right corner.

  2. Tap the device you want to control.
  3. Do any of the following:

    • Control playback: Tap the play, pause, backward, and forward buttons.
    • Adjust the volume: Turn the Digital Crown.

Switch to or add AirPlay devices

When you’re controlling audio on an AirPlay device such as HomePod, you can also switch to or add additional AirPlay devices. If you’re listening to HomePod in your living room, for example, you can bring in the HomePod speakers in the kitchen and bedroom.

  1. Open the Now Playing app on your Apple Watch.
  2. Tap a device you want to control.
  3. Tap the selector button in the top-right corner, then tap AirPlay.
  4. On the Now Playing screen, tap the More Options button.
  5. Select the devices you want to add or remove.

See music and podcast suggestions when near your HomePod

If nothing is playing on a nearby HomePod or on your Apple Watch, a widget at the top of the Smart Stack shows suggestions from the Music and Podcast apps.

  1. To review the suggestions, turn the Digital Crown upward or swipe up from the bottom of the screen.
  2. Tap a suggestion to play it on HomePod.

Note: Music and podcast suggestions are available on Apple Watch and HomePod models with Ultra Wideband.

See also

Tag: Music