Got a tip for us?

Apple Watch

In the Messages app, you can read incoming text messages, then reply with a quick reaction or suggested response.

You can also send a reply by dictating, typing, or scribbling, mute or delete a conversation, and choose how to be notified of new messages. You can see when a message was sent, and use information in a message, like dates, flight numbers, and package tracking codes.

Here’s how to read and respond to messages on Apple Watch.

WARNING: For important information about avoiding distractions that could lead to dangerous situations, see Important safety information for Apple Watch.

Read a message on Apple Watch

  1. When you feel a tap or hear an alert sound telling you that a message has arrived, raise your Apple Watch to read it. If the message arrived a while ago, swipe down from the top of the screen to see the notification. Then tap it.
  2. Turn the Digital Crown to read more of the message. To return to the beginning, tap the top of the screen.

    Tip: Swipe left on a message to see when it was sent. You can also tap information within a message—like dates, flight numbers, package tracking codes, and currency amounts—to see relevant actions, such as creating a calendar event or tracking a package.

Send a reply
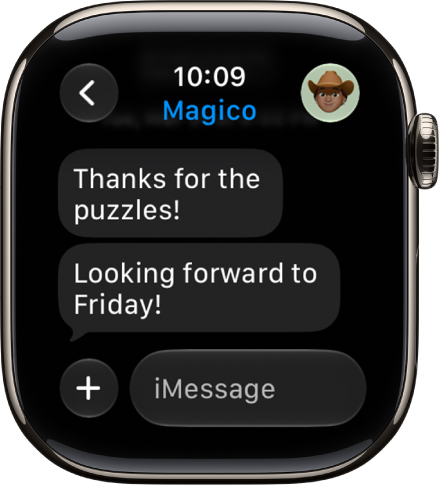
A message conversation. The Apps button and message field are at the bottom.

When you’re in a message conversation, do any of the following:

  • Send a reaction: Double-tap the message bubble, then choose a tapback—such as a thumbs up or heart.
  • Send a suggested reply: Scroll down to see the suggestions, then tap one to send it.
  • Compose a reply: Tap the text field, then dictate, type, or scribble your response.
  • Reply to a specific message: Double-tap the message bubble, scroll down, then tap Reply.

Mute or delete a conversation

  1. Start the Messages app on your Apple Watch.
  2. In the Messages conversation list, swipe left on a conversation. Do any of the following:
    • Mute the conversation: Tap the Notifications Off button.
    • Delete the conversation: Tap Trash button.

Choose how to be notified of new messages

  1. Start the Apple Watch app on your iPhone.
  2. Tap My Watch, tap Apps, and tap Messages.
  3. Tap Custom to set options for how you want to be notified when you receive a message.

If you’re using a Focus that doesn’t allow Messages notifications, you won’t receive a notification.

Detect sensitive content

If you choose, your Apple Watch can detect and blur sensitive photos and videos before you view them.

  1. Start the Settings app on your iPhone.
  2. Tap Privacy & Security, then tap Sensitive Content Warning.
  3. Turn on Sensitive Content Warning and then make sure AirDrop and Messages are turned on.
  4. To view the content after being warned, tap Show and tap I’m Sure.

    To learn how to deal with sensitive content, tap Ways to Get Help.

Turn on this setting, and it affects images and videos on your Apple Watch as well as on iPhone.

Note: Apple doesn’t have access to the photos or videos.

See also

With Fall Detection turned on, Apple Watch can help alert emergency services when a hard fall has been detected and notify your emergency contacts.

When it detects a hard fall, your watch taps your wrist, sounds an alarm, and displays an alert. You can have Fall Detection on at all times or only during workouts.

Note: Apple Watch cannot detect all falls. Your watch might detect high-impact activity as a fall and trigger Fall Detection.

If you use Emergency SOS, your emergency contacts won’t be automatically notified if the Messages app isn’t the selected text messaging app or is deleted.

How Fall Detection works

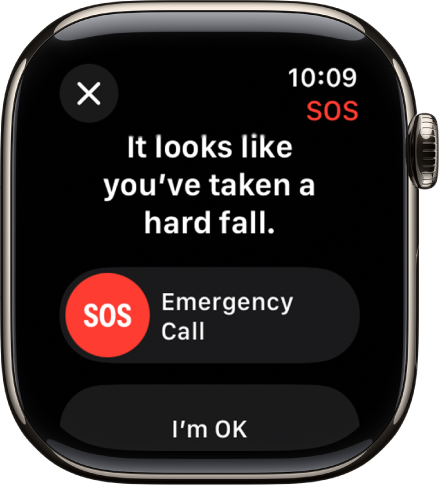
When your Apple Watch detects a hard fall, it taps your wrist, sounds an alarm, and displays an alert.

The Fall Detection screen showing the SOS slider to start an emergency call and the I’m OK button.

  • If you’re able to respond: If you don’t need help, tap I’m OK. If you need emergency services, drag the Emergency Call slider to the right. Your Apple Watch makes the call to emergency services and you can speak to a responder.

    If you don’t need emergency services and the call has been made, don’t hang up. Wait until a responder answers, then explain that you don’t need help.

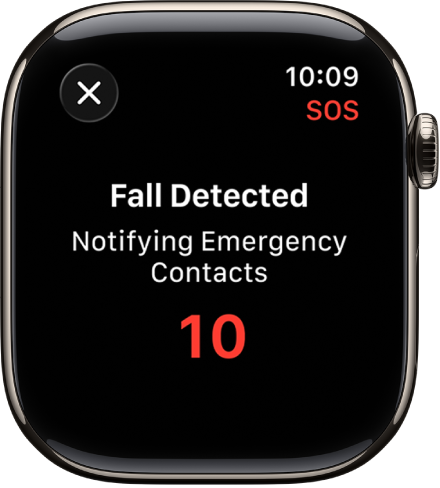
  • If you’re unresponsive: When Apple Watch detects that you’re immobile for about a minute, it begins a 30-second countdown, while tapping you on the wrist and sounding an alert. The alert gets louder, so that you or someone nearby can hear it. If you don’t want to call emergency services, tap Cancel.

    When the countdown ends, your Apple Watch automatically tries to contact emergency services. When the call connects, Apple Watch plays an audio message that informs emergency services that your watch detected a hard fall, and shares your current location as latitude and longitude coordinates. Your Medical ID is also shared with emergency services (if you turned on Share During Emergency Call for your Medical ID). The first time the message plays, the audio is at full volume, but then the volume is reduced so that you, or someone nearby, can talk to the responder. The message continues to play until you tap Stop Recorded Message or the call ends.

Note: To contact emergency services, your Apple Watch or nearby iPhone needs a cellular connection or Wi-Fi calling with an internet connection.

If you’re off the grid without cellular and Wi-Fi coverage, Apple Watch can try to contact emergency services via satellite. (Available on supported Apple Watch Ultra models* or other Apple Watch models paired with iPhone 14 or later.)

After the call ends, Apple Watch sends a message to your emergency contacts to tell them your location, and that your watch detected a hard fall and contacted emergency services.

A screen showing “Fall Detected” and a countdown to notify emergency contacts.

Set up Fall Detection

  1. Open the Settings app on your Apple Watch.
  2. Tap SOS, tap Fall Detection, and turn on Fall Detection.

    You can also go to the Apple Watch app on your iPhone, tap My Watch, tap Emergency SOS, then turn on Fall Detection.

    Note: If you turn off wrist detection, Apple Watch won’t automatically attempt to call emergency services even after it has detected a hard impact fall.

  3. Choose Always on to have Fall Detection on at all times, or Only on during workouts to have Fall Detection on only when you’ve started a workout.

    If you’re between age 18 and 55, and setting up a new Apple Watch with watchOS 8.1 or later, Fall Detection only during workouts is turned on automatically. If you upgrade your existing Apple Watch from an earlier version of watchOS, you must manually turn on the “Only on during workouts” feature.

  4. On your paired iPhone, open the Health app, set up your Medical ID with important health information and your emergency contacts. Then turn on Share During Emergency Call.

*Satellite features aren’t available on Apple Watch Ultra 2 and earlier models, aren’t available in all countries and regions, and aren’t offered on models sold in certain countries and regions. Satellite features are free for 2 years after the activation of your Apple Watch Ultra. Messages and location sharing via satellite require an active carrier plan.

See also

Apple Watch provides several features that can help keep you safe and assist in a variety of emergency situations.

Check In can automatically notify a friend when you’ve arrived at a destination, and a Medical ID shows important medical information on your Lock Screen. There’s also Fall Detection, Crash Detection, the siren on Apple Watch Ultra, and satellite communication.

Check In

Check In can automatically notify a friend when your Apple Watch arrives at a destination, when a workout session ends, or after a specific period of time has passed. If you don’t successfully complete your check in, you choose what details they can see.

Use Check In to let friends know you’ve arrived

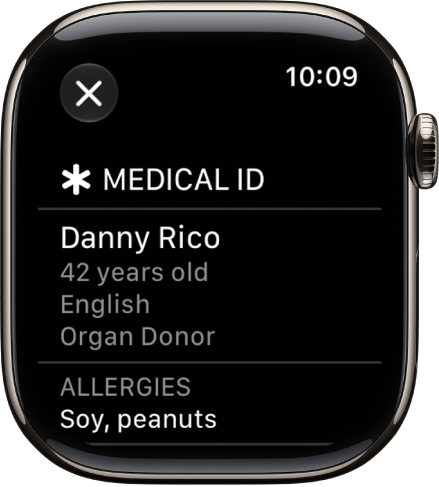
The Medical ID screen showing the person’s name, age, language, organ donor status, and emergency contacts.

Medical ID

You can create a Medical ID that shows important medical information on the Lock Screen of your Apple Watch. In an emergency, those attending to you can see such details as your age, blood type, medical conditions, and any allergies you may have.

Set up and view Medical ID

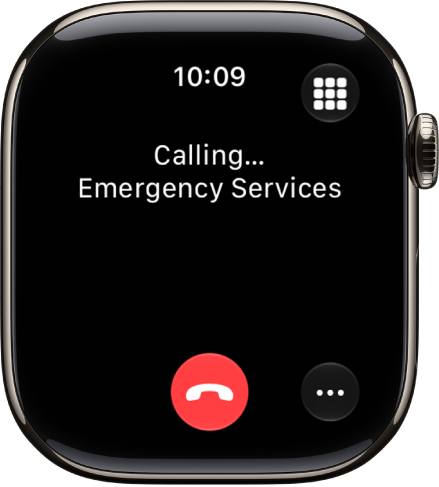
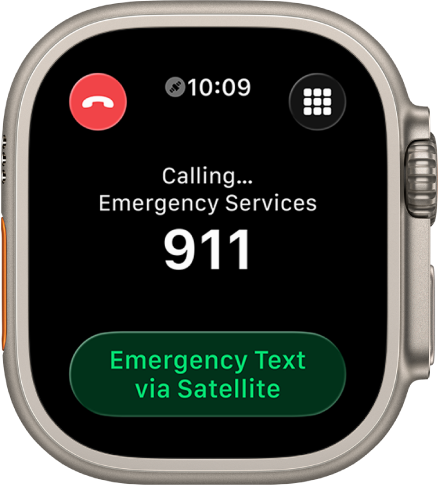
A screen showing a call to emergency services in progress.

Contact emergency services

Press and hold the side button on Apple Watch to call emergency services or use Siri or Messages to make contact. Add emergency contacts to alert your friends and family to an emergency.

Contact emergency services

The Fall Detection screen showing the SOS slider to start an emergency call.

Fall Detection

With Fall Detection turned on, Apple Watch can help alert emergency services when a hard fall has been detected and notify your emergency contacts.

Manage Fall Detection

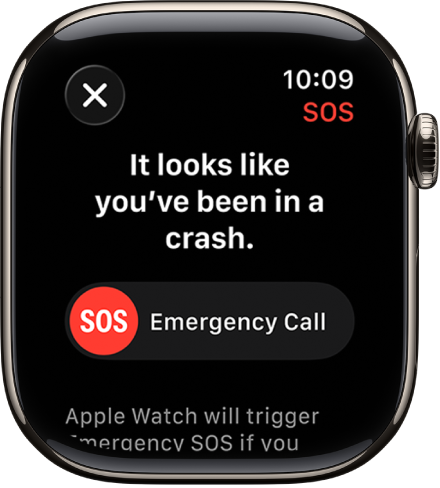
The Crash Detection screen showing the SOS slider to start an emergency call.

Crash Detection

With Crash Detection turned on, Apple Watch can help alert emergency services when a severe car crash has been detected and notify your emergency contacts.

Manage Crash Detection

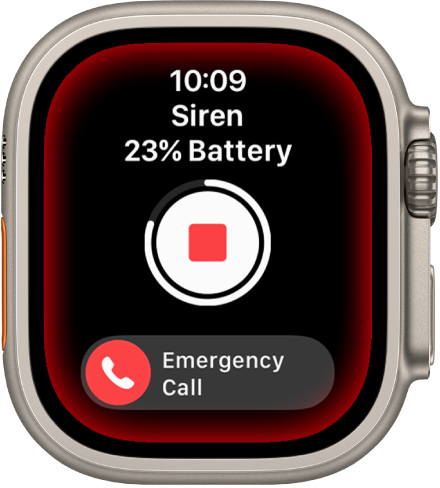
Siren counting down. Near the top is the battery charge, in the middle is a Play button, and at the bottom is the Emergency Call slider.

Siren

To try to attract help, Apple Watch Ultra models include a built-in siren that emits high-intensity sound patterns across a wide range of frequencies.

Activate the siren

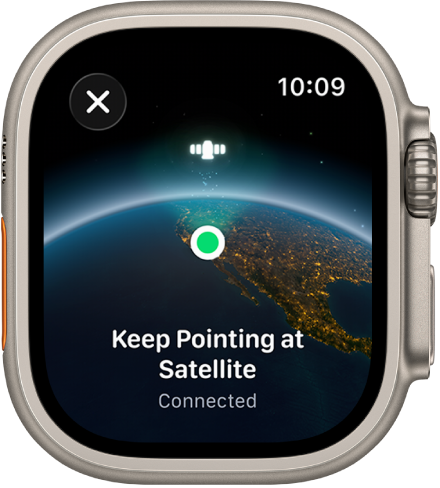
A screen showing a satellite icon over a curved view of Earth, a green connection indicator, and “Keep Pointing at Satellite” text.

Communicate via satellite

On supported Apple Watch Ultra models*, you can connect to a satellite to text emergency services, message friends and family, and share your location—all while you’re off the grid without cellular and Wi-Fi coverage.

Set up satellite communications

Per Apple, not all features are available in all areas and on all models.

*Satellite features aren’t available on Apple Watch Ultra 2 and earlier models, aren’t available in all countries and regions, and aren’t offered on models sold in certain countries and regions. Satellite features are free for 2 years after the activation of your Apple Watch Ultra. Messages and location sharing via satellite require an active carrier plan.

See also

A Medical ID provides information about you that may be important in an emergency, like allergies and medical conditions. When you set up your Medical ID in the Health app on your iPhone, that information is also available on your Apple Watch.

If you share your Medical ID, your Apple Watch can send your medical information to emergency services when you call or text 911 or use Emergency SOS (U.S. and Canada only). Your Apple Watch can also display your Medical ID so that it’s available to someone attending to you in an emergency.

The Medical ID screen showing the person’s name, age, language, organ donor status, and emergency contacts.

Set up your Medical ID on iPhone

On your paired iPhone, go to the Health app, then set up your Medical ID with important health information and your emergency contacts. You may also want to turn on Share During Emergency Call.

View your Medical ID on Apple Watch

  1. Press and hold the side button until the sliders appear.

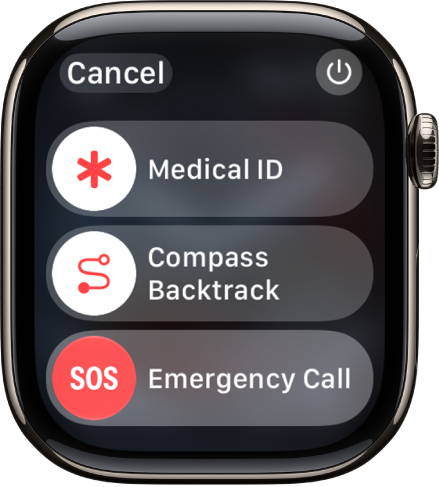
    The emergency services screen. Near the top is the Medical ID slider, in the middle is the Compass Backtrack slider, and at the bottom is the Emergency Call slider.

  2. Slide the Medical ID slider to the right.
  3. Tap Done when you’re finished.

You can also go to the Settings app on your Apple Watch, tap SOS, then tap Medical ID.

See also

Tag: Health

On supported Apple Watch Ultra models, you can set up satellite features to text emergency services, message friends and family, and share your location—all while you’re off the grid without cellular and Wi-Fi coverage.

It’s best to do it before you go outside of cellular or Wi-Fi coverage. You set up Emergency SOS via satellite and try the demo, then set up Messages and location sharing via satellite. Satellite features are free for 2 years after you activate your watch.

Note: Satellite features aren’t available on Apple Watch Ultra 2 and earlier models, aren’t available in all countries and regions, and aren’t offered on models sold in certain countries and regions. Satellite features are free for 2 years after the activation of your Apple Watch Ultra. Messages and location sharing via satellite require an active carrier plan.

Before you begin

To set up your Apple Watch Ultra to use Emergency SOS, Messages, and location sharing via satellite, do the following before you go outside of cellular or Wi-Fi coverage:

  • Set up and pair Apple Watch Ultra (if you haven’t done so already).

    Note: Satellite features may take some time to become active after you first set up Apple Watch Ultra.

  • Add the following shortcuts:

  • Set up Emergency SOS via satellite and try the demo.
  • Set up Messages via satellite.
  • Set up location sharing via satellite.

Set up Emergency SOS via satellite and try the demo

Note: The Emergency SOS demo doesn’t start a call to emergency services.

  1. Create your Medical ID.
  2. Add emergency contacts.
  3. Make sure you have the Messages app on Apple Watch Ultra. (Required for sharing information with emergency contacts.)
  4. Practice using Emergency SOS via satellite with the demo before you head off-grid:
    • In Control Center: Tap the satellite icon and tap Try Demo.
    • On the watch face: Tap the satellite icon and tap Try Demo.
    • In the Settings app: Tap SOS, scroll down, and tap Try Demo.

Set up Messages via satellite

  1. Make sure iMessage is turned on—open the Settings app on your iPhone and tap Apps. Tap Messages.
  2. Verify that the SIM on your Apple Watch Ultra is active. SMS availability depends on your carrier. Carrier fees may apply; check with your carrier for details. See Set up and use cellular service on Apple Watch.
  3. Make sure you’ve exchanged messages within 30 days with the people you want to contact via satellite. If not, send them a message on your Apple Watch Ultra before you go outside of cellular and Wi-Fi coverage.

Set up location sharing via satellite

  1. Go to the Find My app on your Apple Watch Ultra.
  2. Tap the button at the top left and scroll down. Tap Me.
  3. Below My Location, check the following:
    • Your location is being shared from your paired iPhone and Apple Watch Ultra.
    • Share My Location is turned on.
  4. Tap the button at the top left, tap People, and then add the people you want to share your location with.

See also

With Crash Detection turned on, Apple Watch can help alert emergency services when a severe car crash has been detected and notify your emergency contacts.

When it detects a severe crash, your watch displays an alert and initiates an emergency call unless you cancel.

Here’s how to manage Crash Detection on Apple Watch.

What is Crash Detection?

If your Apple Watch detects a severe car crash, Crash Detection can help connect you to emergency services and notify your emergency contacts.

Note: Apple Watch cannot detect all car crashes.

How Crash Detection works

When your Apple Watch detects a severe car crash, it displays an alert and initiates an emergency call unless you cancel. Crash Detection doesn’t override any existing emergency calls that were placed by other means.

  • If you’re able to respond: To call emergency services, drag the Emergency Call slider to the right. Your Apple Watch makes the call to emergency services and you can speak to a responder.

    If you don’t need emergency services and the call has been made, don’t hang up. Wait until a responder answers, then explain that you don’t need help.

  • If you’re unresponsive: When you haven’t initiated a call or canceled the alert after 10 seconds, your Apple Watch begins a 30-second countdown. During this countdown, Apple Watch sounds an alarm and taps your wrist to get your attention.

    If you still don’t respond, your device automatically calls emergency services at the end of the countdown. It plays an audio message for emergency services, which informs them that you’ve been in a severe car crash and shares your current location as latitude and longitude coordinates with an approximate search radius. If you’ve added emergency contacts, your device sends a message to share your location and tell them you’ve been in a severe car crash.

Note: To contact emergency services, your Apple Watch or nearby iPhone needs a cellular connection or Wi-Fi calling with an internet connection.

If you’re off the grid without cellular and Wi-Fi coverage, Apple Watch can try to contact emergency services via satellite. (Available on supported Apple Watch Ultra models* or other Apple Watch models paired with iPhone 14 or later.)

Turn Crash Detection on or off

Crash Detection is on by default. To turn Crash Detection on or off, do the following:

  1. Start the Settings app on your Apple Watch.
  2. Tap SOS, tap Crash Detection, and tap Call After Severe Crash.

*Satellite features aren’t available on Apple Watch Ultra 2 and earlier models, aren’t available in all countries and regions, and aren’t offered on models sold in certain countries and regions. Satellite features are free for 2 years after the activation of your Apple Watch Ultra. Messages and location sharing via satellite require an active carrier plan.

See also

On supported Apple Watch Ultra models, you can connect to a satellite to text emergency services, message friends and family, and share your location—all while you’re off the grid without cellular and Wi-Fi coverage.

Look for the satellite icon at the top of the screen, which indicates the availability of satellite features at your location. If your iPhone is nearby and in Airplane mode, though, satellite features aren’t available on your watch.

Note: Satellite features aren’t available on Apple Watch Ultra 2 and earlier models, aren’t available in all countries and regions, and aren’t offered on models sold in certain countries and regions. Satellite features are free for 2 years after the activation of your Apple Watch Ultra. Messages and location sharing via satellite require an active carrier plan.

According to Apple, connection and response times may vary based on location, environmental conditions, and other factors. Wi-Fi, cellular, and Bluetooth connectivity may be impacted when connected to a satellite. Satellite features aren’t available on Apple Watch Ultra if your iPhone is nearby and in Airplane mode.

Connect to Emergency SOS via satellite

After you’ve set up Emergency SOS via satellite on Apple Watch Ultra, you can contact emergency services even when you’re outside of cellular and Wi-Fi coverage.

A screen showing a satellite icon over a curved view of Earth, a green connection indicator, and “Keep Pointing at Satellite” text.

  1. Wear Apple Watch Ultra naturally on your wrist. Then ensure it has a clear line of sight to the sky. If you’re under heavy foliage, surrounded by other obstructions, or indoors, you might not be able to connect to a satellite.
  2. Try calling your local emergency number (such as 911, 112, or 999), even if you’re outside of cellular and Wi-Fi coverage.

    If your carrier’s cellular network isn’t available, Apple Watch Ultra displays the satellite icon and attempts to route any emergency calls through other networks, if available.

    You can also go to the Messages app, then text your local emergency number (such as 911, 112, or 999).

  3. If the call or message doesn’t go through, tap Emergency Text via Satellite.

    A screen showing “No Connection” after an attempted call to emergency services. The Emergency Text button is at the bottom.

    Note: While off-grid, satellite features aren’t available on Apple Watch Ultra if your iPhone is nearby and in Airplane mode.

  4. Tap Report Emergency and follow the onscreen instructions, which include an emergency questionnaire.

    After you’ve completed the questionnaire, Apple Watch Ultra starts a text conversation by sharing important information including your Medical ID and emergency contact details (if you’ve already set them up). It also shares your answers to the emergency questionnaire, your location (including elevation), and the battery level of Apple Watch Ultra. You can also choose to share the information you send to emergency services with your emergency contacts.

Important: If an Emergency SOS via satellite session has started and you don’t need emergency services, don’t disconnect the satellite session. Exchange messages with the responder to tell them you don’t need help.

Other satellite-enabled services may also become available, including Messages via satellite and location sharing via satellite.

Send and receive messages via satellite

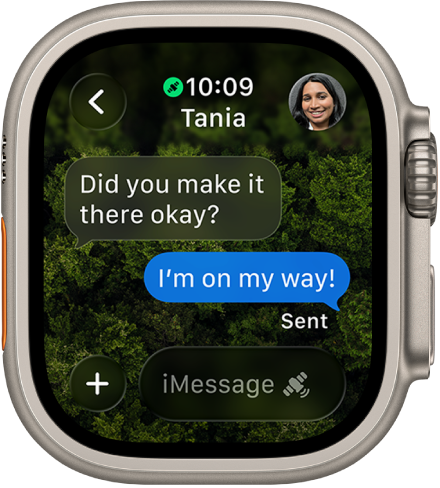
If you’ve set up Messages via satellite on Apple Watch Ultra, you can swap texts, Tapbacks, and emoji with friends and family over iMessage and SMS, even outside of cellular and Wi-Fi coverage. Before they’re sent, messages are encrypted end-to-end.

A screen showing a Messages conversation with the latest reply in a blue bubble marked as ‘Sent’. At the bottom is the compose field with a satellite icon, indicating satellite messaging capability.

Note: Messages via satellite is designed for casual communication with family and friends, not for emergency situations. To connect with emergency services, use Connect to Emergency SOS via satellite. SMS messages via satellite require your paired iPhone to be connected to a cellular or Wi-Fi network.

  1. Wear Apple Watch Ultra naturally on your wrist. Then ensure it has a clear line of sight to the sky. If you’re under heavy foliage or surrounded by other obstructions, you might not be able to connect to a satellite.
  2. On the watch face or in Control Center, tap the satellite icon and then tap Messages.

    You can also go to the Messages app. If you see an alert that you’re outside of cellular and Wi-Fi coverage, tap Use Messages via Satellite.

  3. Follow the instructions to connect to a satellite, while remaining aware of your surroundings. You may be instructed to adjust your position.
  4. Enter your message and tap Send.

Important: It might take a few minutes to send your message via satellite; continue to follow the onscreen instructions until the message is sent.

Send your location via satellite

Sending your location works even outside of cellular and Wi-Fi coverage, as long as you’ve set up location sharing via satellite on Apple Watch Ultra.

  1. Wear Apple Watch Ultra naturally on your wrist. Then ensure it has a clear line of sight to the sky. If you’re under heavy foliage or surrounded by other obstructions, you might not be able to connect to a satellite.
  2. On the watch face or in Control Center, tap the satellite icon and then tap Send Location.

    You can also go to the Find My app.

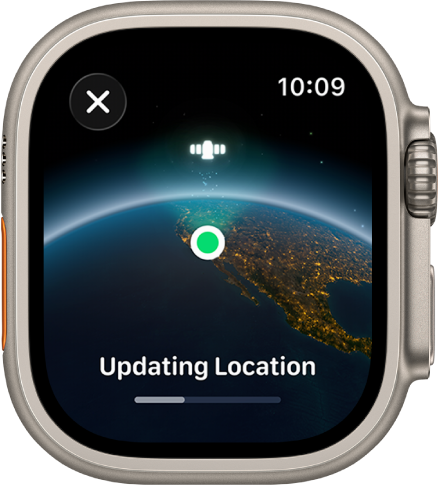
  3. Tap Update Location (available only when you’re outside of cellular and Wi-Fi coverage).

    A screen showing ‘Updating Location’ with a progress bar and a view of Earth from space with a green location indicator dot.

  4. Follow the instructions to connect to a satellite, while remaining aware of your surroundings. You may be instructed to adjust your position.

Important: It might take a few minutes to send your location via satellite; continue to follow the onscreen instructions until the location is sent. You can send your location once every 15 minutes. When you send your location via satellite, you don’t see your friend’s location in the Find My app.

See a friend’s location sent via satellite

In the Find My app, a satellite icon appears next to the picture and location of any contact who sends you their location via satellite, and their most recent location stays viewable for up to 7 days.

See also

In case of an emergency, use your Apple Watch to quickly call for help, share your Medical ID, and alert your emergency contacts.

How your watch reaches emergency services depends on your device model, location, and network availability. You can also keep your Medical ID and emergency contacts up to date, and update your emergency address if it’s changed.

Requirements

Your Apple Watch attempts to contact emergency services in the following ways, depending on your device model, location, and network availability:

  • Standard emergency calls: Your Apple Watch or nearby iPhone needs a cellular connection or Wi-Fi calling with an internet connection.
  • International emergency calls: Requires Apple Watch SE, Apple Watch Series 5, Apple Watch Ultra, or later models. When you start an Emergency SOS call while abroad, your watch connects to local emergency services, but it may not be able to send your location or a text message to your emergency contacts. In certain areas, international emergency calling works even if you haven’t set up cellular service on the watch.
  • Emergency SOS via satellite: On supported Apple Watch Ultra models*, you can contact emergency services even when you’re off the grid without cellular and Wi-Fi coverage. See Use Emergency SOS via satellite.

Contact emergency services

Do one of the following:

  • Start an emergency call: Press and hold the side button until the sliders appear, then drag the Emergency Call slider to the right.

    The emergency services screen. Near the top is the Medical ID slider, in the middle is the Compass Backtrack slider, and at the bottom is the Emergency Call slider.

    Your Apple Watch calls the emergency services in your region—for example, 911. (In some regions, you may be required to press a keypad number to complete the call.)

  • Use only the side button: Press and keep holding the side button until your Apple Watch issues a warning sound and starts a countdown. When the countdown ends, your Apple Watch calls emergency services. The Apple Watch makes the warning sound even if it’s in Silent Mode. So if you’re in an emergency situation where you don’t want to make noise, use the Emergency Call slider to call emergency services without a countdown.

    If you don’t want your Apple Watch to automatically start the emergency countdown when you press and hold the side button, turn off Automatic Dialing. Go to the Settings app on your Apple Watch, tap SOS, tap Hold Side Button, then turn off Hold Side Button. (Or go to the Apple Watch app on your iPhone, tap My Watch, tap Emergency SOS, then turn off Hold Side Button to Dial.) You can still make an emergency call with the Emergency Call slider.

  • Make a voice call: Ask Siri to call your local emergency number (such as 911, 112, or 999). Or go to the Phone app, tap the Dialer button, then dial your local emergency number.
  • Send a text message: Ask Siri to text your local emergency number (such as 911, 112, or 999). Or go to the Messages app, tap the New Message button, then text your local emergency number.

Apple Watch may automatically contact emergency services in the following situations:

  • When a hard fall is detected: If Fall Detection is turned on and you have been immobile for about a minute, Apple Watch automatically attempts to call emergency services. See Manage Fall Detection.
  • When a severe car crash is detected: If Crash Detection is turned on, Apple Watch displays an alert and can initiate an emergency phone call after 30 seconds. See Manage Crash Detection.

Important: If an emergency call has been made, but you don’t need emergency services, don’t hang up. Wait until a responder answers, then explain that you don’t need help.

Keep your Medical ID and emergency contacts up to date

After an emergency call ends, your Apple Watch alerts your emergency contacts and active Check In contact with a text message, unless you choose to cancel. Your Apple Watch sends your current location, and for a period of time after you enter SOS mode, your emergency contacts and active Check In contact receive updates when your location changes.

Note: If you use Emergency SOS, your emergency contacts won’t be automatically notified if the Messages app isn’t the selected text messaging app or is deleted.

To update emergency contacts, go to the Health app on your paired iPhone.

Update your emergency address

If emergency services can’t locate you, they go to your emergency address.

  1. Open the Settings app on your iPhone.
  2. Tap Apps, tap Phone, tap Wi-Fi Calling, and then tap Update Emergency Address.
  3. Enter your emergency address.

*Satellite features aren’t available on Apple Watch Ultra 2 and earlier models, aren’t available in all countries and regions, and aren’t offered on models sold in certain countries and regions. Satellite features are free for 2 years after the activation of your Apple Watch Ultra. Messages and location sharing via satellite require an active carrier plan.

See also

Use Check In to automatically notify a friend when your Apple Watch has arrived at a destination, when a workout session is completed, or after a specific period of time has passed. You can choose what details they can see if you don’t complete your Check In as expected.

You can start a Check In from Messages or from Workout. And if you’re running late, you can add extra time, or cancel the Check In.

Note: Check In requires the following:

  • Apple Watch must be near its paired iPhone or connected to the internet using Wi-Fi or cellular.
  • Both the sender and recipient must have an Apple Watch with watchOS 11 or later or an iPhone with iOS 17 or later.

Start a Check In from Messages

  1. Start the Messages app on your Apple Watch.
  2. Start a new message or select an existing conversation, tap the Apps button, and then tap Check In.
  3. Tap Edit, tap Check In, and then choose one of the following:

    • When I arrive: Specify your destination, how you’re traveling (driving, transit, or walking), and add extra time if needed.

      Check In monitors your journey and notifies your friend if your Apple Watch isn’t progressing for an extended period of time or if it doesn’t reach your destination as expected. When your Apple Watch arrives at the destination successfully, Check In automatically completes and notifies your friend.

    • After a timer: Specify a period of time—for example, if you’re meeting someone new.

      If you don’t end the Check In before the time you set, Check In notifies your friend.

  4. Tap Send.

Start a Check In from Workout

  1. Go to the Workout app on your Apple Watch.
  2. Turn the Digital Crown to the workout you want to do.

    Tap Add Workout at the bottom of the screen for sessions like kickboxing or surfing.

  3. Tap the workout to begin.
  4. Swipe right and then tap Check In.

Check In notifies your friend if the workout completes.

Add extra time for the Check In

  1. Open the Smart Stack. (From the watch face, swipe up from the bottom of the screen or turn the Digital Crown.)
  2. Tap the Check In widget.
  3. Scroll down, then tap Add Time.

Cancel a Check In

To let your friend know you’ve completed your journey, or that you want to end your session for whatever reason, you can cancel your Check In.

  1. From the watch face, turn the Digital Crown to open the Smart Stack.
  2. Tap the Check In widget.
  3. Scroll down and then tap Cancel Check In.

Choose what details you share

Your iPhone is where you can adjust the details you share with your friend during a Check In.

See also

When someone shares their location with you, you can use Find My to locate them on a map.

You can get directions to their location, call or message them, and send notifications when you leave your current location or arrive at their location. You can also receive notifications when your friend leaves or arrives, and see a list of all your friends.

Here’s how to locate people in Find My on Apple Watch.

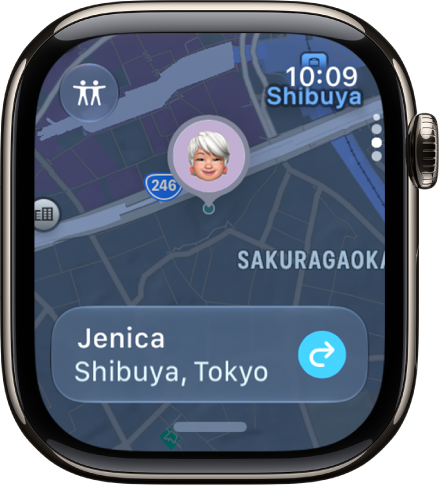
A Find My screen showing a friend's location on a map.

Find a friend’s location

  1. Start the Find My app on your Apple Watch.
  2. Tap the button at the top left and tap People.
  3. Turn the Digital Crown to scroll through your friends and see their locations on a map.

    Note: If your friend is wearing an Apple Watch with cellular service and is sharing their location, but they don’t have their iPhone or iPad with them, Find My shares the location of their Apple Watch.

  4. Tap the name of the person you’re looking for and then do any of the following:

    • Get directions to their location: Tap Directions to navigate in the Maps app.
    • Call or message your friend: Tap their name, then tap Contact.

Send and receive location alerts

When you leave your current location or arrive at a friend’s location, you can send notifications to that friend. Notifications can also come to you when your friend leaves their current location or arrives at yours.

  1. Start the Find My app on your Apple Watch.
  2. Tap the button at the top left and tap People.
  3. Turn the Digital Crown until you see your friend. Then tap their name.
  4. Scroll down to Notify Me or Notify [friend’s name] and then tap Add Location Alert.

See a list of all your friends in Find My

  1. Start the Find My app on your Apple Watch.
  2. Tap the button at the top left and tap People.
  3. Swipe up from the bottom of the screen to see the list of friends.

See also

Tag: Find My