Got a tip for us?

iPhone

The iPhone is a smartphone from Apple that runs the iOS mobile operating system. Between its apps, communication features, the camera, mobile internet access, and other functionalities, the iPhone has quickly become an integral part of many peoples tech lives.

During a one-to-one FaceTime video or audio call, you can remotely control someone else’s screen or allow a trusted person to remotely control yours. The person controlling the screen can help with an issue or demonstrate how to use an app.

You stay in charge, too. You can accept or decline a remote control request, and stop remote control at any time.

Here’s how to request or give remote control in a FaceTime call on iPhone.

Note: Remote control isn’t currently available in the European Union.

Request remote control

You can ask to control an iPhone screen that’s being shared with you.

Note: You and the other participant both need iOS 18 or later.

  1. Start the FaceTime app on your iPhone.
  2. Tap the window showing the shared screen, then tap the Remote Control button.

If the other participant accepts your request, you can tap or swipe to interact with the shared screen. You can also use the onscreen keyboard within apps.

Accept a remote control request

To remotely control your screen, a participant needs to be in your contacts and on an iPhone or iPad with iOS 18, iPadOS 18, or later. Additional restrictions may apply to remote control requests to help protect your data and privacy.

When you receive a remote control request notification in the FaceTime app on your iPhone, tap Allow.

WARNING: The person remotely controlling the screen can perform tasks on your iPhone such as opening and closing apps, changing settings, deleting items, or sending messages. Only approve remote control requests from people you trust.

Tasks like erasing your device, making payments, or changing your Apple Account or Face ID settings may be off-limits to the person remotely controlling the screen. Face ID and Touch ID don’t work during a remote control session.

You can still tap, swipe, or type while your screen is remotely controlled—your actions take priority over remote actions.

Decline a remote control request

When you receive a remote control request notification in the FaceTime app on your iPhone, tap Don’t Allow. Screen sharing continues, and the other participant can still tap, draw, or write on your screen to highlight important areas.

Stop remote control

At any time, you can end remote control in one of these ways:

  • If you’re allowing someone to control your screen: Tap Stop at the bottom of the screen sharing window.
  • If you’re controlling someone’s screen: Tap the Remote Control button at the bottom of the screen sharing window.

Ending a FaceTime call ends remote control and screen sharing, too.

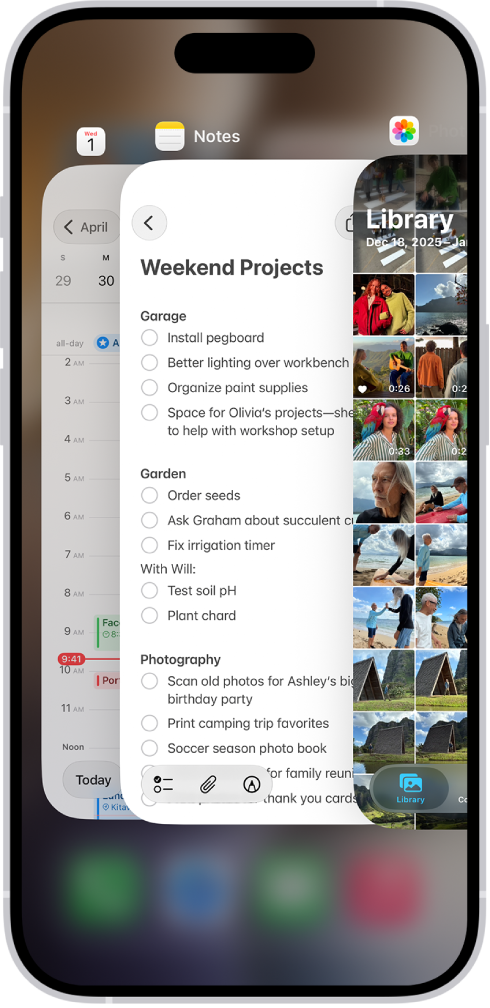
You can quickly switch from one open app to another on your iPhone. When you switch back, you can pick up right where you left off. The App Switcher shows all your open apps, and on an iPhone with Face ID, there’s an even quicker way to switch between open apps.

Use the App Switcher

  1. To see all your open apps, do one of the following:
    • On an iPhone with Face ID: Swipe up from the bottom of the screen, pause in the center of the screen and then lift your finger.
    • On an iPhone with a Home button: Double-click the Home button.
  2. To browse the open apps, swipe right and tap the app you want to use.

The App Switcher. Icons for the open apps appear at the top, and the current screen for each open app appears below its icon.

Switch between open apps

To quickly switch between open apps on an iPhone with Face ID, swipe right along the bottom edge of the screen.

On iPhone 18 Pro models, you can use Apple Reference Image to save and share additional data to verify the authenticity of a photo. Use Reference mode to take a photo and also capture the original data from the sensor in the Main camera.

You only have to turn on Reference mode once, in the Settings app. After that, it’s a camera mode like any other, and iPhone captures the original, signed sensor data with each photo.

Note: Apple Reference Image is not available in all countries or regions.

Before you begin

It’s a one-time step: turn on Reference mode in the Settings app.

  1. Open the Settings app on your iPhone.
  2. Tap Camera, then tap Reference Image.
  3. Tap Add Reference Mode, then follow the onscreen instructions.

Take a photo with a reference image

  1. Open Camera on your iPhone.
  2. Swipe to select Reference mode.
  3. Tap the Shutter button, or click the Camera Control (on supported models), to take the photo.

iPhone also captures the original, signed data from the Main camera’s sensor, so you can develop and view a reference image in Photos.

Tag: Photos

You control whether third-party apps have access to information in Contacts, Photos, Calendar, and other apps. The first time an app wants information from another app, it has to ask you and explain why, and you can change access later. You can also review how apps use the permissions you grant them.

Review or change access to information in apps

When an app first wants to use information from another app, you’ll get a request explaining why. A messaging app, for example, may request access to your contacts to find friends who use the same app. Whether you grant or deny access, you can change it later.

  1. Open Settings and then tap Privacy & Security.
  2. Tap a category of information, such as Calendars, Reminders, or Motion & Fitness.

    A list appears showing the apps that requested access. You can turn access on or off for any app on the list.

Review how apps are using the permissions you grant them

Go to Settings > Privacy & Security, then tap App Privacy Report.

To see how apps are using the permissions you granted them, and their network activity, check the App Privacy Report.

To turn off the report and delete its data, go to Settings > Privacy & Security > App Privacy Report, then tap Turn Off App Privacy Report. You can return to this Settings screen to turn the report on again.

You can add and delete photos and videos that you added to a shared album. You can also save photos and videos from a shared album to your photo library.

The people you share the album with are notified automatically when you add new photos. Everyone in the album can also react to content with emoji and comments that all participants can see.

Here’s how to contribute to a shared album on iPhone.

Add photos and videos to a shared album

  1. Open the Photos app on your iPhone.
  2. Tap Collections.
  3. Tap Shared Albums and tap an album.
  4. Tap the More button and then tap Add Photos.
  5. Select photos and videos and then tap the Done button.

Whenever you add new photos, the people you share the album with get notified automatically.

Note: Seeing Items Not Shared after adding content to the album usually means the organizer is short on iCloud storage. Ask them to make sure they have enough for new content.

Comment and react to shared album content

In a shared album, you can react to content with emoji and comments, and all participants can see them.

  1. Open the Photos app on your iPhone.
  2. Tap Collections.
  3. Tap Shared Albums and tap an album.
  4. Tap a photo or video and then tap the Reactions button to react with an emoji, or tap the Comment Lines button to enter a comment.

To delete a comment, touch and hold it, then tap Delete. You can only delete your own comments, unless you’re the album organizer, who can delete any comment.

View shared album activity

  1. Open the Photos app on your iPhone.
  2. Tap Collections.
  3. Tap Shared Albums and tap Activity.
  4. The latest contributions to your shared albums are shown here.

Tap the Updates button to see a detailed feed of all activity in your shared albums. Tap the Reactions button or the Comment Lines button below a contribution to leave a reaction or comment. Tap the More button to save content someone else contributed or to delete content that you contributed.

To view activity for a specific shared album, tap the album, then tap the Conversation button.

Filter shared album content

  1. Open the Photos app on your iPhone.
  2. Tap Collections.
  3. Tap Shared Albums and tap an album.
  4. Tap the Sort and Filter button, tap Media Types or Shared By, and tap a filter option.

To remove the filter, tap the Sort and Filter button, then tap Remove Filter.

Delete photos, videos, and comments from a shared album

In a shared album, organizers can delete any photos, videos, or comments, but participants can only delete content they personally added. Whatever’s deleted is removed from the shared album automatically, both on all your devices and on the devices of every participant.

  1. Open the Photos app on your iPhone.
  2. Tap Collections.
  3. Tap Shared Albums and tap an album.
  4. Do either of the following:
    • Delete multiple items: Tap Select, tap the items to delete and tap the Delete button. Then tap Delete from All Devices.
    • Delete a single item: Tap the photo or video, tap the Delete button, and then tap Delete from All Devices.

To delete a comment, touch and hold it, then tap Delete. You can only delete your own comments unless you’re the album organizer, who can delete any comment.

Save photos and videos from a shared album to your library

  1. Open the Photos app on your iPhone.
  2. Tap Collections.
  3. Tap Shared Albums and tap an album.
  4. Tap the More button. Then tap Save All Shared Items or Save Remaining Items.

To save a single photo or video, tap the image to open it, then tap the Save button.

Tag: Photos

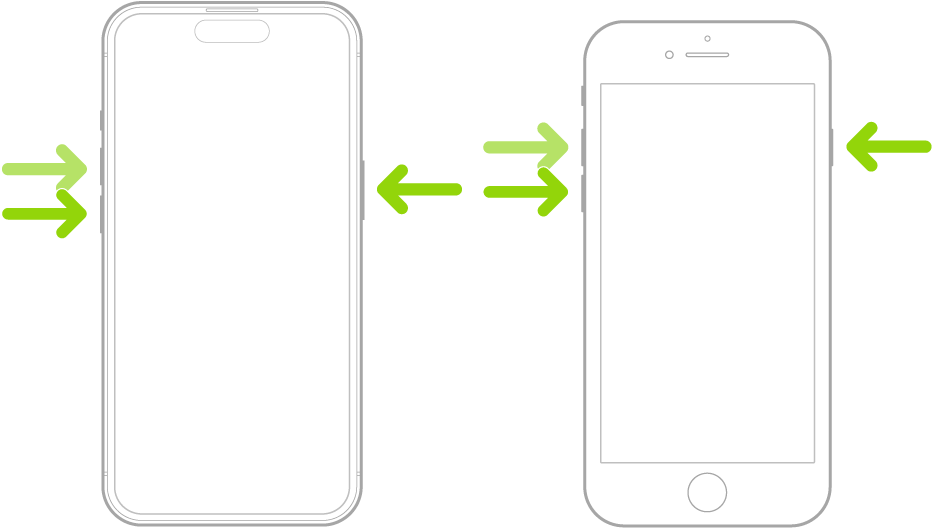
If iPhone isn’t responding, and you can’t turn it off then back on, try forcing it to restart. A force restart uses the volume up button, the volume down button, and the side button on your iPhone. When the Apple logo appears, you’ll know it’s restarting.

  1. Press and quickly release the volume up button.
  2. Press and quickly release the volume down button.
  3. Press and hold the side button.
  4. When the Apple logo appears, release the side button.

Two iPhone models, one with a Home button and one without, screens facing up. The volume buttons of each are on the left, and the side button is on the right.

Tag: iPhone

You can import photos and videos directly to the Photos app from a digital camera, an SD memory card, or another iPad or iPhone that has a camera. You can also export unmodified versions of your photos and videos directly to an external drive, memory card, or other storage device that’s connected to your iPhone.

To import from a camera, you connect it with an adapter and make sure it’s in transfer mode.

Import photos and videos to your iPhone

From another device, such as a digital camera or an external drive, you can import saved photos and videos to the Photos app on your iPhone.

  1. Insert the camera adapter or card reader into the Lightning or USB-C connector, or connect the device directly to your iPhone.
  2. Do one of the following:
    • Connect a camera: Connect the adapter to the camera and then turn on the camera and make sure it’s in transfer mode.
    • Connect an external storage device or insert an SD memory card into the card reader: Don’t force the card into the slot on the reader; it fits only one way.
    • Connect an iPhone or iPad: Use the Lightning adapter or the USB-C cable that came with the device to connect it to the camera adapter. Turn on and unlock the device.
  3. Start the Photos app on your iPhone.
  4. Tap Import.
  5. Select the photos and videos you want to import. Select your import destination.
    • Import all items: Tap Import All.
    • Import selected items: Tap the items you want to import (a checkmark appears for each), tap Import, and then tap Import Selected.
  6. After the photos and videos have been imported, keep or delete them on the camera, card, iPhone, or iPad.
  7. Disconnect the camera adapter or card reader.

Export photos and videos to an external storage device

You can export photos and videos you took on your iPhone straight to a memory card, an external drive, or another storage device.

Note: For edited photos and videos, the export is the unmodified original version.

  1. Connect your iPhone to the storage device using the Lightning or USB-C connector, or connect the device directly to your iPhone.
  2. Start the Photos app on your iPhone.
  3. Select the photos and videos you want to export.
  4. Tap the Share button and then tap Export Unmodified Original.
  5. Tap your storage device (below Locations) and tap Save.

Photos and videos in the Hidden album won’t be transferred if the album is locked. To unlock the Hidden album, go to Settings > Apps > Photos, then turn off Use Face ID, Use Touch ID, or Use Passcode.

Tag: Photos

You can move apps and widgets anywhere on the Home Screen to create the ideal layout: frame your wallpaper photo, align apps and widgets along the side or bottom, or move them to other Home Screen pages. If you have multiple Home Screen pages, each one can have a unique layout.

You can also temporarily hide Home Screen pages and change where new apps get downloaded. And if you change your mind, you can reset the Home Screen and apps to their original layout.

Quick tip: One Home Screen page can hold all your apps and widgets for a particular Focus, such as your Work Focus, and you can make that page accessible during that Focus.

Move apps and widgets on your Home Screen

  1. Go to the Home Screen.
  2. Touch and hold the Home Screen background until the items begin to jiggle.
  3. Drag the app or widget to one of the following locations:

    • Another location on the same page—including the top, bottom, or side of the screen
    • Another Home Screen page

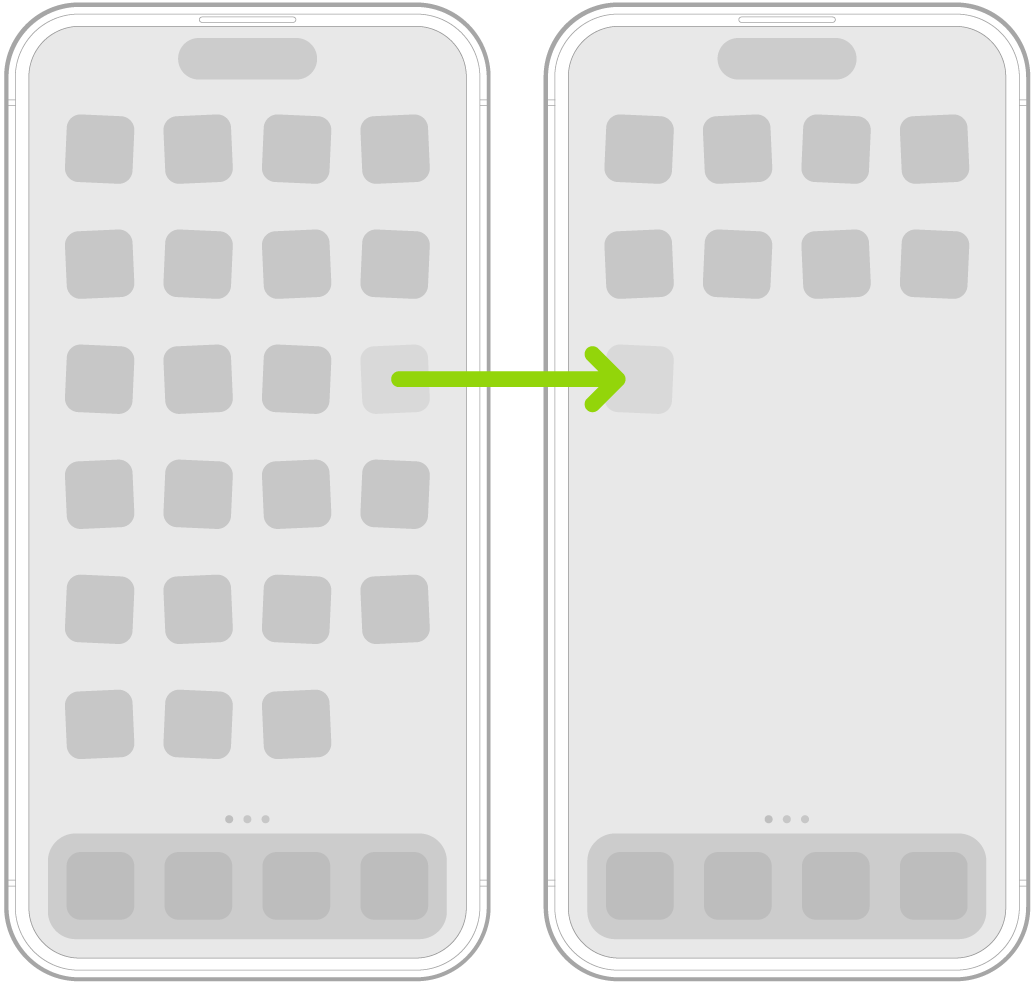
      Drag the app or widget to the right edge of the screen. You might need to wait a moment for the new page to appear. The dots show how many pages you have and which one you’re viewing.

    Jiggling apps on the Home Screen with an arrow showing one app being dragged to the next page.

  4. When you’re finished, press the Home button (on an iPhone with a Home button) or tap the Home Screen background (on other iPhone models).

Reset the Home Screen and apps to their original layout

  1. Open the Settings app on your iPhone.
  2. Tap General, then tap Transfer or Reset iPhone.
  3. Tap Reset and tap Reset Home Screen Layout. Then tap Reset Home Screen.

Apps you downloaded are arranged alphabetically after the apps that came with your iPhone, and any folders you created are removed.

Most of what has been written about iOS 27 describes Siri AI. These are the iOS 27 tips that are easy to miss. Settings buried two panes deep, a gesture Apple removed quietly, and features with a catch worth knowing first.

Every tip here is new in iOS 27 release, and comes from my own testing rather than from Apple’s feature list.

1. Where Siri went

You can bring up Siri (by default), as in previous releases, by saying “Siri” or “Hey Siri,” or by pressing and holding the side button. However, the change introduced in iOS 26 that let you double-tap the bottom of the screen is gone. In iOS 27, you can swipe down on a Home screen to reveal the new combination of Spotlight and Siri: a field labeled Search or Ask. You can type into that field, or tap the Dictation icon and talk to Siri that way.

2. Set the Liquid Glass level

When you upgrade to iOS 27 or iPadOS 27, the last stages of the installation present a new screen that lets you choose to adjust Liquid Glass using a slider. If you don’t make the adjustment at that moment, you can do so later, or change your initial choice. Go to Settings > Appearance > Liquid Glass.

This new screen offers a slider you can drag from the left edge, which Apple describes as “More Clear” (most Liquid Glass effect) across a range to the right: “More Tinted” (most opaque). Apple makes it easy to visualize by providing a scrollable preview that shows Liquid Glass elements overlaid on a webpage with images and text.

3. Flatten Liquid Glass completely

Go to Settings > Accessibility > Display & Text Size and enable Reduce Transparency. This flattens Liquid Glass, removing transparency and providing an almost identical look to iOS 18/iPadOS 18. The level of Liquid Glass you have enabled doesn’t have an effect.

Use Settings > Accessibility > Display & Text Size > Increase Contrast to bump up the difference in tones. In iOS 27/iPadOS 27, the difference appears slight, where it was sharply distinct in the previous releases.

4. Why the slider is locked

You can’t change the Liquid Glass intensity when either of those two options is enabled. When you attempt to change the Liquid Glass setting, you’re told that Reduce Transparency and Increase Contrast must be disabled. You can tap Turn Off.

5. Give alarms their own volume

It took this long for Apple to let you set the volume of alarms and timers hitting zero seconds separately from your ringtone volume. Go to Settings > Sounds & Haptics and, under Alarms and Timers, disable Match Ringtone Volume.

6. Stop clinging to dead Wi-Fi

In iOS 27, Apple rebranded the Wi-Fi Assist feature as Connectivity Assist, and if you had Wi-Fi Assist enabled—it was by default—you’ll find the new feature already turned on in Settings > Wi-Fi.

7. Use both FaceTime cameras

After many, many years of FaceTime supporting a single camera view on iPhone, you can now use the front and back cameras simultaneously. The proviso? You need an iPhone 17, iPhone 17 Pro, iPhone 17 Pro Max, or iPhone Air and iOS 27. The other person or people can see your dual-camera feed only if they have iOS 27, iPadOS 27, or macOS 27. (This builds off the dual-capture mode in the Camera app on those models introduced in iOS 26.)

To use the dual-camera mode, in an active FaceTime session (or before someone has joined), tap the Flip Camera button in the inset selfie view. This shows both cameras by default.

8. Share location for any period

Previously, you could share your location for an hour, until the end of the day, or indefinitely. Now you can set a custom period of time.

9. Hide your location silently

If you’re sharing your location with someone, you can hide your location from your end until the next morning (at 4 a.m.), and they’re not notified. They’re also not told when you resume sharing, or “unhide” your location. They simply see you with a “location unavailable” label.

10. Photo keywords, at last

It took many years, but you can finally apply keywords to media in the Photos app on an iPhone and iPad. Huzzah? (Keywords are a useful way to link images for searching and organization.) However, you can still only apply keywords to items one at a time, as opposed to singly or in selections of two or more on a Mac. To add keywords, tap the info button, then tap Add Keywords.

11. See only what you selected

When you make a selection by tapping the Select button in the upper-right corner of any multiple-item view in Photos, a new Show Selected button appears at the bottom. Tap it, and it reveals just the items you chose. You can adjust the selection or view the images and videos in a carousel. Tap Deselect All to remove the current selection.

12. Two albums appear by themselves

Apple adds two new albums in Collections > Utilities. Captured by Me contains images or videos you created using any iPhone or iPad, such as via the Camera app or by taking a screenshot. The Identity Documents album uses machine learning (not Apple Intelligence) to collect scans or photos of personally identifying documents. (Identity Documents hasn’t yet appeared for me in iOS.)

13. Upgrade a Shared Album first

In iOS 27/iPadOS 27 (and on macOS 27 and at iCloud.com), you have access to several new features. However, you must first upgrade an album: select the album in Collections > Shared Albums, tap the More button, then tap Upgrade Shared Album. This may take some time—minutes or longer—depending on the size of the items in the library and your internet connection.

After upgrading, you have access to the following:

  • Full-resolution photos and videos are now supported across all common formats.
  • You can filter by photos or videos. Tap the Filter button, then tap Media Types.
  • There’s a Create Shared Album option for any existing album. Tap the More button, then tap Create Shared Album.
  • Albums can be set to expire after 30 days, but only when created. After creating a Shared Album from an existing album or by tapping the Add button in the Collections > Shared Albums view, enable Make Album Temporary.
  • You can create an upload link that allows anyone—not just people with access to the album—to upload images. With the album selected, tap the Share button, tap “Only invited people can join,” and choose Anyone with the Link. (This is similar to other kinds of sharing across iOS 27/iPadOS 27.)
  • A recent activity log lets you see changes made to the album, including emoji reactions. (This doesn’t yet appear to be in place.)

14. Save a video still

You can extract a frame from a paused video to save as an image. Tap the More button and choose Save Video Frame.

15. Make Photos sync now

Photos often decides to pause syncing to iCloud to avoid draining the battery, even when the battery is quite full. You can now go to Settings > Apps > Photos > Sync Immediately and choose For Today. This prioritizes syncing instead of preserving battery life for the remainder of the calendar day. If Low Power Mode or Low Data Mode are enabled, Photos will still pause until those modes are turned off, such as by recharging the phone for the former.

16. Slideshows without Memories

Slideshows can now be built from any album or even a selection of media, rather than relying on memories.

17. Search a podcast’s episode notes

If you navigate to a podcast’s view of all of its episodes by tapping the podcast and then tapping Episodes, you can now search against the title and show notes of all listed episodes.

This doesn’t search transcripts, which Podcasts generates for some shows. It searches only the per-episode notes published in the podcast feed.

18. Watch a page for changes

On any page, tap the Page Info button and choose Notify Me. Here’s the interesting part: You write in plain language what you want Safari to check for, then tap Next. Safari will check daily by default. You can tap Edit while creating the notification or afterward to switch to hourly, weekly, or monthly, and set the time of day.

19. Scan a card into Wallet

You can create entries for cards, membership cards, and other kinds of barcode/QR code-related proofs of entry or membership from scratch, a task formerly available only for third-party apps and websites.

Tap the Add button in Wallet, then tap Create a Pass. You’re guided through a few steps, one of which lets you scan the existing card, so that Wallet can pull in its number, barcode, or QR code. You can fill out details that aren’t present on the card or captured by Wallet.

20. Share details at the till

Entirely new is Tap to Share with merchants at the point of sale, such as in a store or at a fair. This makes in-person Apple Pay more akin to Apple Pay in Safari. Tap to Share lets an entire set of interactions occur before you pay. You start by approving a connection with a merchant’s iPhone that has a supported payment app. (Ostensibly, this may encompass not just companies like Square and Stripe, but in-house developer apps for retailers like Old Navy or Lowe’s.)

Once you begin, you can choose what you share with the business—like contact details, a shipping address, or your email. This also means you don’t have to state this information aloud or rely on the merchant typing it in correctly! A merchant can offer to sign you up for a membership or loyalty program. You can use a pass from the merchant, or they can issue one, related to discounts, credits, or other transaction-related purposes. Finally, you see the full cart as a digital receipt before completing payment with Apple Pay.

21. Read anything in Accessibility Reader

Accessibility Reader used to require a shortcut trigger. Now, you can use the share menu in any app to open content in the reader.

22. Captions for any video

Your iPhone and iPad now generate captions from any uncaptioned video you’re watching in Photos and other supported apps. (This isn’t related to tvOS or TV app captioning.) If captions already exist, you can have them automatically translated between supported languages.

23. iPad tips: the menu bar

In iPadOS 26, the menu bar had to be triggered either by swiping down from the top of the display or by hovering with a pointing device, at which point it would appear. It then hid, after a short delay, when it wasn’t in use or being hovered over.

In iPadOS 27, the default behavior appears similar, but there are two significant changes:

  • The app name always appears on the far-left side of the menu bar, at the upper-left corner of the screen.
  • To unfurl the menu bar, tap or drag over the app name.

Along with that new behavior, you can also opt to have the menu bar remain in place, persistent at all times. Go to Settings > Multitasking & Gestures, then disable Automatically Show and Hide Menu Bar.

24. React to a keyboard connecting

Apple previously didn’t offer a way to trigger an automation when a keyboard was connected to or removed from an iPad. This frustrated some users, who interact with their iPad differently when a keyboard is connected—such as in a dock-style environment—and when they are using only the touch screen or an Apple Pencil.

Now, you can use Shortcuts to create automations based on whether a keyboard was connected, disconnected, or the keyboard connection state changed. This includes the “Set multitasking mode to” item. You might want to switch between Full Screen Apps and Windowed Apps when using your iPad without a keyboard. You’d have to set up two shortcuts: one would trigger when the keyboard was attached; the other when detached.

For more iOS 27 tips and tricks, see the complete guide to every iOS 27 feature. There are also 36 changes that owe nothing to AI that I recommend you to check out.


Siri AI is the flagship of the version 27 releases. Most of what has been written about it describes what it can do. These are the Siri AI tips and tricks that are easy to miss. Settings that are not obvious, shortcuts Apple has not documented, and two limits that explain most failures. I tested these Siri AI tips on my iPhone, iPad and Mac rather than reprinting Apple’s feature list.

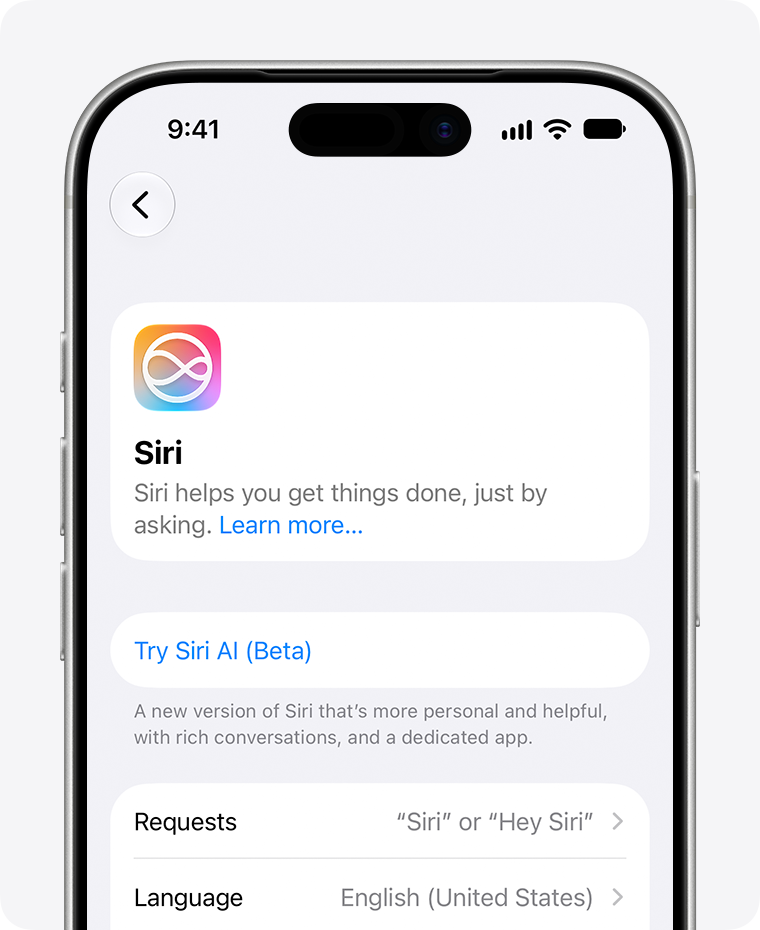
iPhone showing the Try Siri AI \(Beta\) option.

1. Which Siri are you running?

Open the Siri pane of Settings on an iPhone or iPad, or System Settings on a Mac. It tells you whether Siri AI is currently engaged, which is not always the case:

  • If you see the new monochrome Siri icon, that means your device is currently configured to use Siri AI.
  • If you see the old, colorful Siri icon, that means it’s not.

Among the reasons the old icon might appear are that your device, or Siri, is set to an incompatible language, that the two language settings described below don’t match, or that you have turned off Siri.

2. The silent language trap

Initially, only English is supported for Siri AI, though Apple plans to add more languages over time. As a result, if you set language to anything other than English, your device reverts to the old Siri—with the old icon—rather than Siri AI, with the new one.

In addition, both your Siri language and your system language (in Settings > General > Language & Region > Preferred Languages) must be identical—including the dialect, if applicable on your device. For example, if one is set to English (United States) and the other is set to English (Canada) on a Mac, you’ll get the old version of Siri. Make sure the two match—and note that switching your system language may require a restart.

3. Just type what you want

This automatic recognition of your query type means you don’t have to think about how you formulate a search or question: type what you want and let Siri figure it out. If the results list for a search doesn’t suffice, elaborate on what you’re asking.

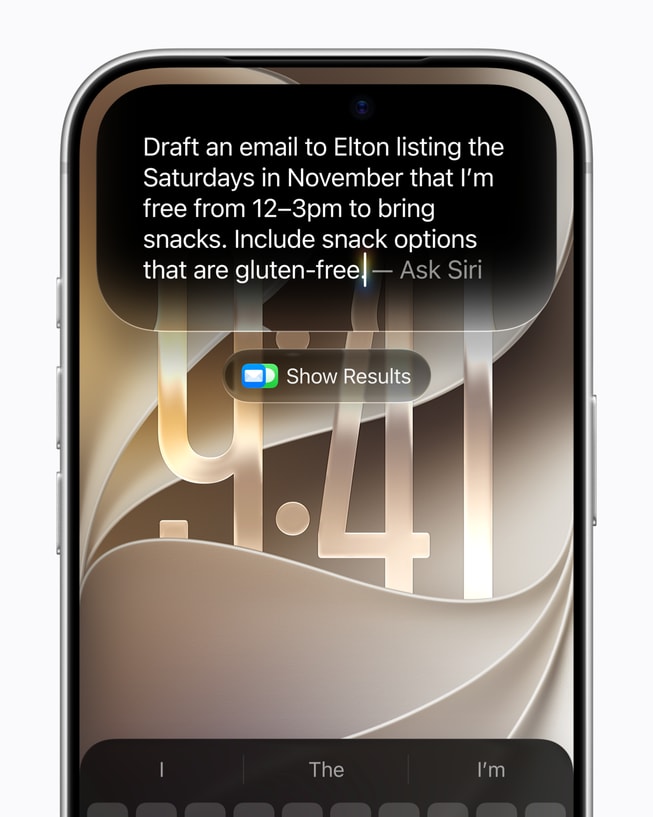
Using Siri AI to draft an email.

4. Send one question to ChatGPT

You can also explicitly add “ChatGPT” to a request—for example, “Ask ChatGPT the best way to fry an egg.” This works with spoken requests, too!

To route a single question to ChatGPT from the Search or Ask field:

  1. Activate Siri using a method where you can type to it.
  2. Touch and hold in the Search or Ask field on an iPhone or iPad, or Control-click/right-click that field on a Mac.
  3. From the menu that appears, choose Ask > Use ChatGPT.
  4. The text in the field changes to ChatGPT. Enter your query.

5. Plain Spotlight, on a Mac

What if you just want a plain Spotlight search, without Siri’s involvement at all? You can still have it, with some extra effort.

On a Mac, activate Siri and type a search term, then press ⌘-2 to search for that term only within files and folders. You can also press ⌘-1 to look for apps, ⌘-3 to look for actions, or ⌘-4 to search your clipboard history.

Siri AI is shown on a user's Mac.

On any device, you can also specify as part of your search term where Spotlight should look—for example, “Files about cats”, “Contacts named John” or “Emails about Apple”.

6. Keep talking, don’t restart

However you navigate to activate Siri, you can immediately type or speak something after its response to whatever your first question or requested action was.

This can be useful if Siri’s first response or action wasn’t sufficient, or if it provided information or succeeded and you want to follow up by using context. You don’t have to define your scenario once again, which Siri often required before Siri AI.

7. Slow Siri down

It has long been possible to choose among various male- and female-sounding voices and even different dialects, and Siri AI adds even more choices. But now, you can also adjust Siri’s speed and expressiveness. If you want a zippy, flat, “just the facts” response; a relaxed, cheerful response; or anything in between, you can go to Settings > Siri on an iPhone or iPad, or System Settings > Siri on a Mac, and click or tap Voice. On this pane, you can select a base voice and then drag the Pace and Expressivity sliders as sample responses are played to dial in exactly the tone you prefer.

This feature requires more advanced chips than are needed for Apple Intelligence. See which devices support Siri AI.

8. Stop Siri talking back

You have two choices as to how Siri responds to requests:

  • Spoken Response: Siri speaks responses when you speak to Siri, but provides textual responses when you type to Siri.
  • Silent Response: Siri almost always provides textual responses. But note that even with this setting, Siri speaks responses if you’re driving or wearing headphones—and possibly in other limited situations.

9. Pin, share, or speak

You can pin a selected conversation, which anchors it at the top of the list. To pin on a Mac, choose Conversation > Pin Conversation, or right-click or Control-click and choose Pin from the contextual menu. On an iPhone or iPad, you can swipe left and tap the Pin icon, or touch and hold and choose Pin.

To share a specific response—not a conversation as a whole—as a PDF, you can click the Share icon on a Mac, or touch and hold the response on an iPhone or iPad and choose Share.

In any conversation in the Siri app, you can click or tap the microphone button to speak your request rather than type it.

10. Control what Siri keeps

Your device can store all your Siri conversations indefinitely, or it can delete them after 30 days or a year. To configure this, go to Settings on an iPhone or iPad, or System Settings on a Mac, then Your Name > iCloud > See All > Siri, and choose 30 Days, 1 Year, or Forever from the Keep Conversations pop-up menu.

The same pane controls syncing. You can disable Sync this Device, which is enabled by default. The Keep Conversations setting is synced with the main Siri retention setting: change it here, and it’s changed globally, not just for iCloud.

11. Summaries did not disappear

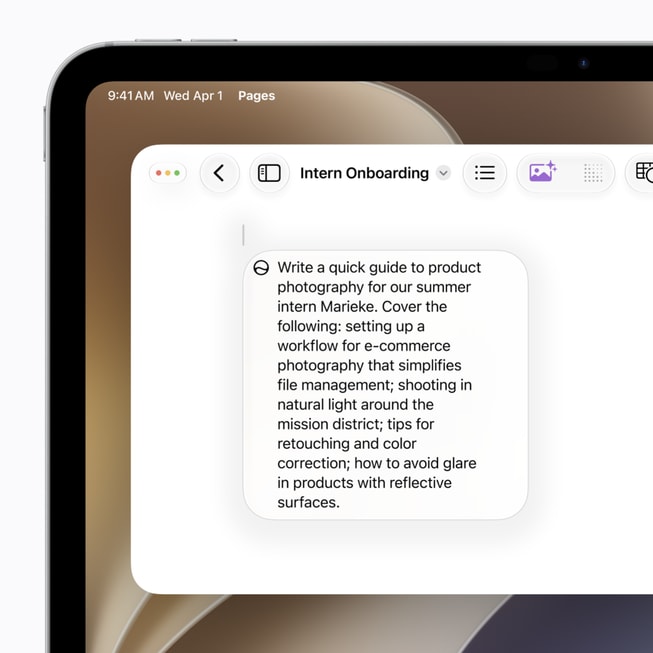
Options that were formerly part of Writing Tools, such as Summary, Key Points, List, and Table, no longer explicitly appear in the Write/Edit with Siri interface, but you can still use them. In the Edit with Siri field, you can type “Summarize this” or “Make this into a list”, for example, and Siri does just that.

12. When the Siri icon is missing

If the Siri icon doesn’t appear (as is the case in Messages, for example), you can right-click or Control-click (on a Mac) and choose Ask Siri, or tap once to bring up the text menu (on an iPhone or iPad) and then tap the Siri icon to display an “Ask Siri about this” field.

13. Turning Siri off changes less

Unlike in the previous two generations of Apple’s operating systems, you can no longer disable Apple Intelligence completely, and if you want to disable Siri (along with portions of Apple Intelligence), you must scroll to the bottom of the pane, click or tap the red Turn Off Siri button, read a long description of all the things that will stop working if you do, and then click or tap Turn Off Siri.

Even if you turn off Siri, “Visual Intelligence will continue to work but with more limited capabilities,” though Apple doesn’t spell out what those limitations are, and other Apple Intelligence features such as Write/Edit with Siri, Image Playground, and Shortcuts continue to work. All this is Apple’s heavy-handed way of pushing these new features, even if you actively dislike them and don’t ever want to use them.

14. The shortcut you cannot change

One thing you might be surprised not to see in the Siri settings pane is a setting for the keyboard shortcut that invokes Siri on a Mac. Although you can change the Spotlight keyboard shortcut and the shortcuts used for Siri screenshots (in System Settings > Keyboard > Keyboard Shortcuts > Spotlight and Screenshots, respectively), there’s no evident way to change the Siri shortcut to anything else.

15. Two limits worth knowing

Remember that the data has to exist for Siri to answer. I rely on a third-party email client, so Siri seems to have limited access to my email stores for now. But nearly everything else i do is stored in and synced by iCloud.

The second limit is music. Siri only knows about locally stored music from its metadata, as far as i can tell, or at least without asking further questions. For additional Siri AI tricks, see the complete guide to Siri AI.