Got a tip for us?

Mac

Mac OS, Mac OS X, or macOS, is the operating system that resides on Apple’s desktop and portable computer lineup. Built upon a Unix core, it is easy to use yet highly advanced, extremely stable, and an excellent OS for productivity and creation. Browse through our articles to
look for something specific that is pertinent to the Mac operating system.

Setup Assistant runs at the end of the installation, whether you upgraded in place or installed clean. It looks like a continuation of the installer and never shows its own name, which is why the screens it puts in front of you can feel like part of macOS 27 Golden Gate itself.

After an in-place upgrade

What happens next depends on how your Mac was previously set up:

  • If you had Automatic Login turned on previously, macOS 27 should log you in automatically.
  • If Automatic Login was off, your entire screen becomes a login screen. Select (or enter) your username if necessary, enter your password, and press Return to log in. This initial login process may take longer than usual, so be prepared to wait a few minutes before the login screen disappears.

The first time you use macOS 27, the installer’s Setup Assistant app runs, although you won’t see that name; if it appears at all, it looks like a continuation of the installer itself. Setup Assistant may display one or more screens that ask you to make various setup choices.

If you happen to be installing macOS 27 onto an external drive connected to a Mac with a Touch ID sensor, you may see an additional screen here prompting you to set up Touch ID (again).

One choice you’ll see is a Liquid Glass slider, which lets you adjust the transparency for some Liquid Glass interface elements. Set this however you like. (I prefer all the way to the right, the most heavily tinted—or as little transparency as possible.) You can change this later in System Settings; see how to reduce Liquid Glass.

Depending on which version of macOS you’re upgrading from and your previous settings, you may also see one or more additional screens. Those include (not necessarily in this order):

  • Sign in with Your Apple Account: Even if you were signed in to iCloud in your previous version of macOS, this screen may prompt you to sign in again. Depending on the circumstances, you may be asked only for your password, or for both your Apple Account username and password. If you don’t want to enter an Apple Account username—and are willing to forgo all iCloud features for the present—select Set Up Later, click Continue, and then click Skip again to confirm. (You can enter this information later, in System Settings > Apple Account.)
  • Terms and Conditions: Setup Assistant wants to be sure that you’ve consented to a bunch of additional legalese, so it may invite you to read, study, and agree to one or more statements, such as “macOS Software License Agreement” or “Game Center Terms and Conditions.” Handle these however you want; I’ve found that my lawyer enjoys chatting with me about each paragraph of such agreements in detail (at his usual hourly rates).
  • Enable Location Services: If you hadn’t previously enabled Location Services (which is used for iCloud’s Find My Mac feature, Maps, Spotlight suggestions, and numerous other things), a dialog may appear asking whether you’d like to do so. Check “Enable location services on this Mac” if you like (if you leave this disabled, you can enable the setting later in System Settings > Privacy & Security > Privacy > Location Services), or click the “About Location Services & Privacy” link to learn more.
  • Analytics: macOS 27 can automatically send diagnostic and usage data to Apple and/or third-party developers to help them track down the causes of crashes and other bugs you may encounter. This information is anonymous and doesn’t contain personal data.

If you want to send this troubleshooting data in the event that a problem occurs, select Send Diagnostics & Usage Data to Apple. With that selected, you may also select Share Crash Data with App Developers. (You can’t share crash data with app developers unless you also share diagnostic data with Apple.)

  • Siri: You may see a Siri screen that simply reminds you that you can now say “Siri” instead of “Hey Siri” if you like. If you’re updating from a much older version of macOS without Siri enabled, you may also see a prompt asking whether you’d like Siri to listen for your spoken requests. A second Siri screen, titled Improve Siri & Dictation, could also appear, asking you to give Apple permission to listen to recordings of your voice in order to improve speech-to-text accuracy. For privacy reasons, I recommend selecting Not Now.

You can always enable or disable Siri later: go to System Settings > Siri > Requests once macOS 27 is up and running and choose your desired setting.

If you had to struggle through any or all of that, here’s when the “Setting Up Your Mac” screen makes its brief appearance. Then Setup Assistant quits automatically, and your macOS 27 desktop appears.

Not sure whether you’ve successfully upgraded since you missed the end of the process? Choose Apple menu > About This Mac. If the window says 27.0 or higher at the top under “macOS,” you’re running macOS 27.

After a clean install

Setup Assistant is an app that looks like a continuation of the macOS 27 Golden Gate installer, and the installer doesn’t display the name “Setup Assistant.” The assistant runs automatically after macOS 27 restarts at the end of the installation process, and walks you through a number of setup and configuration questions. It also offers to transfer files from another Mac or PC, another volume (which can be a bootable or data-only duplicate), or a Time Machine backup. That part is covered in how to use Migration Assistant.

Here’s an overview of the main screens you may see. Depending on your hardware setup and which decisions you make as you work your way through the installer, this list may vary somewhat:

  • Hello: A “hello” screen greets you in a series of languages, changing every few seconds. There’s just one button at the bottom of the screen, “Get Started,” which you should click—even if the language has changed and you can’t read what it says!
  • Select Your Country or Region: Your first task is to select a country or region on the Welcome screen and click Continue.
  • Written and Spoken Languages: In some cases, you may be asked to confirm your preferred written and spoken languages, including those used for your keyboard and dictation.
  • Accessibility: This screen gives you a convenient way to set a wide variety of accessibility preferences. Clicking any of the four titles shown (Vision, Motor, Hearing, or Cognitive) leads you through a series of options in that category, each with graphical descriptions of what the options do. You can adjust any or all of these, in any order—or click Not Now if you want to adjust them later in System Settings.
  • Select Your Wi-Fi Network: Setup Assistant next looks for a network connection. You see a screen called Select Your Wi-Fi Network. Select the network to which you want to connect and, if required, enter the password. Then click Continue. (If you connect to the internet some other way—or if you have no internet connection—click Other Network Options and select the appropriate option.)
  • Data & Privacy: A Data & Privacy screen appears, showing a handshake icon. Read the screen to learn that this icon should appear when an Apple feature is asking for permission to use your personal information. Finally, click Continue.
  • Migration Assistant: Next is the Migration Assistant screen, which enables you to transfer files from your backup.

Although you could choose not to transfer your information now and use the standalone Migration Assistant app later, I generally find it quicker and more convenient to do it here. If you’re tempted to skip this step in order to have a completely clean copy of macOS 27, be sure to read about the nuke-and-pave option.

The next steps in Setup Assistant are mostly self-explanatory.

Depending on which version of macOS you’re upgrading from, what information you transferred, and your previous settings, you may see one or more additional screens. Most of these are identical to those described above. After each one, click Continue to advance through the remaining screens.

Regardless of what, if anything, Setup Assistant displays, macOS 27 itself may display any number of dialogs and alerts the first time you use it, such as password prompts, software update messages, and requests to enable various features. To learn how to deal with these and other immediate concerns, see what to do after installing.

Check for proper operation

In all probability, your upgrade will have gone smoothly, and everything will now work more or less the way you expect. However, even if everything looks fine, don’t declare upgrade victory until you have worked through the post-installation tasks, including dealing with any alerts and queries that pop up shortly after installation, checking for software updates, and configuring a few new options in System Settings.

If anything did go amiss, or if you later discover problems that aren’t solved by troubleshooting the upgrade, you can fall back to a clean install.

The short-lived Apple Intelligence & Siri setting pane is no more. In its place is a Siri pane, complete with a new icon. (For more about Siri on the Mac.)

In order for the new version of the pane, with its new icon, to appear, the Language setting on the pane must currently be set to English (United States). Set it to anything else—even English (Canada)—and you get the old icon with the Tahoe-era Siri features. Language support should expand in the future.

The most prominent change is that unlike the old pane, the new one no longer has either an Apple Intelligence switch or a Siri switch at the top. That is, you can no longer disable Apple Intelligence completely, and if you want to disable Siri (along with portions of Apple Intelligence), you must scroll to the bottom of the pane, click the red Turn Off Siri button, read a long description of all the things that will stop working if you do, and then click Turn Off Siri.

Interesting to note, however, is that even if you turn off Siri, “Visual Intelligence will continue to work but with more limited capabilities,” though Apple doesn’t spell out what those limitations are, and other Apple Intelligence features such as Writing Tools, Image Playground, and Shortcuts continue to work. All this is Apple’s heavy-handed way of pushing these new features, even if you actively dislike them and don’t ever want to use them.

Assuming you’re using English as your language—and that’s the only language supported in the initial release of macOS 27 Golden Gate—the pane adds three settings regarding the Siri App:

  • Opens To: Select what appears when you open the app: either Recent Conversations or A New Conversation.
  • Keep Conversations: Select 30 Days, 1 Year, or Forever. Note that there’s no longer a Delete Siri & Dictation History button, though you can manually delete any or all of the history items in the Siri app.
  • Preview: Select None or 1–5 lines.

In addition, the Requests entry replaces the previous “Listen for” pop-up menu (where you can select “Siri” or “Hey Siri,” “Hey Siri,” or Off), and the Responses item gives you only two options: Spoken Response or Silent Response. (Tahoe had an Automatic option, along with Prefer Silent Responses and Prefer Spoken Responses.) Instead of clicking Siri Suggestions & Privacy to specify each app’s Siri settings, you now click App Access. And there are some additional ChatGPT options, for anyone who connects Siri to ChatGPT.

The Automatic Visual Look Up switch also lives here; what it does is covered in Siri AI on the Mac.

Finally, Tahoe let you set the keyboard shortcut used to invoke Siri, but macOS 27 does not. You can invoke Siri with ⌘-Space, the Spotlight shortcut, or with a second dedicated shortcut; holding that second shortcut speaks to Siri even if Requests is turned off. Although you can still change the Spotlight keyboard shortcut (in System Settings > Keyboard > Keyboard Shortcuts > Spotlight), there’s no evident way to change the dedicated Siri shortcut to anything else.

Control Siri conversations syncing among your devices in System Settings > Your Name > iCloud: click See All, then click Siri. You can disable Sync this Mac (enabled by default). The Keep Conversations setting is synced with the main Siri retention setting: change it here, and it’s changed globally, not just for iCloud.

Do you need a more powerful PDF editor than your Mac’s Preview app or other free alternatives? UPDF for Mac is one such tool that offers more power and convenience in a premium package.

What is UPDF? Why should you download it?

UPDF is a PDF editor, markup tool, organizer, and reader with a clean UI that emphasizes content. Though many of us can get away with free PDF apps like Preview, some require more powerful tools for annotation, sharing, editing, and signing PDFs. That’s where premium apps like UPDF kicks in.

Editing PDFs on Mac is Never So Easy

UPDF for Mac is a fast, full-featured PDF editing tool that’s particularly easy to use because it’s designed with a simple and clear user interface that won’t confuse anybody.

Drag. Drop. Edit. That’s it!

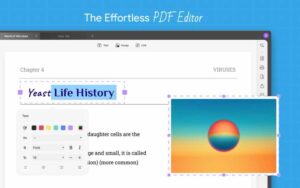
Edit PDF

UPDF for Mac offers comprehensive PDF editing tools that give you the power to do just about anything to your PDF files. It’s as easy as drag and drop.

  • Edit Text: UPDF for Mac provides a range of text editing tools, including font styles, sizes, and formatting options.
  • Edit Image: UPDF can edit the images in your PDF. You can rotate, crop, or replace the images in your PDF. The app can resize, shrink, and stretch your images.
  • Edit Links: The software allows users to edit links within PDFs, making it easy to update URLs or add new links.
  • Edit Headers & Footers: Users can customize headers and footers across PDFs, including adding text, images, or logos.
  • Edit Watermarks & Backgrounds: UPDF for Mac offers advanced watermark and background editing tools, enabling users to add custom designs or remove existing ones.
  • Organize Pages: The software provides tools to organize PDF pages, including rearranging, deleting, or merging pages.

Explore the Power of Generative AI Right Inside UPDF on Mac

UPDF AI

UPDF for Mac integrates AI technology to enhance productivity and creativity. Users can leverage AI-powered features such as:

  • Translate PDF: Translate any language to what you need with UPDF Mac PDF editor.
  • Summarize PDF: Summarize long PDFs or simplify complex data charts in seconds.
  • Ask PDF: Chat and ask any questions on PDF content. Get explanations for selected text.
  • Chat: The UPDF AI chat function extends beyond topics found in the document. It’s an AI chatbot that interacts with PDF documents, answers questions, and provides insights in a conversational manner for improved productivity. Ask about any topic and the AI can answer.

Your Go-to for PDF Reading and Annotating

UPDF makes it very easy to read PDF files on Mac. Alongside reading your PDF files, you can also write PDF on Mac using a variety of tools.

  • Cloud Storage: 10 GB of cloud storage. This makes it incredibly easy to securely store and sync your PDF files and make them available across all the platforms.
  • Markup Tools: 14 markup tools to review PDFs. You can underline, strikethrough, and add text boxes, stamps, shapes, stickers, and more.
  • Page Display Modes: 5 page display modes to view PDFs flexibly.
  • Light / Dark Read Modes: Options for light and dark read modes.

Simplify Your Workflow on Mac with Smart PDF Tools

UPDF for Mac provides tools to streamline your workflow, including:

  • Create fillable PDFs: Create fillable forms with text fields, checkboxes, radio buttons, lists, drop-down lists and buttons.

  • Fill Forms: When the PDF document is sent, the recipient can easily fill out the pre-defined text fields and mark the appropriate entries in forms.

  • Sign PDFs: Add your signature with a keyboard, mouse, or a trackpad. Furthermore, you can customize the signature to your liking by adjusting its stroke and color.

  • Protect PDFs: Protect PDFs with passwords, permissions, or encryption so only the intended recipient can access your sensitive information.

  • Redact: Redact sensitive information from PDFs.

  • Bates Numbering: Add Bates numbering to PDFs for easy referencing.

Convert PDF with OCR Effortlessly

OCR PDF reader

If you want to do OCR PDF on Mac, UPDF has you covered. The software has OCR technology for converting scanned documents to editable PDFs. The software supports:

  • 14 formats: Convert PDFs to or from 14 popular formats including Word, Excel, and PowerPoint.
  • 38 languages: Recognize and extract text from images or scanned PDFs in 38 languages.

Should I Buy UPDF?

Free apps typically don’t cover all the bases, and premium apps often cost too much. That’s what makes UPDF so great. It’s in the sweet spot of doing a lot and costing a little.

When you chose UPDF Editor, you get a full-featured PDF editor with OCR and AI tools you won’t find in other PDF editors. Despite having more features and a universal license, UPDF is intuitive, user-friendly, and it’s available at a much lower price.

When a PDF editor is an all-in-one app that can accomplish all of your tasks, it simplifies the workflow. It could become your go-to PDF editing solution.

If you need to find an AI PDF tool that is lightweight and easy to use, then UPDF is a very good choice. If you have any other questions about this software, leave a comment down below.

Tag: PDF

If you see an X on the battery indicator symbol in the bar at the top of your MacBook screen, then there’sa good chance you’ve also experiencedproblems with your MacBook’s battery. When the battery symbol has an X on it, you may not be able to use your MacBook at all unless it is plugged to power outlet. You might also have seen a notification saying No Batteries Available. In this post, I’ll explain what the X on MacBook battery mean and how you can fix it.

Let’s get into it!

A photo showing Mac battery with a X in it  

What does the X mean on MacBook battery?

The X on MacBook’s battery basically means there is something very wrong with the battery. To the point where the battery is essentially useless. There are a number of possibilities:

  • Your MacBook battery need to be replaced.
  • The battery connection might have come loose inside your MacBook.
  • You can attempt to fix the X on MacBook battery by resetting your SMC.

What can you do when you see the X on your Mac battery?

If your MacBook battery is showing an X, you will probably need to get your MacBook looked at.

If you have technical skills, you can order and replace the battery yourself. Otherwise, you will need to take your Mac in for repair. You can make an appointment at a Genius Bar or with an Apple Certified repair center such as Best Buy.

Before you do that, though, you can try resetting the SMC and taking a look at the Apple Diagnostics report.

Reset the SMC

Sometimes you can reset the SMC on a Mac laptop and that will fix the X on your MacBook’s battery, particularly if the error is related to a power management quirk or some other hiccup, and not a battery hardware issue.

The procedure for resetting the SMC on an Apple laptop depends on whether it is an Apple silicon or an Intel Mac.

Navigate to the Apple  menu and click on About This Mac.

  • If you have a Processor listed (that says Intel), that means you have an Intel Mac.
  • If you see Chip listed, that means you have Apple silicon.

Also, if you have an Intel MacBook, from the information in the About This Mac window, make a note of your exact model, such as MacBook Pro (13-inch, 2017, Two Thunderbolt 3 ports).

If you have Apple silicon

  1. Make sure your Mac is plugged into power/charging.
  2. Click the Apple icon  and choose Restart. Or, hit the Apple icon  > Shut Down, and after a minute, turn it back on.

If you have an Intel MacBook

Depending on the type of Mac you have, the process for resetting the SMC will be different.

Mac with the T2 chip

Intel Macs, released in 2018 and later, have the T2 security chip. Find out if your Mac has a T2 security chip, and if it has, follow these steps.

MacBook:
  1. First, shut down your MacBook.
  2. After that, press & hold the power or Touch ID button for 10 seconds and then stop pressing the button.
  3. Now, wait for a few seconds and press the power/Touch ID button to turn on your MacBook.

Once this is done, the X symbol on MacBook battery should no longer exist. But in case the above steps didn’t help, follow along to reset your MacBook’s SMC:

  1. Shut down your MacBook.
  2. Press and hold all the following keys on your laptop’s built-in keyboard:
    • Control from the bottom left side of the keyboard.
    • Option from the bottom left side of the keyboard.
    • Shift from the right side of the keyboard.
  3. Make sure you hold all the above keys for 7 seconds. And once 7 seconds are done (don’t stop pressing the above three keys), start pressing & holding the power button. So, now you’re pressing and holding a total of four keys.
    4) Continue to hold all four keys for 7 more seconds and then let go.
    5) After waiting for a few seconds, press the power button to turn on your MacBook.
Mac desktop:
  1. Shut down your Mac.
  2. Unplug the main power cord.
  3. After at least 15 seconds, plug in the power cord.
  4. Finally, wait for 5 more seconds and press the power button to start your Mac.
Mac without T2 security chip

If you have a pre-2018 Mac, then follow these steps to reset the SMC.

MacBook:
  1. Completely shut down the computer.
  2. Press the left-side Shift, Control, andOption keys, along with the right-side power button on your keyboard, all at the same time.
  3. Continue to hold all four keys for 10 seconds.
  4. After 10 seconds, release all keys and press the power button to start your MacBook.
Mac desktop:
  1. Shut down your Mac.
  2. Unplug the main power cord.
  3. After waiting for 15 seconds, plug in the power cord.
  4. Finally, press the power button after 5 seconds to turn on your computer.
Very old Macs
Mac notebook with a removable battery:

Although these are a little bit more ancient, some Macs even had batteries you could remove. These include pre-2009 MacBooks and MacBook Pros. These machines also had a way of resetting the SMC, and to do that, follow these steps:

  1. Turn off the computer completely.
  2. Disconnect the MagSafe power connector and any other plug accessories if you have them plugged in.
  3. Remove the battery from the computer.
  4. Press and hold the power button for 5 seconds and then release the power button.
  5. Re-install the battery and reattach the MagSafe adapter and any other accessories.
  6. Turn your computer back on with the power button.

After following these steps correctly, your Mac’s SMC will have been reset, and hopefully, the X on your MacBook’s battery will be gone.

Mac Pro, iMac, Mac mini, and Xserve:

If you aren’t using a notebook but instead an Intel-based Mac desktop computer, such as the Mac Pro, iMac, Mac mini, or Xserve, then the steps to reset your computer’s SMC will involve the following steps:

  1. Shut down your computer completely before moving on to the next step.
  2. Unplug the power cord and any other plugs from your Mac so there is no power being supplied to the computer.
  3. Wait 15 seconds, and then reattach your power cord and any accessories.
  4. Wait five additional seconds, and then turn your Mac back on with the power button.

Run Apple Diagnostics

If resetting the SMC didn’t fix the problem, you can try running Apple Diagnostics. This won’t actually fix the issue, but it can help determine which hardware component might be at fault. Apple Diagnostics also suggests solutions and helps you contact Apple Support for assistance.

If you have previously set up a VPN connection on Mac but no longer use the VPN service, you may want to delete and remove the VPN from MacOS. Additionally, you may wish to remove a VPN configuration from a Mac that is not needed for a particular purpose, job, or enterprise anymore.

Removing a VPN from the Mac is pretty easy, and if you manually configured a VPN then you’ll be happy to discover how easy it is to delete the VPN from Mac especially compared to the manual setup process which is much more complex. In this article, I’ll explain how you can completely uninstall a VPN, including its configurations, from your Mac.

Why might you want to uninstall a VPN from your Mac?

VPNs may introduce certain issues or challenges. There could be many reasons why you would want to delete it from your Mac:

  • A VPN may affect another service’s performance, such as Messages, emails, Wi-Fi or FaceTime.
  • It May slow down your internet connection.
  • Most VPNs are not free and require subscription fee.
  • If you subscribe to iCloud , you may be using Private Relay instead of a VPN.
  • You may want to delete a VPN from Mac to create more storage space.
  • You may think you no longer need it, and your Mac’s built-in security is all you need. Your Mac is pretty secure without a VPN.

Read the instructions below to learn how to delete a VPN from your Mac.

How to delete a VPN on Mac

Removing a VPN from your Mac is straightforward and doesn’t take more than a couple of seconds. Here’s how to do it:

Step 1: Delete the App

There are two ways for a VPN app to be downloaded to your Mac. You can get it from the Mac app store or from the developer’s website.

If your VPN app was downloaded from the App Store:

  1. LaunchLaunchpad on your Mac. You can click its icon in the Dock to open it.
  2. Find the VPN in Launchpad. You can use the search field to find it if you would like.
  3. Click and hold the VPN app until it starts to jiggle.
  4. Click the (x) delete button on the icon.

If your VPN app was downloaded from the Internet:

You can use Finder to delete it. Here is how:

  1. LaunchFinder on your Mac. You can click its icon in the Dock to open it.
  2. In Finder, find the VPN app. It is probably inside the Applications folder. Open Applications and locate it.
  3. Then, delete it by using one of these methods:
    • Drag and drop it to the Trash bin.
    • Right-click the app and then select Move to Trash.
    • Select the app and then press CommandDelete.

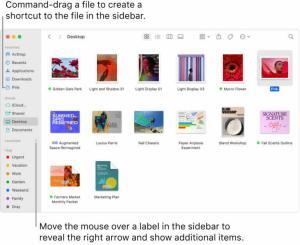
To the right of Locations in the Finder sidebar is an arrow to click to show additional items. In the Finder window on the right, a file is selected, and a shortcut to the file is in the sidebar, below Favorites.  

Step 2: Delete the VPN configuration files

If you want to completely remove VPN from your Mac, you need to delete the VPN configurations from your computer. Because if you do not, the anticipated benefit of removing the VPN may not occur. For example, if you want to delete a VPN because you could not download the full version of your photos from iCloud, you may still experience the problem even after deleting the VPN unless you also delete the configuration files. Here is how:

  1. Go to the Apple menu and navigate to System Settings.

  2. From the left sidebar, click Networkand then VPN.

  3. Click the info (i) button next to the VPN.

  4. Then click Remove Configuration. A popup will appear, asking if you really want to remove it. Click Remove again.

Now you have deleted the VPN. Restart your Mac to ensure that your changes take effect, and then you are done.

If you have another method or approach to removing VPN from a Mac, or any particular experience with this, share it with us in the comments below.

Tag: VPN

Are you facing issues establishing a Wi-Fi connection on your Mac after macOS Sonoma update? While connecting to Wi-Fi is generally an easy and straightforward process on a Mac, some users have faced problems in getting internet access via Wi-Fi after installing macOS Sonoma. Users have reported that their Macs have no Internet access, even though Wi-Fi seems to be connected.

The common Wi-Fi issues associated with Sonoma often involve frequent connection drops, slow internet connection, unreliable Wi-Fi connections, or subpar overall network performance. Various factors, such as Wi-Fi router issues, third-party app conflicts, or post-update software-related problems, could cause these issues on your Mac.

If you are also facing these problems, follow the troubleshooting steps explained below to fix Wi-Fi issues in macOS Sonoma.

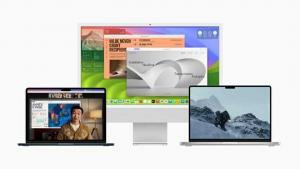
macOS Sonoma displayed on MacBook Air, the 27-inch iMac, and MacBook Pro.  

Troubleshooting macOS Sonoma Internet problems

Whether you’re using a MacBook, MacBook Pro, MacBook Air, Mac mini, iMac, or Mac Pro, these troubleshooting steps should fix all macOS Sonoma WiFi problems. After trying each step, please test to see if your Wi-Fi problem is fixed:

1. Check for macOS updates

A bug in macOS Sonoma may be the cause of your Wi-Fi issues. There is a possibility Apple has already released an update to fix this. To check, open System Settings and select General, then Software Update and install available updates. Also, you may want to turn on Automatic Updates.

2. Update the Wi-Fi router

If you manage the network’s Wi-Fi router, install the latest firmware updates for the router, as recommended by its manufacturer.

3. Reboot your router and Mac

Rebooting is a simple fix that’s known to solve many network-related problems. Start off by shutting down your router: unplug it from the wall and then wait a few minutes. Once you plug it back in, wait a minute or two for the device to set up. While you’re waiting, go ahead and reboot your Mac. To restart your Mac, go to the **Apple  menu **and select Restart.

Once both your computer and the router are back up and running, turn on Wi-Fi to see if your Mac can connect now. If it didn’t, it’s time to move on to the next step.

4. Check anti-virus or VPN software

Sometimes, you might have a VPN installed to protect your network by, for example, hiding your IP address. However, it just might be what’s causing macOS Sonoma internet problems.

Check the VPN or any other security-related software to ensure that they aren’t the source of the macOS Sonoma Wi-Fi problems by disabling them and seeing if the issue persists.

  • Uninstall the anti-virus software and then check if you can connect. If you can connect, then, obviously, this software is the problem. Check if there is an update to the software. Then, you can try to install the updated version. If the updated version causes problems, too, you may want to keep the software uninstalled until its developers address the issue.
  • VPN services may also be the cause of macOS Sonoma Wi-Fi problems. Are you using a VPN? Then disable or uninstall it and then try again.

Please note that uninstalling the VPN may not be enough. Even after uninstalling it, its configuration may stay on your Mac and continue to cause issues. You may need to remove it. On your Mac, go to** Apple menu** >System Settings > Network. Then select VPN. Then, tap the info (i) button next to the VPN service and select Remove Configuration. You will be asked if you are sure you want to remove it. Click Delete again.

5. Reset network settings

When all else fails, reset network settings. Doing so may fix macOS Sonoma internet problem. This will not get rid of your saved Wi-Fi passwords. Here is how:

  1. Go to Apple Menu and then System Settings.
  2. From the sidebar, select Network.
  3. You will see Wi-Fi. Control-click (or right-click or double-finger click) it.
  4. Select Delete Service. You will be asked if you really want to delete it. Click **Delete **again. When you delete it, your Wi-Fi status bar will say Not Configured. This is normal.
  5. After deleting the Wi-Fi service, restart your Mac.
  6. Now, go to the Network settings (Apple menu > System Settings) again.
  7. Click the** three-dot button** and selectAdd Service.
  8. From the Interface options, select** Wi-Fi**. You can also change the Service Name if you wish.
  9. Click the blue** Create** button.

Now, check if you have solved macOS Sonoma Internet problems.

Tag: macOS

"Hold up," you’re probably thinking. "Isn’t macOS famously secure by default?" You’re not wrong, actually: All Macs and MacBooks ship with built-in antivirus software that blocks and removes malware, and any apps you download from the internet are swabbed for malicious code by Apple’s Gatekeeper tool. Furthermore, all of the data that lives on your macOS device’s hard drive is secured with FileVault 2, a full-disk program featuring XTS-AES-128 encryption and a 256-bit key.

Front view of 16 Inch open MacBook Pro in Space Gray.  

It’s when any of your precious data ventures outside the localized protection of your Mac that things start to get dicey — and that happens every single time you connect to the web. Your Internet Service Provider, or ISP, tracks your every click to compile browsing logs they (sometimes) sell to marketers, who are champing at the bit to use your data for targeted ads. That information can also wind up in the hands of certain government agencies if your ISP is served with a subpoena. Thankfully, adding a VPN on Mac enhances protection and eliminates any cybersecurity risks.

In this article, we cover a few of the key reasons why you may want to consider downloading a VPN for your Mac. Or, if you already have one, highlight some of the less common VPN benefits you can take advantage of.

What is a VPN?

Before diving into all the benefits of using a VPN on your Mac, let’s quickly look at what it is. A virtual private network, or VPN, is an encrypted connection between your Mac and a private, remote server. In the most basic sense, it’s a service that keeps you totally incognito on the web by masking your online activities and making it seem like your connection’s coming from somewhere you aren’t. This makes it more difficult for third parties to track your activities online and steal data. The encryption takes place in real time.

How does a VPN work on an Mac?

The concept is pretty complex, but the general idea is relatively simple. A VPN establishes a direct connection and encrypts all its online traffic, thereby protecting the user’s activity and details.

Essentially, the VPN service sends all the Mac’s digital traffic through remote servers, which are typically located in different parts of the world. The service also hides the device’s real Internet Protocol (IP) address, replacing it with that of the service’s servers. This means the connection is secure, the device’s actual location is hidden, and hackers—or, indeed, internet service providers—cannot monitor activity over the connection or access any data.

Do I need a VPN on my Mac?

In a word — yes. It is very common now for people to use their computers for all sorts of digital activities, from making bank transfers and purchasing items online to sending emails and surfing the web. However, all of these actions require someone to input personal details that cybercriminals or businesses try to harvest. Here are some examples of why you do, in fact, need a VPN on your Mac:

  • Internet Service Providers (ISPs) can view the Mac’s online activity and sell the data to third parties for targeted advertising.
  • ISPs can also use IP addresses to monitor internet use and throttle (slow down) connections if too much bandwidth is being used, such as with too much gaming and streaming.
  • Websites can use IP addresses to track the location of visitors, and search history, to gauge interest and create targeted advertisements and suggestions.
  • Some services are restricted to people in specific regions, for example, TV content, or videos from YouTube. If you are travelling, but still want to keep up with your favorite show, a VPN will allow you to do this.

As such, what a VPN does on an Mac is help protect the user’s online privacy and the security of the data they send. The service can secure sensitive data and personal information, such as bank details and credit card information.

Ensuring the security of an Mac by using a VPN service is important for any user. However, it is especially essential for remote workers and business people. This is because business MacBooks are often used to send and receive a lot of sensitive information, such as confidential documents and financial records. If these computers are hacked, all of this information can be leaked, causing problems or embarrassment for the business.

What are the benefits of having a VPN on my Mac?

As well as offering some security and privacy, a VPN has many benefits for those using an Mac. Computer users are becoming increasingly aware of what using a VPN on an Mac does and, as such, are increasingly choosing to use the service. Here are just some of the reasons:

  1. Avoiding geo-restrictions: Not all online content is available everywhere. For example, some countries restrict the use of search engines like Google while certain streaming services, like Netflix and Amazon Prime, offer country-specific catalogs. Connecting an Mac to a VPN circumvents these types of geo-restrictions so that users can access the digital content they want.
  2. Getting location-specific search results:The geographical location of your Mac can skew the results of search engines. As such, using a VPN ensures that the search results are relevant to the location the user wants. For example, using a VPN configured to use a Bangkok-based VPN can help narrow the search for a specific store in Thailand, even when the user is physically in the USA.
  3. Avoiding targeting: IP addresses are often used to create targeted advertising and personalized suggestions for each website visitor. VPNs can change the user’s IP address, thus minimizing the ability of ISPs and third parties to make these bespoke adjustments.
  4. Minimizing throttling: VPNs can help Mac users avoid bandwidth throttling from ISPs, especially if the computer is being used a lot for streaming and gaming, for example.

What are the potential drawbacks of using a VPN on my Mac

Although there are many reasons why users should add a VPN to their Macs, there are, of course, some disadvantages. Although this does not mean users should begin removing VPN services from Macs, it is important to take these into account:

  1. Slower connection speeds: Because VPNs encrypt data and must re-route all traffic through remote servers, many users find their internet connections become slower. However, users of premium VPN services usually do not encounter this issue.
  2. Insecure connections: Because free VPNs do not charge any fees, they are forced to monetize their service in different ways. This is often done by tracking user data and then selling it to third parties, which is what many users are trying to avoid in the first place. Because of this, paid services offer greater protection.
  3. Subscription costs: The best VPN services available often charge basic fees, which some users may balk at. However, these subscription costs are usually negligible when weighed up against the security and privacy benefits.
  4. VPN bans: Before setting up a VPN on their Macs, users should note that the service is banned or restricted in certain countries. For example, VPNs are illegal in North Korea and Belarus, while Russia and India only allow VPN providers that agree to log and share user data.

When should I use a VPN on my Mac?

By now, most users will be aware of what a VPN does on an Mac and why the service is important. At this point, many wonder whether they need to use a VPN connection all the time, or only under particular circumstances. The short answer is that using this service consistently affords the highest level of security, and so users should use it at all times. However, VPN connections are most critical when accessing bank information and making transactions, providing credit card information, downloading files, and sharing sensitive information through email and chat services.

Does my Mac’s macOS encryption offer enough security?

It is a common misconception that Apple’s macOS makes MacBookss, iPhones, and iPads impervious to hackers and other security threats. The security that macOS offers is limited to protecting passwords stored on the device and encrypting the device’s data when the device is locked. As such, macOS encryption does not extend to web traffic, leaving data sent or received on Macs vulnerable if they do not use a VPN.

Choosing a VPN for an Mac

It is tempting to think that all VPNs are created equal, but this is simply not the case. Services differ in their quality and functionality, and of course, how they handle user data. As such, it is important to do some research when choosing a VPN for your Mac. Here are a few important points to consider:

  • Connection security: Look at what encryption method the VPN provider uses—256-bit encryption is the minimum for a secure VPN.
  • Activity logging: Read the provider’s terms and conditions or privacy policies to ensure that it does not track or log user activity.
  • Monetization: Find out how the VPN provider makes money—if it does not charge a subscription fee, it might be selling user information to third parties for advertising.
  • Connection speed: Ensure that the VPN will not slow your internet connection—check reviews or test it during the trial period that most providers offer.
  • Usage caps: Some providers implement daily or monthly limits on their VPN connections, especially if they offer free and paid tiers—check to see what caps apply and whether this is acceptable.

Setting up a VPN on an Mac

After deciding that you do need a VPN on your Mac, setting up the service is simple. In most cases, once you have selected a provider, the process of configuring your computer with the VPN service should take just a few minutes. Here are the steps to take:

  1. Create an account on the provider’s website—users may need to choose a subscription tier, provide payment details, and confirm their account by email.
  2. Purchase and download the provider’s VPN app through the App Store.
  3. Follow the provider’s setup instructions, which usually only require users to log into their account.
  4. If not already done when creating the account, choose a subscription tier and confirm the account.
  5. Connect to the VPN service using the automatic quick-connect function, or by selecting a location-specific server.
  6. Go back to the app to turn off the connection when no longer required.

Removing a VPN from an Mac

Mac users who no longer need a VPN service on their devices can simply remove it. This can be done by navigating to the Mac System Settings, disconnecting the VPN service, and deleting the app.

Conclusion

While most people spend some effort to keep their smartphones, email, and bank accounts secure, computers are often a second thought. But because these devices are such a crucial part of daily life, it is especially important to ensure their security—even if the device in question is an Mac. Setting up a VPN service on an Mac provides many benefits. Security and privacy are, of course, two of the most important. But, users can also elude geo-restrictions, access more content and digital services, and minimize the chances of targeted advertising. As such, it becomes imperative to add a VPN configuration on Macs.

Frequently Asked Questions

What is VPN for Mac?

A VPN—or Virtual Private Network—is a service that encrypts a user’s data and activities and masks their IP address while online. When an Mac’s settings are configured with an active VPN, the service will route activities through a remote server using an alternative IP address and masking all personal details and traffic.

Do I need a VPN on my Mac?

In a word, yes. Having a VPN an Mac ensures its security and privacy. Not only does this help protect sensitive data such as personal details, bank accounts, and credit card information, but it minimizes the ability of Internet Service Providers (ISPs) and third parties to track activity and create targeted advertising.

What does VPN do on Mac?

The main function of a VPN setting on an Mac is to secure data sent to and from the device and ensure all web activity remains private. However, a VPN service can also be useful for circumventing geographical restrictions, accessing location-specific content,.

Tags: macOS, VPN

These are the best Macs and MacBooks for music production according to our testing.

As a music producer, you know that the choice of equipment can make or break your music creation experience. When it comes to computers, Macs and MacBooks have set a high standard in the music production industry due to their superior processing power, seamless software integration, and remarkable stability. But which Macs and MacBooks are the best for music production in 2023?

We’ve tested every single computer from Apple, and we’re just the experts to help you find the best Mac or MacBook for music production. And, these MacBook and Macs below are our top picks.

For years now, Apple has produced some of the best laptops for music production. One thing to note is that with the launch of the new models, Apple has stopped selling the 2021 models of the 14-inch and the 16-inch. However, since other retailers may still have them in stock and could even offer MacBook deals on the older models, we’ve kept some of them on the list.

What Makes a Mac or MacBook for Music Production special?

An Apple computer great for music production has a few areas that need to be a focus that might not matter as much for a computer designed for journalism or business students, for example.

Music production computers must operate high-powered music creating applications in many windows. This could be a Logic Pro window, Ableton Live, and Pro Tools all open and running at the same time.

Because of this, the demand for high-end graphics cards, powerful processors, and increased RAM are higher than in the average computer. Where most Apple computers focus on a lightweight frame, long battery life or other specifications, these machines need to be able to perform advanced operations with ease even if it means that they don’t have all day battery life.

How did we choose the best Macs and MacBooks for Music Production?

To choose among the best Macs and MacBooks for music production, our team of expert musicians and producers started with extensive personal experience: All the computers here have been road-tested and reviewed in some way. Then, we added in-depth research by cross-referencing third-party reviews with specs sheets, first-party benchmarks and user experiences. Rest assured, we know the ins and outs of all these machines, so you can choose the perfect one for you.

The best MacBook and Macs for music production in 2023

Whether you want to make the switch to the macOS environment or are upgrading from your aging one, here are the best MacBook and Macs for music production on the market.

1. MacBook Pro 16-inch (2023)
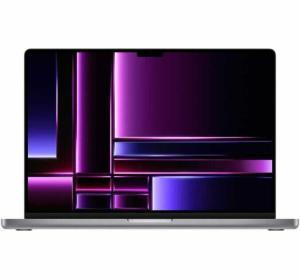
Front view of 16 Inch open MacBook Pro in Space Gray.  

The best MacBook for music producers who want a lot of power

SPECIFICATIONS

CPU: Apple M2 Pro (12-core) – Apple M2 Max (12-core)Graphics: Integrated 19-core – 38-core GPURAM: Up to 96GBScreen: 16.2-inch Liquid Retina XDR displayStorage: Up to 8TB

Pros

  • Gorgeous 16-inch Liquid Retina XDR display
  • Spectacular performance
  • Epic battery life
  • Generous port selection

Cons

  • Steep asking price
  • Nominal upgrade from 2021 model

Why it’s the best MacBook for music production

Starting with the top-end model, the MacBook Pro 16-inch (2023) sets the standard for music production. Regardless of what music production tasks you want to perform, the new MacBook Pro 16-inch (2023) can handle it. Thanks to Apple’s impressive in-house M2 Pro and M2 Max chips, the MacBook Pro 16-inch (2023) is more than capable of handling any DAW (Digital Audio Workstation), virtual instrument, or plugin suite you throw at it. Plus, with a high-fidelity six-speaker sound system, you can monitor your mixes with unparalleled clarity.

Upgraded from the M1 Pro and M1 Max from 2021, the 2023 model provides even more performance, while also boasting an incredible battery life of over 20 hours. We found during our testing that this beast of a laptop pumps out impressive performance without draining the battery and doesn’t throttle its performance when on battery power.

The 16-inch MacBook Pro also comes with an incredible display, as well as plenty of ports including next-gen Thunderbolt 4 ports and a MagSafe charging port. All that performance does come at a price, as even the base model costs a lot. But, considering how powerful this laptop is, it’s worth the price of entry.

2. MacBook Air (M2, 2022)

Side profiles of MacBook Air opened up in silver, starlight, space gray, and midnight.  

The best MacBook for music production overall

SPECIFICATIONS

CPU: Apple M2 chip with 8-core CPUGraphics: Integrated 9-core – 10-core GPURAM: 8GB – 24GB unified memoryScreen: 13.6-inch (diagonal) 2560-by-1664 LED-backlit display with IPS technologyStorage: up to 2TB

Pros

  • Gorgeous new design
  • Very good performance
  • Long battery life

Cons

  • More expensive than the previous model
  • New colors are a bit tame

Why it’s the best MacBook for music production

It used to be that if you were a serious music producer, anything under Apple’s MacBook Pro line simply wouldn’t cut it for the processor and RAM intensive tasks put upon it by audio production. With the M2 chip inside the 2022 Apple MacBook Air however, we were convinced that this argument could largely be put to bed, at least for the majority of home producers. We found its performance to be exceptional during testing, tackling 4K video editing and music production workflows fast and in silence (thanks to its fanless design). In some benchmark tests, its single-core performance is even on par with the MacBook Pro 13-inch (M2, 2022).

It isn’t just its specs that saw an upgrade over its predecessor. Its battery life got a 5-hour uptick, giving it 16 hours of use on a single charge, while its screen is bigger and its design is better

3. MacBook Air (M1, 2020)
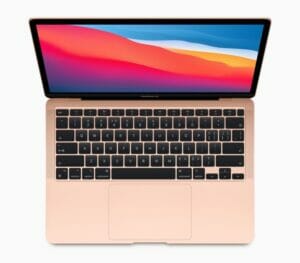
The M1-powered MacBook Air in rose gold.

The best budget MacBook for music production

SPECIFICATIONS

CPU: Apple M1 chip with 8‑core CPUGraphics: Integrated 7-core – 8-core GPURAM: 8GB – 16GB unified memoryScreen: 13.3-inch 2560 x 1600 Retina displayStorage: 256GB – 2TB SSD

Pros

  • Fast and responsive
  • Great battery life
  • Silent in use

Cons

  • Fanless design could impact performance

Why is the best MacBook for music production

The MacBook Air (M1, 2020) is the first thinnest and lightest laptop, putting it on the list of the most exciting Apple laptops for music production of recent years. During testing, it felt fast and capable. It was able to handle quite a few music production apps running all at once, keeping up brilliantly and with ease when we swapped between power hungry music production apps.

The fan-less design makes it remarkably quiet, which can be a significant advantage in a recording environment. We didn’t notice any major incidents of throttling, despite the fact that it has a fanless design and is therefore more susceptible to overheating.

With this new chip, the MacBook Air is better than ever, touting excellent performance alongside its brilliant battery life – without raising the price to keep it (fairly) affordable still. This MacBook is an excellent choice for most music producers.

4. Apple MacBook Pro 14-inch (2023)
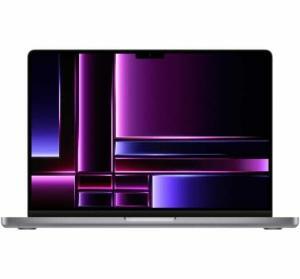
Front view of 14 Inch open MacBook Pro in Space Gray.  

The best MacBook Pro for most music producers

SPECIFICATIONS

CPU: Apple M2 Pro (10-core) – Apple M2 Max (12-core)Graphics: Integrated 16-core GPU – 38‑core GPURAM: 16GB – 96GB unified memoryStorage: 512GB – 8TB SSDDimensions (W x D x H): 0.61 x 12.31 x 8.71 inches (1.55 x 31.26 x 22.12 cm)

Pros

  • Blistering performance
  • Vibrant mini-LED display
  • Superb battery life
  • Good port selection includes HDMI and SD Card
  • Faster Wi-Fi 6E

Cons

  • Expensive
  • Notch is distracting
  • No Face ID support
  • Price rise for UK and Australia

Why is the best MacBook for music production

If you’re a professional music producer and want the best performance that Apple has to offer, the MacBook Pro (14-inch, 2023) is the laptop for you. The M2 Pro and M2 Max chip delivering incredible speed, especially when it comes to video editing. You also get a stellar mini-LED display, plenty of ports and over 14 hours of battery life. Yes, it’s pricey, but it’s capable of handling the most demanding music production tasks with ease.

It seems that every year, Apple is making the MacBook Pro 14-inch a lot more power than you’d expect. Its 2021 predecessor may have been an almost perfect laptop for music production, but this one blows it out of the water in terms of power, cementing the line’s status as a mobile workstation that’s reserved for music producers who can maximize its sheer performance.

The MacBook Pro 14-inch (2023) handled every music production task we threw at it during testing, whether we were editing videos in 8K, recording numerous instruments at the same time, or editing multi-track audio projects in Albeton Live 11. The active cooling system allows for sustained performance during long production sessions. And, its Liquid Retina XDR and mini-LED technology display with ProMotion adaptive refresh rates of up to 120Hz delivered vibrant colors and rich, deep contrast, making our creative experience incredibly immersive.

It keeps the same design as the 2021 model, but that’s no bad thing given the brilliant screen and solid build quality. It is, as with many creative mobile workstations, eye-watering expensive, however. That’s especially for UK and Australian consumers. So only invest if you can justify the price with your demands.

5. iMac (24-inch, 2021)

6 different colors of iMac  

The best all-in-one Mac for most music producers

SPECIFICATIONS

CPU: Apple M1 chip with 8‑core CPU Graphics: Integrated 7-core – 8-core GPU RAM: 8GB – 16GB unified memory Screen: 24-inch 4.5K Retina display Storage: up to 2TB

Pros

  • Gorgeous display

  • Striking new design

  • Fantastic 1080p webcam

  • Speakers deliver rich, vibrant audio

  • M1 chip offers speedy performance

Cons

  • Lack of ports remains
  • Entry-level model lacks features for some

Why is the best Mac for music production

Apple’s new M1-equipped 24-inch iMac is a slender-yet-speedy machine packing great speakers, an excellent webcam, a Magic Keyboard, and a beautiful screen, providing the experience needed in a professional music production setup.

If you think that the new iMacs couldn’t possibly be as good as they look, you’d be wrong. They are not just an improvement over their 21.5-inch predecessor externally, touting a fresh new face that comes in several different colors.

They also come with fresh new specs, rocking Apple’s new M1 chip that makes it much more powerful than the previous Intel iMacs. Loading up Final Cut Pro to do some editing on an 8K video, it performed very well during testing, smoothly scrubbing through 8K content. If you’re a serious music maker, you may be best served by a more powerful Mac, but this one should more than suffice for most music producers.

There are six speakers built into the bottom of the new 24-inch iMac: 2 pairs of low-frequency woofers and one pair of high-frequency tweeters, with support for spatial audio via Dolby Atmos. What that means, in my experience, is that things sound real good coming out of the new iMac.

You’ll also be happy to know that you’re getting great value here, as you’re getting the Magic Keyboard and Magic Mouse included – in matching colors, we might add. And, while the port selection could be better, the upgraded 1080p FaceTime camera delivers better low-light performance and amazing image quality. In my experience, this 24-inch all-in-one is more than capable of handling whichever DAW or plug-in you might throw at it.

6. MacBook Air 15-inch (2023)
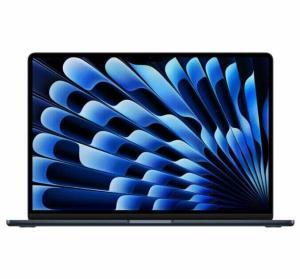
2023 15-inch MacBook Air, open, thin bezel, FaceTime HD camera, raised feet, curved edges, Midnight  

The best 15-inch MacBook for music production

SPECIFICATIONS

CPU: Apple M2 chip with 8-core CPUGraphics: Integrated 10-core GPURAM: From 8GB unified memoryScreen: 15.3-inch Liquid Retina display with True ToneStorage: From 256GB SSD

Pros

  • Bright and vivid 15-inch display
  • Sleek, elegant design
  • Extremely portable
  • Blazing-fast performance
  • Better speakers than 13-inch

Cons

  • Skimpy port selection
  • Supports just one external monitor
  • Less portable than 13-inch model

Why it’s the best MacBook for music production

The new MacBook Air 15-inch M2 is a super-sized version of the 13-inch model, featuring stellar performance, epic battery life and a gorgeous display in a sleek, elegant chassis. It’s arguably the best 15-inch laptop for music production.

In its own right, the Apple MacBook Air 15-inch (2023) is a fantastic laptop with its impressively thin and light design, fantastic performance, and brilliant screen that gives you about two extra inches than the regular Air. Music producers hoping for a screen real estate upgrade in their notebook will be overjoyed, especially if you’ve got a slightly aging MacBook Air 13-inch (2021) or older.

This laptop performed really well on test, with macOS Ventura feeling fast and responsive, and it was able to handle multiple music applications simultaneously. And it does live up to Apple’s promise of up to 18 hours of video playback, scoring 18 hours and 52 minutes in our looped 1080p video battery benchmark. It’s truly one of the best 15-inch laptops for music production you’ll find in 2023.

And honestly, this would have ranked higher on this list, had it not been for the fact that this is essentially a 13-inch Air M2 with a bigger screen – complete with the same specs and everything. In fact, our benchmark results show that it offers the same level of performance as the 13-inch, which means that if you’ve got that, there’s really no reason to spend a whole lot of money on this. Just invest in a monitor if you need the extra screen real estate.

7. MacBook Pro 14-inch (2021)

MacBook Pro is shown with the new M1 Pro and M1 Max chips.

Older but still great for professional music producers, especially those on a budget

SPECIFICATIONS

CPU: Apple M1 Pro 8-core – M1 Max 10-coreGraphics: Integrated 14-core – 32-core GPURAM: Up to 64GBScreen: 14-inch Liquid Retina XDR displayStorage: Up to 8TB

Pros

  • Blisteringly-fast performance
  • Gorgeous mini-LED display
  • Epic battery life
  • HDMI, SD memory and MagSafe return
  • Comfy Magic Keyboard
  • 1080p webcam

Cons

  • No USB-A port
  • No update to $1,299 model

Why it’s the best MacBook for music production

The MacBook Pro is now its truest self with the launch of the MacBook Pro 14-inch (2021) and its 16-inch counterpart. Armed with the new M1 Pro and M1 Max, MacBook impresses with breathtaking power and equally breathtaking battery life – just what every music maker needs and deserves.

Our review model worked exceptionally well during testing, allowing us to create and edit complex 3D scenes in Cinema 4D quickly and smoothy as well as edit 8K video on Final Cut Pro impressively seamless. Its unified memory also helps it handle demanding music production workloads beautifully.

Apple then rounds it all out with its XDR display with 1600 nits of peak brightness and a wide color gamut. There’s also an SD card slot, an HDMI port, and three Thunderbolt 4 ports (all of which can stay available thanks to MagSafe charging being back.) It’s among the most expensive MacBook Pros ever launched, but it’s also certainly among the best Apple laptops for music production.

8. Mac Studio
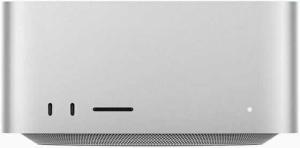
Front view of Mac Studio  

A compact Mac for professional music producers

SPECIFICATIONS

CPU: Apple 10-core M1 Max or 20-core M1 UltraGraphics: Integrated 24-core – 32-core (M1 Max) or 48-core – 64-core (M1 Ultra) GPURAM: 32GB – 128GB unified memoryStorage: 512GB – 8TB SSDDimensions (H x W x D): 9.5 x 19.7 x 19.7 cm

Pros

  • Blazing-fast performance from M1 Ultra
  • Great design
  • Plenty of ports
  • Whisper-quiet

Cons

  • Expensive for what you get, especially at the high end

Why is the best Mac for music production

Apple’s Mac Studio can deliver more power than almost any other computer on the market, and it packs it all into a quiet, well-designed chassis that looks good on a desk. It’s an excellent desktop for music producers.

The Mac Studio is like a super-charged Mac mini for music makers. Apple’s newest Mac, this is an impressively compact computer that comes packing some serious power. Thanks to a choice of the M1 Max chip, or the brand-new uber-powerful M1 Ultra, the Mac Studio is well-equipped for demanding music production tasks.

The Mac Studio is a formidable machine when it comes to video editing, coding and 3D modeling, in particular. It proved during testing that it the graphical grunt to handle 18 streams of 8K footage on the fly, allowing us to view, edit and add effects on Premiere Pro easily. We also saw it load up an incredibly detailed 3D scene that took up more memory than most discrete professional PC GPUs come with.

The level of performance on offer here will be overkill for many music producers, but if you’re looking for a workstation PC for heavy creative workloads, such as editing 8K footage or rendering complex 3D scenes and animations, then the Mac Studio will be a great choice. It’s expensive, but worth the investment.

9. MacBook Pro 13-inch (M2, 2022)
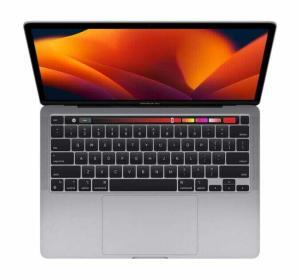
Top-down view of an open 13-inch MacBook Pro in Space Gray.  

Apple’s most affordable MacBook Pro for music production with powerful internals

SPECIFICATIONS

CPU: Apple M2 with 8-core CPUGraphics: Integrated 10-core GPURAM: 8GB – 24GBScreen: 13.3-inch 2560 x 1600 display with P3 and True Tone technologyStorage: 256GB – 2TB SSDDimensions (H x W x D): 30.41 x 21.24 x 1.56 cm

Pros

  • Blazing-fast performance
  • Amazing battery life
  • Sharp, vibrant display
  • Comfortable keyboard

Cons

  • Same old design
  • 720p webcam
  • Limited ports

Why it’s the best MacBook for music production

The Apple MacBook Pro 13 inch (2022) delivers mind-blowing performance thanks to its M2 processor along with class-leading battery life. It might not come with a new design update, which makes it look and feel a bit redundant, especially because the M1 version is pretty impressive in its own right. However, while there’s nothing exciting about its outside, Apple’s brand-new M2 chip certainly makes up for it in a massive way.

If you already have the M1 MacBook Pro 13-inch, this might not be worth an upgrade – unless, of course, you need a bit more power. In our tests, this 2022 model achieved better performance in both single and multi-core CPU tests. That means a noticeable boost in its multitasking capabilities, allowing music producers to open and utilize various applications open at once. It also scored around twice as much as the Intel Core i7-1185G7-powered Surface Laptop 4, and lasted almost two hours longer than the M1 MacBook Pro 13-inch in our battery life test. That’s while keeping the same price tag as before.

How We Test The Best Music Production Laptops

To find the best Apple laptop for music production, we run each through our gauntlet of benchmarks and real-world tests, and then use them as our main computer for as well. Only then are we comfortable recommending them (or not) for your purchase.

We use a Klein K-10A colorimeter to test each Mac’s screen to find its average brightness and color quality (so we don’t just assume Apple’s ratings are correct). When it comes to general performance, we use the Geekbench 5 (CPU performance) benchmark, and time how long the Macs will take to transcode a 4K video to 1080p.

We also run the BlackMagic storage speeds test to see how fast these Macs’ SSDs are (spoiler alert: they’re all pretty fast). Then, we run our custom battery test to see how long each MacBook (at 150 nits of brightness) can last browsing the web over Wi-Fi until it runs out of juice.

We’ve also tested various computer games on MacBooks, with Civilization VI: Gathering Storm being one of our current favorites to run because it runs well on both macOS and Windows, giving us a good point of comparison.

No matter which Apple MacBook you buy, be sure to check out these MacBook Ventura tips and tricks to make the most of your Apple laptop.


Make your Mac more secure than ever before.

Apple’s MacBooks are renowned for their robust security. After all, how often do you hear about Macs getting infected with viruses? But despite Apple’s stringent security measures, there’s still always a chance that your Mac could be compromised. A simple measure to further boost security on your Mac? Install a VPN.

The M1-powered MacBook Air in rose gold.

Consumers across the globe are using VPNs for security. But that’s just the tip of the iceberg when it comes to using a VPN on Mac. Think better internet accessibility, improved gaming – even, in some circumstances, better pricing on online shopping!

In this article, we discuss a few of the key reasons why you may want to consider downloading a VPN for your Mac. Or, if you already have one, highlight some of the less common VPN uses you can take advantage of.

Without further ado, here are the main importance of a VPN for Mac users.

1. Access geo-blocked content

There’s a common problem with streaming services: geo-blocking. This is when a service prevents users from viewing or installing content because of their geographical location. For example, when you’re unable to find a title on Netflix but your friend in a different country has access to it. And, sometimes, a streaming service may not even be available where you are, like HBO Max, which is only present in the US.

Using a VPN for streaming is handy for bypassing geo-restrictions because it connects you to servers in other countries. To a streaming service provider, your internet traffic looks local, so it unlocks that region’s catalog for you. With a VPN on your Mac, you can unlock a new world of entertainment on the go and, when you’re travelling, make sure that you can still watch what you’d normally be able to at home.

2. Tunnel through restricted apps

Whilst connected to your school or office WiFi, you may have faced restrictions when trying to access social media or other websites and apps on your Mac. This is because most schools and many companies limit internet use, and they set up firewalls on the network to prevent users from accessing certain websites.

Although it’s best to comply with the rules set out by your school or workplace, if you urgently need to access a blocked website, a VPN can help. It’ll tunnel right through the firewall to securely access all the content that’s blocked. A VPN also encrypts your internet traffic data, so your online activity will be private.

3. Security on Public Wi-Fi

Public Wi-Fi is convenient but comes at the expense of security. When you’re answering emails at a local coffee shop, someone may be tracking your online activity.

Using a VPN protects your data while you are on other networks, hiding your browsing history, banking information, account passwords and more from ill-intentioned internet strangers.

Now most credible apps these days are getting much better at securing your data, but the VPN will further encrypt the network data across all the applications on your Mac, making it even harder for intruders to read your online activity or steal your credentials.

4. Better deals on services and products

If you are willing to put in a little research, a VPN can help you save money via its location spoofing capabilities. Many types of businesses, such as subscription services and airlines, offer the same amenities or products for different prices.

A VPN can help you with this. For a website to inflate pricing on its services or products, it needs to gather your IP address details and cookies. A VPN on your Mac (or phone) will anonymize your identity, preventing the website from collecting your data and targeting you.

Now we’re not suggesting that this will work every time, but if you’re continually seeing flight, hotel and other tariffs shooting up after the first time you looked, then hopping on to another server and trying again may save you some cash.

5. Avoid bandwidth throttling

Bandwidth throttling is a major inconvenience for heavy internet users in some parts of the world. Internet service providers (ISP) use bandwidth throttling to slow down a user’s internet and provide stable speeds to everyone on the network.

One of the downsides of using a VPN is that it inherently slows your internet connection, at least by a little. There are instances where a VPN boosts your Mac’s internet speed, though. Some internet service providers throttle certain types of content.

If you stream a lot of videos, play data-heavy online games or frequently download large files, some ISPs will track that you’re consuming a lot of data and potentially limit you.

One way to try and avoid this is by installing a VPN on your Mac because it’ll mask your IP address. This way, your ISP will not know what activity of yours is using up data, and they won’t throttle your bandwidth.

Make sure you choose a good VPN for your Mac. Low-quality providers will not give you a good speed for your online activities and free VPNs often have their own server speed limits in place – so completely counterproductive.

6. Extra security for online banking

Any sensitive online data must be handled with care, and that’s exactly why online banking has high-grade security. Multiple levels of security make it difficult for hackers to breach through and access crucial financial information.

Of course online banking apps and services are getting more secure all the time and banks go to great lengths to protect their customers from cybercriminals. To have an even safer banking experience on your Mac, you can use a VPN. This will set up a secure and encrypted data tunnel to the VPN’s server so that bad actors have even less opportunity to intercept or steal your information.

7. Bypass VoIP restrictions

VoIP is the technology that applications like Skype use to make calls over the internet. As the world grows more connected, VoIP helps us to communicate at low costs with people living far away from us and is a crucial means of communication in a lot of the developing world.

VoIP apps are banned in certain countries like UAE and China, but a VPN can help you bypass such restrictions. Keep in mind that you’ll need a top-of-the-line VPN for this because not all VPNs are capable of working around blocks imposed by the government and letting you unblock WhatsApp and others.

8. Improved online gaming

Believe it or not, a VPN can help with gaming too. When playing online battle royales, timing is key, and that’s why even a little lag can give another player a competitive advantage over you. If you’re experiencing lag on your normal network, a VPN can help by reducing the ping (lag) so that you have a more responsive gaming experience.

Since a VPN encrypts and reroutes your data, it generally slows down the internet speed a bit. But if you select a VPN server that’s fast and close to your game’s server, you’ll experience better speeds. Not all VPN providers give you access to good quality servers, so pick one that has servers optimized for gamers.

Thinking about choosing a VPN for your Mac but don’t know where to start? Here’s what you need to check before signing up to a VPN service.

A VPN is an invaluable way to protect your privacy, but choosing a VPN provider is an exercise in trust. You are handing over access to much of your online data to a third party, so you need to be sure they will protect your information and not misuse it. If you’re new to using a VPN, it can be tough to know which providers are reputable.

Fortunately, there are steps you can take to check out a VPN provider before making a commitment. In this article, I’ll show you how to assess a VPN provider, so you can see for yourself whether they are worthy of your trust and your money.

macOS Sonoma displayed on MacBook Air, the 27-inch iMac, and MacBook Pro.  

What Is a VPN on an Mac?

A virtual private network, or VPN, sets up a secure and encrypted pathway between your Mac and the internet. A VPN server can be used to reroute your internet traffic, which will disguise your IP address and keep your online activities private from hackers, ISPs, government agencies and other third parties.

Why should I use a VPN on Mac?

Many Mac users have come to believe that macOS as a whole is an incredibly secure platform. That may be true to an extent, but vulnerabilities still exist. More obviously, these vulnerabilities may not exist in macOS themselves but rather third-party apps that implement poor code.

Using a VPN on an Mac offers several benefits:

  • Enhanced privacy and security: VPNs encrypt your internet traffic, making it unreadable to anyone who may try to intercept it. This includes hackers on public Wi-Fi networks, ISPs monitoring your browsing habits and government surveillance.
  • Bypass internet censorship: VPNs enable you to bypass internet censorship and access blocked websites by connecting to a server in a different country. This can be useful for accessing georestricted content, such as streaming services or news websites that are not available in your region.
  • Prevent online tracking: VPNs help protect your privacy by hiding your true IP address, making it difficult for advertisers and other third parties to track your online activities and build a profile based on your browsing habits.
  • Secure data transfers: Using a VPN on your Mac is particularly important when transferring sensitive information, such as when conducting online banking or accessing confidential business files. The encryption provided by a VPN ensures that your data remains secure during transmission.
  • Improved network performance: In some cases, using a VPN may improve network performance by avoiding ISP throttling or congestion on heavily used networks.

How To Choose the Best Mac VPN

An Mac VPN can protect your privacy on the go and at home. Here’s what you need to know about choosing the best one.

Essential VPN Features

  • Strong encryption: Get a VPN with industry-standard encryption protocols such as OpenVPN and WireGuard for better security and privacy.
  • Number of Servers: For convenience, you want a VPN provider with plenty of servers for you to connect to.
  • Strict no-logs policy: No-logs policy assures that the VPN provider doesn’t store any info on your internet usage, making it impossible for them to share your data with other people.
  • Kill switch: This feature automatically severs your device from the internet if the VPN connection disconnects, ensuring there are no data leaks.
  • DNS leak protection: DNS leak protection safeguards your DNS queries, keeping your browsing activity private and secure.
  • IPv6 leak protection: This feature prevents IPv6 leaks, which can expose your real IP address and compromise your privacy.

macOS Compatibility and Multi-Device Use

Most Mac VPNs also work on other Apple devices such as iPhones, iPads and iPod Touch. Additionally, many VPN providers offer apps for non-Apple products, including Android and Windows devices, allowing you to secure multiple devices under a single subscription. However, some providers have protocols built for specific devices (for example, hide . me has Bolt for Windows).

Pricing

Users should expect to pay for premium VPNs on a subscription basis, typically monthly or annually. Standard Mac VPN rates are around $7 to $10 per month if paid month to month, but users can save significantly by opting for longer-term plans. Annual and multi-year subscriptions often come with considerable discounts, lowering the average monthly cost.

There’s usually no difference in pricing for computer VPNs compared to mobile as most VPN providers offer multi-platform support within the same subscription plan. However, additional features such as a dedicated IP address, which provides you with a unique IP for enhanced privacy and access to certain services, may come at an extra cost.

To reduce VPN costs, you can:

  • Look for promotional offers or seasonal discounts provided by the VPN provider.
    Choose a longer-term subscription plan, which often comes with a lower average monthly cost.
  • Compare various VPN providers to find the best balance between price and features.
  • Give the VPN service a test run with a free trial or a money-back guarantee.
  • Keep an eye out for special deals, such as student discounts or referral programs that offer rewards for bringing in new customers.

Don’t always go for the cheapest option–consider value, features, security performance and customer support when choosing a VPN for your Mac.

Speed

When evaluating VPNs, it’s essential to consider the average download and upload speeds they offer to ensure an optimal browsing experience. Speed is crucial for a variety of online activities, such as streaming video, online gaming, video conferencing and file transfers. Fast speeds provide a seamless internet experience, while slow speeds can lead to buffering, lag and a frustrating user experience.

Fast VPN Speeds

A fast VPN should provide download speeds of at least 50 Mbps and upload speeds of 20 Mbps or more. These speeds are generally sufficient for most online activities, including HD video streaming and large file downloads. Faster speeds mean better user experiences, especially for those on high-speed connections.

VPN Throttling and Speed Reduction

It’s important to note that using a VPN can sometimes result in slower internet speeds. This is because your data must travel through the VPN server, which can add latency and decrease speed. The level of speed reduction largely depends on the VPN provider, server distance and network congestion.

Some VPNs also implement bandwidth throttling, intentionally limiting users’ connection speeds to manage server load or encourage users to upgrade to a higher-priced plan. However, many top-tier VPNs prioritize providing fast and stable connections without throttling.

To maintain fast speeds while using a VPN, consider the following:

  • Choose a VPN with a large server network: A VPN with a vast server network can distribute user traffic more efficiently, reducing the likelihood of server congestion and slow speeds.
  • Connect to a nearby server: The closer you are to the VPN server, the lower the latency and the faster the connection. Selecting a server in your country or a neighboring country can help improve speeds.
  • Use a VPN with WireGuard or similar protocols:WireGuard is a cutting-edge VPN protocol that offers faster speeds and improved performance compared to older protocols such as OpenVPN and IKEv2. Many top VPN providers now support WireGuard or have developed their own high-speed protocols.
  • Test different servers: If you’re experiencing slow speeds, try connecting to a different server. Some servers may be less congested or offer better routing to your destination, resulting in faster speeds.
  • Check your base internet speed: Your VPN speeds can’t exceed your base internet connection speed. Ensure you have a fast internet connection to make the most of your VPN’s capabilities.

Customer Support

Quality customer support is crucial when using a VPN. Look for providers with various support channels including email, live chat and ticket systems. Support that is 24/7 ensures you can receive assistance at any time, while comprehensive knowledge bases and FAQs can help you troubleshoot common issues independently.

What’s next for VPNs and macOS?

Discussions around VPNs will continue to occur so long as security is in the forefront of user’s minds. Until Apple rolls out its own VPN, users will have to rely on their own intuitions on which to pick from.

Tags: macOS, VPN