Got a tip for us?

iPad

The iPad is a tablet computer from Apple that runs the iOS mobile operating system. Similar in functionality to the iPhone, the iPads purpose is often quite different, sometimes even serving as a general desktop computer replacement.

You can relay phone calls and text messages through your iPhone to your iPad, so it’s easy to stay in touch no matter which device you’re on. Both devices need Wi-Fi on and the same Apple Account, and they need to be within 30 feet (10 meters) of each other. You can send and receive both iMessage and SMS messages.

Note: Cellular charges may apply. Wi-Fi Calling isn’t available from all carriers.

Before you begin

Before you begin, check that each of the following is true:

  • Both devices have Wi-Fi turned on and are connected to the same Wi-Fi network.
  • You’re signed in to the same Apple Account on both devices.

If you use a VPN, its configuration shouldn’t prevent local networking, since that may interfere with some Continuity features.

Set up your iPhone to allow phone calls on your iPad

  1. On your iPhone, open the Settings app.
  2. Tap Apps, then tap Phone.
  3. Tap Calls on Other Devices, turn on Allow Calls on Other Devices, and choose the devices you want to allow to make and receive calls.

    The devices you choose can make and receive calls when they’re near your iPhone, connected to the same Wi-Fi network, and signed in to the same Apple Account.

    Note: If you don’t have the Phone app on your iPad, you can download it from the App Store.

Make or receive phone calls on your iPad

Set up your iPhone to allow calls on your other devices, and your iPad can make and receive phone calls.

  • Make a call: Tap a phone number in Contacts, Calendar, FaceTime, Messages, or Safari. Or open the Phone app, then tap the Keypad button and type a number, or search for a contact.

    If you make a call from another device by relaying it through your iPad with Dual SIM, the call is made using your default voice line.

  • Receive a call: Swipe or tap the notification to answer or ignore the call.

Send and receive messages on your iPad

You can send and receive both iMessage and SMS/RCS/MMS messages on your iPad.

For sending and receiving iMessages on iPad, read our article, Get started with Messages on iPad.

If phone calls and text messages on your iPad aren’t working

  • Make sure that you’re signed in to the same Apple Account on both devices.
  • Make sure that your iPhone and iPad have Wi-Fi turned on.
  • Your devices must be within 30 feet (10 meters) of one another.

Besides making and receiving phone calls on your iPad, you can use Handoff to move a FaceTime call from one device to another. See our guide, Hand off a FaceTime call from your iPad to your other Apple devices.

See also

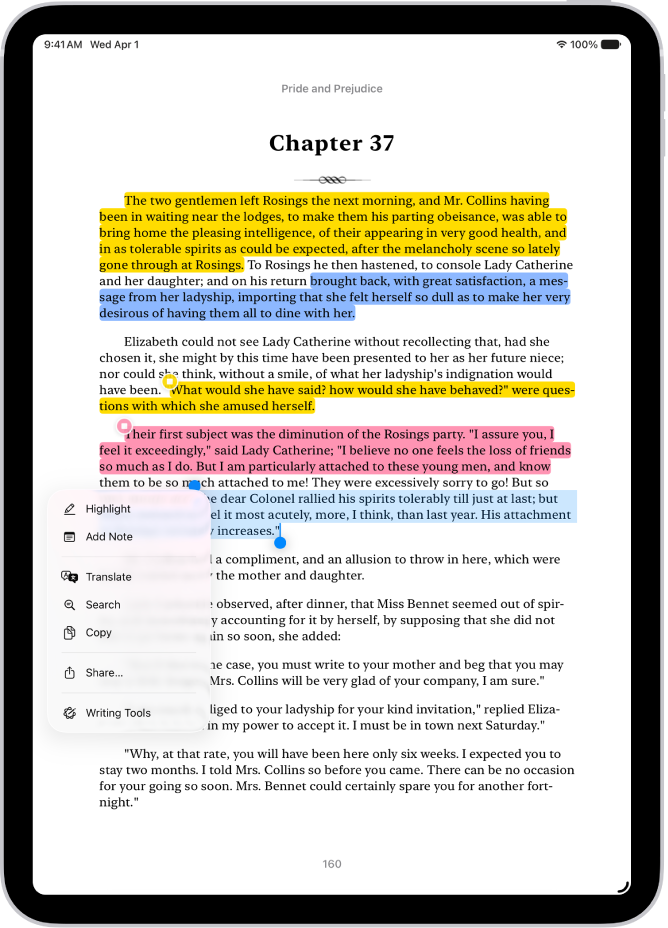
You can highlight, underline, and take notes as you read books in the Books app, and then share your annotations with others.

You can see all of your highlights and notes in one place, go to that location in the book, change the highlight color, or switch to underline. You can also translate, search, or copy text, and remove a highlight or a note.

Here’s how to annotate books in the Books app on iPad.

A page of a book in the Books app, with a portion of the page’s text selected. The Highlight, Add Note, Translate, Search, Copy, and Share buttons are above the selected text.

Note: Apple Books isn’t available in all countries or regions.

Highlight or underline text

  1. Start the Books app on your iPad.
  2. Tap a book cover to open it.
  3. Touch and hold a word, move the grab points to adjust the selection. Then tap Highlight.

    To remove a highlight or underline, tap the text, then tap Remove Highlight.

  4. To change the highlight color or switch to underline, tap the text, tap Highlight, and tap an option.

To see all of your highlights, tap the page, tap the Menu button, tap Bookmarks & Highlights, then tap Highlights. Tap a highlight to go to that location in the book.

Add a note

  1. Start the Books app on your iPad.
  2. Tap a book cover to open it.
  3. Touch and hold a word and then move the grab points to adjust the text selection.
  4. Tap Add Note, enter text, and then tap the Done button.

    To remove a note, tap the highlighted text, tap Remove, then tap Remove Note.

To see all of your notes, tap the page, tap the Menu button, tap Bookmarks & Highlights, then tap Highlights. Tap a note to go to that location in the book.

Share highlights and notes

  1. Start the Books app on your iPad.
  2. Tap a book cover to open it.
  3. Tap a highlight or note and tap the Forward button. Then tap Share.

    Tip: To share multiple highlights or notes at the same time, tap the Menu button, tap Bookmarks & Highlights, then tap Highlights. Tap the Checklist button, tap the items you want to share, then tap the Share button.

Delete a note

  1. Start the Books app on your iPad.
  2. Tap a book cover to open it.
  3. Tap a note and tap Remove. Then choose Remove Note or Remove Highlight & Note.

    Tip: To delete multiple notes or highlights at the same time, tap the Menu button, tap Bookmarks & Highlights, then tap Highlights. Tap the Checklist button, tap the items you want to delete, then tap the Delete button.

Translate, search, or copy text

As you read, select text and translate or copy it, or search the book for that text.

  1. Start the Books app on your iPad.
  2. Tap a book cover to open it.
  3. Touch and hold a word and then move the grab points to adjust the text selection.
  4. Tap the Forward button and then tap Translate, Search, or Copy.

See also

You can personalize your Lock Screen by choosing a wallpaper, showcasing a favorite photo, changing the font of the time, adding widgets, and more.

You can also create more than one Lock Screen and switch between them, and even link a Lock Screen to a Focus—so you could set one for when you’re working. You can even try a spatial scene for a 3D effect on supported models, and the time can dynamically adapt to your photo wallpaper and notifications.

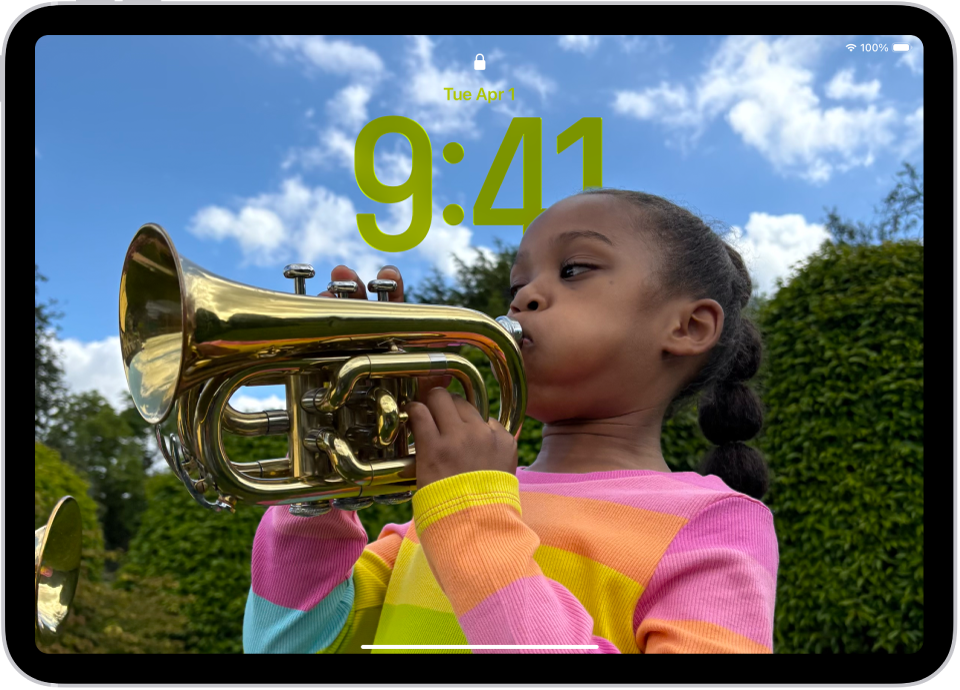
The iPad Lock Screen with a custom photo that fills the screen.

Edit your Lock Screen or create a new one

  1. Press the top button on your iPad.
  2. Touch and hold the Lock Screen and then tap the Add New Lock Screen wallpaper button to create a new Lock Screen. (If the Add New Lock Screen wallpaper button doesn’t appear, touch and hold your Lock Screen again, then enter your passcode.)

    To make changes to an existing Lock Screen, swipe to the screen you want to change, then tap Customize.

  3. If you’re creating a new Lock Screen, choose your wallpaper. On supported models, you can try a spatial scene for a 3D effect and try options where the time dynamically adapts to your photo wallpaper and notifications.

    Note: If you don’t see a wallpaper option you want to use (for example, Weather or Astronomy), scroll down to see more options, then tap Get below the one you like.

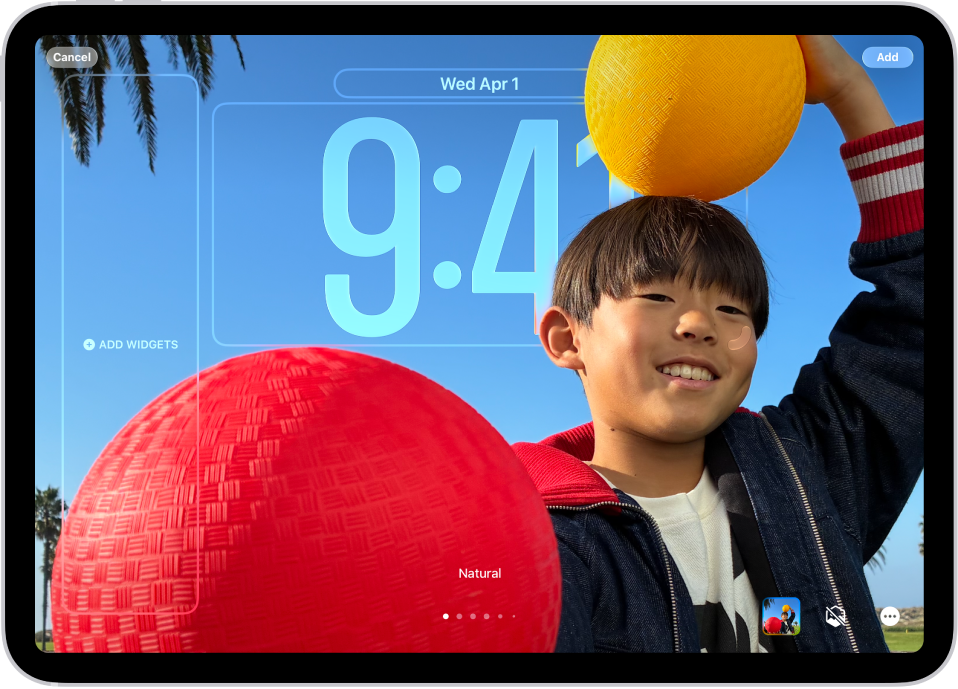
    A custom Lock Screen in the process of being edited. Elements available for customization are selected—the date, the time, and a button for adding widgets.

  4. Here are some ways to customize your Lock Screen (options depend on the wallpaper you choose):

    • Change the look of the clock: Drag the bottom right corner to increase the height and tap the time to change the font, switch to a more transparent look, and more.
    • Add a 3D effect: On supported models, if you’ve added a photo that supports spatial effects, tap the Spatial Capture button.
    • Add or change the widgets: Tap your existing widgets or tap Add Widgets.
    • Reposition your photo: Pinch open to zoom in and drag the image with two fingers to move it. Pinch closed to zoom out.
    • Create a multilayered effect: Tap the Depth Effect button. Or if you have a photo that supports layering, tap the More button and choose Depth Effect.
    • Change the style: Swipe left or right to try different color filters.
    • Create a motion effect with a Live Photo: If you select a Live Photo that can be translated into slow motion, tap the Live Photo button to play the Live Photo when the device wakes up.
    • Set the shuffle frequency: If you chose Photo Shuffle, tap the photo thumbnail to change the photo selection or change the shuffle frequency by tapping the More button.
    • Switch between a light and dark appearance: If the background you chose has a light mode and dark mode option, tap the Appearance button.
  5. Tap Add, then do one of the following:

    • Choose to use the wallpaper on both the Lock Screen and Home Screen: Tap Set as Wallpaper Pair.
    • Make changes to the Home Screen: Tap Customize Home Screen. Tap a color to change the wallpaper color, tap the Select a photo button to use a custom photo, or select Blur to blur the wallpaper so the apps stand out.

Link a Focus to your Lock Screen

A Focus minimizes distractions so you can concentrate on a task. Once you set up a Focus, link it to your Lock Screen, and your Focus settings apply whenever you use that Lock Screen, and that Lock Screen shows up whenever that Focus is on.

  1. Press the top button on iPad.
  2. Touch and hold the Lock Screen until the Customize button appears at the bottom of the screen.
  3. Tap Focus near the bottom of the wallpaper to see the Focus options—for example, Do Not Disturb, Personal, and Work.
  4. Select a Focus and then tap the Close button.

Switch between Lock Screens

You can create multiple custom Lock Screens and switch between them throughout the day.

  1. Press the top button on iPad.
  2. Touch and hold the Lock Screen until the Customize button appears at the bottom of the screen.
  3. Swipe to the Lock Screen you want to use, then tap it.

Note: If you switch from a Lock Screen that’s linked to a specific Focus to another Lock Screen, your Focus switches, too.

Delete a Lock Screen

You can delete Lock Screens you no longer need.

  1. Press the top button on iPad.
  2. Touch and hold the Lock Screen until the Customize button appears at the bottom of the screen.
  3. Swipe to go to the Lock Screen you want to delete, swipe up on the screen, tap the Trash button, and tap Delete This Wallpaper.

See also

Any recording can be exported from Voice Memos to the Files app on your iPad. By default, recordings are exported in .m4a format, so layered recordings are flattened and Spatial Audio becomes stereo.

You can keep them, though. When you share, you can adjust your sharing options to retain any layers or recording effects, and from the Files app, you can import your recording into Logic Pro, where you’ll edit or enhance it with professional audio editing tools.

Export a recording to Files

  1. Go to the Voice Memos app on your iPad.
  2. Tap the recording you want to export and then tap the Share button.
  3. To export a file where the effects and layers can be adjusted later (QuickTime Audio format), tap Options. Then tap Editable. Choose if you want your layers merged or separated. Then tap the Done button.
  4. Scroll down and tap Save to Files, go to the location where you want to save the recording. Then tap Save.

You can import your recording from the Files app into Logic Pro, then edit or enhance it with professional audio editing tools.

See also

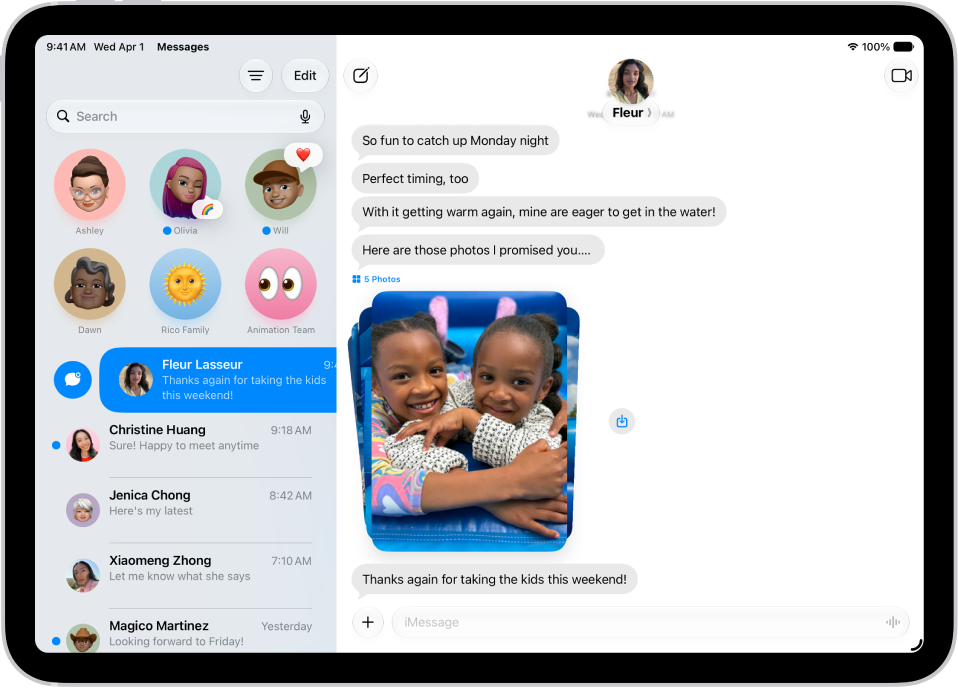
You can catch up on text messages you missed, mark messages as unread, and pin and unpin conversations to prioritize messages in the conversation list.

If messages arrive while notifications are paused or you’re away from your iPad, you can jump straight to the first one you haven’t read. And when you don’t have time to respond, marking a conversation as unread lets you come back to it later. You can also see a list of your unread messages.

A Messages conversation list with an unread message and another being marked as unread.

Catch up on messages you missed

If messages came in while notifications were paused or you were away from your iPad, you can jump to the first one you haven’t seen in a conversation.

  1. Go to the Messages app on your iPad.
  2. Open an unread conversation and then tap the Catch up button.

    Your view of the conversation moves up to the first unread message.

Mark messages as unread

When you don’t have time to respond, you can mark conversations as unread so you can return to them later.

  1. Start the Messages app on your iPad.
  2. In the conversation list, do one of the following:
    • Swipe right on a conversation to mark it as unread.
    • Drag right and tap the Mark as Unread button.

Quick tip: It’s possible to mark several messages as unread at the same time, too. From the conversation list, tap Edit, tap Select Messages, and select the conversations to mark as unread. When you’re done selecting, tap Unread in the bottom-left corner.

See a list of your unread messages

  1. Start the Messages app on your iPad.
  2. In the conversation list, tap the Filter button and then tap Unread.

    A checkmark appears next to Unread, and the icon turns blue to indicate that filtering is on.

  3. To see both your read and unread messages again, tap the Filter button. Then tap to deselect Unread.

Quick tip: You can mark all your unread messages as read at once: Tap Edit, tap Select Messages, then tap Read All.

Pin a conversation

Pinning specific conversations to the top of the conversation list keeps the people you contact most at the front. Pinned conversations show up as larger icons at the top of your conversation list.

  1. Start the Messages app on your iPad.
  2. Touch and hold a conversation, then tap Pin.

Unpin a conversation

You can unpin pinned conversations so that they no longer appear at the top of the conversation list.

  1. Start the Messages app on your iPad.
  2. Touch and hold a pinned conversation and then do one of the following:
    • Drag the message to the bottom of the list, and let go.
    • Tap Unpin.

Pin shared items

You can pin certain shared items—such as links or collaboration invitations—within a conversation.

  1. Start the Messages app on your iPad.
  2. Touch and hold a message and then tap Pin.
  3. To find pinned items, tap the contact or group icon at the top of the conversation and then tap a category (such as Links). Pinned items appear at the top.

To unpin a pinned item, touch and hold it in the message, then tap Unpin. If you’re in the Links or Documents tab, touch and hold it, tap Show in Conversation, touch and hold it in the message, then tap Unpin.

Turn message summaries on or off

Apple Intelligence can summarize the key points of your conversations, with those summaries automatically replacing your message previews. If you’d rather see the most recent message in each conversation, turn off summaries.

Note: Apple Intelligence on iPadOS 27 or later is available on an Apple Intelligence-enabled iPad mini (A17 Pro) and iPad models with M1 or later. Apple Intelligence is not available in all languages or regions. Usage limits may apply.*

  1. Start the Settings app on your iPad.
  2. Tap Apps, then tap Messages.
  3. Turn Summarize Messages on or off.
  4. To view message summaries, open the Messages app. Then look for the Summary icon below a name in the conversation list. The text following the symbol is a summary of unread messages in that conversation.

*Apple Intelligence is available with Siri and device language set to Chinese (Simplified), Chinese (Traditional), Danish, Dutch, English, French, German, Italian, Japanese, Korean, Norwegian, Portuguese, Spanish, Swedish, Turkish, or Vietnamese. Some features may not be available in all regions or languages. Some devices may not be available in all regions. Siri AI is available in beta in iOS 27, iPadOS 27, macOS 27, watchOS 27, and visionOS 27 and requires an Apple Intelligence–enabled device set to a supported language. Available in English to start. Siri AI will not be initially available in the EU on iOS, iPadOS, and watchOS. Certain Apple Intelligence features that rely on server-side models are subject to daily usage limits, including but not limited to Siri AI, Intelligent Photo Editing Tools, Image Playground, and AFM 3 Cloud models in Shortcuts. Daily limits may vary by feature, request complexity, system demand, system policies, and other factors. Expanded access to such features will be available for a fee in the future. Use of these features is subject to the Apple Intelligence Terms and Conditions.

See also

In the Notes app, you can add photos, videos, and information from other apps, such as maps, links, and documents.

That could be a location from Maps, a webpage from Safari, or a PDF from Files. You can change the preview size of attachments, and even draw on a photo. Photos and videos you take in Notes can be saved to the Photos app, too.

Here’s how to add photos, video, and more to notes on iPad.

Add a photo or video

  1. Start the Notes app on your iPad.
  2. In a note, tap the Attachments button and choose an option.

Quick tip: Tap the photo, then tap the Handwriting Tools button, and you can draw on a photo.

To save photos and videos taken in Notes to the Photos app, go to Settings > Apps > Notes, then turn on Save to Photos.

Add info from another app to a note

You can attach information from another app to a note, such as a webpage in Safari, a screenshot, a location in Maps, or a PDF in Files.

  1. In the app you’re using, open the item you want to share (for example, a map or webpage).
  2. Tap Share or the Share button. Then tap Notes or Add to Quick Note.
  3. Save the item to a new note or choose an existing note.

Change the preview size of attachments

  1. Start the Notes app on your iPad.
  2. In a note, you can change the preview size of the following:
    • A single attachment: Touch and hold the attachment or tap the More button, tap View As, and choose an option.
    • All attachments in a note: Tap the More button, tap Attachment View, and then choose Set All to Small or Set All to Large.

View all attachments in Notes

  1. Start the Notes app on your iPad.
  2. Above the notes list, tap the Folder Actions button. Tap View Attachments to see thumbnails of photos, links, documents, and other attachments. (Attachments in locked notes aren’t shown.)
  3. To go to a note with a specific attachment, tap the attachment thumbnail. Then tap Show in Note.

See also

Tag: Notes

In supported apps such as Notes and Photos, you can use the Markup tools to draw and sketch in your documents and images. You can also use the Markup tools to annotate screenshots, PDFs, and more.

You can move the Markup toolbar to any edge of the screen, collapse it automatically, draw straight lines, and edit or move a drawing.

Here’s how to draw and handwrite with Markup on iPad.

Note: When a supported app doesn’t show the Markup toolbar, tap the Markup button or Markup, and if the toolbar is minimized, tap its minimized version.

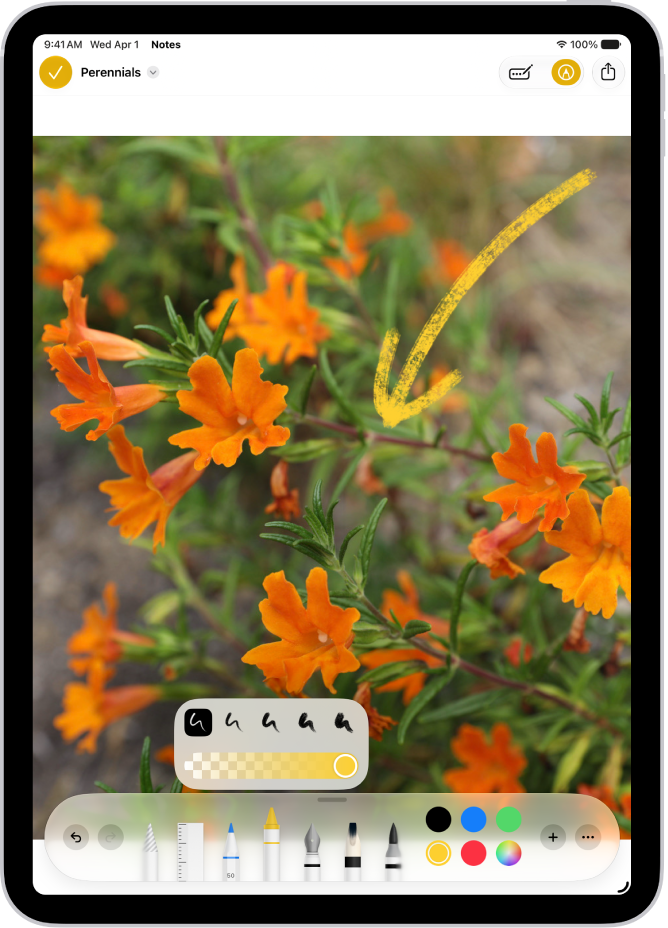
A note is open in the Notes app, and the Markup toolbar is open at the bottom of the screen. The Markup tools from left to right are: the Pen, Mono line, Marker, Eraser, Lasso, Ruler, and Pencil, followed by color buttons, the Add button, and the More button.

Show and hide the Markup toolbar

To show the Markup toolbar in a supported app, tap the Show Handwriting Tools button or Markup, then do any of the following:

  • Move the Markup toolbar: Drag the toolbar to any edge of the screen.

    (Drag from the edge of the toolbar closest to the center of the screen.)

  • Collapse the toolbar automatically: Tap the More button, then turn on Auto-minimize.

    To show the full toolbar again, tap the minimized version.

  • Hide the toolbar: Tap the Show Handwriting Tools button or the Done button.

Draw or handwrite

  1. In the Markup toolbar, tap the pen, marker, or pencil tool. Then draw or handwrite with your finger or Apple Pencil (on supported iPad models).
  2. Do any of the following in the toolbar:
    • Change the line weight: Tap the selected drawing tool, then tap an option.
    • Change the opacity: Tap the selected drawing tool and drag the slider.
    • Change the color: Tap the Color Picker button, tap Grid, Spectrum, or Sliders, and then choose a color.
    • Undo: Tap the Undo button.

Draw straight lines

  1. In the Markup toolbar, tap the Ruler tool. Do any of the following:
    • Move the ruler: Drag the ruler with one finger.
    • Change the angle: Touch and hold the ruler with two fingers. Then rotate your fingers.
  2. Draw a line along the edge of the ruler.
  3. To hide the ruler, tap the Ruler tool in the toolbar again.

Edit or move a drawing

  1. In the Markup toolbar, tap the Lasso tool (between the eraser and ruler).
  2. Touch and hold a group of strokes or circle multiple drawings and then do any of the following in the formatting tools that appear near the selection:
    • Change the color: Tap the Set Fill button.
    • See editing options: Tap the More button. Then tap Cut, Copy, Duplicate, and more.
  3. To move the drawing, touch and hold it until it lifts up and drag it to a new location.

Select and edit handwritten text

  1. In the Markup toolbar, tap the Lasso tool (between the eraser and ruler) and then do any of the following:
    • Select a word or drawn object: Double-tap it.
    • Select a sentence: Triple-tap it.
    • Select a paragraph or text block: Touch and hold the first word and drag to the last word. To select more precisely, drag slowly.
  2. Tap the selected content you want to revise, tap it, and do any of the following:
    • Edit: Tap an option, such as Copy as Text, Translate, or Straighten. To see other options, tap the Forward button. If you see the formatting tools near your selection, tap the More button. Then tap Cut, Copy, Duplicate, and more.
    • Recolor: Tap a color in the Markup toolbar or tap the Set Fill button in the formatting tools.

In iPad apps that support Markup, anything you write in a text field turns into typed text right away. See our guide, Enter text with Scribble. And for more ways to edit your handwriting or drawing in Notes, read our article, Add drawings and handwriting in Notes.

Erase part or all of your drawing

  1. In the Markup toolbar, tap the eraser tool.
  2. Do any of the following:
    • Erase pixels: Scrub over what you want to remove with your finger.
    • Erase a group of strokes: Tap the eraser tool, tap Object Eraser, and touch the grouped strokes with your finger.
  3. To switch between the erasers, tap the eraser tool again and choose Pixel Eraser or Object Eraser.

See also

Tag: Markup

With Apple Intelligence, you can use Live Translation to see incoming texts in other languages automatically translated to your preferred language in the Messages app. Because Live Translation relies on Apple-built models that run entirely on device, your personal conversations stay private.

It works with the languages you download. You can choose a different language for a conversation, view the original text along with the translation, or turn off Live Translation for the conversation.

Note: Apple Intelligence on iPadOS 27 or later is available on an Apple Intelligence-enabled iPad mini (A17 Pro) and iPad models with M1 or later. Apple Intelligence is not available in all languages or regions. Usage limits may apply.*

For more information on Apple Intelligence and privacy, see Apple Intelligence and privacy.

  1. Download the languages you want to translate.
  2. Open the Messages app on your iPad.
  3. When you receive a message in a different language, do any of the following:
    • Choose a different language: Tap the contact or group icon at the top of the conversation, scroll down, and then tap Translate From or Translate To.
    • View the original text: At the bottom of the conversation, tap Translating [language] and then choose to see the original text in addition to the translated text.
    • Turn off Live Translation for the conversation: At the bottom of the conversation, tap Translating [language] and tap Stop Translation.

*Apple Intelligence is available with Siri and device language set to Chinese (Simplified), Chinese (Traditional), Danish, Dutch, English, French, German, Italian, Japanese, Korean, Norwegian, Portuguese, Spanish, Swedish, Turkish, or Vietnamese. Some features may not be available in all regions or languages. Some devices may not be available in all regions. Siri AI is available in beta in iOS 27, iPadOS 27, macOS 27, watchOS 27, and visionOS 27 and requires an Apple Intelligence–enabled device set to a supported language. Available in English to start. Siri AI will not be initially available in the EU on iOS, iPadOS, and watchOS. Certain Apple Intelligence features that rely on server-side models are subject to daily usage limits, including but not limited to Siri AI, Intelligent Photo Editing Tools, Image Playground, and AFM 3 Cloud models in Shortcuts. Daily limits may vary by feature, request complexity, system demand, system policies, and other factors. Expanded access to such features will be available for a fee in the future. Use of these features is subject to the Apple Intelligence Terms and Conditions.

iPad turns off the display to save power, locks for security, and goes to sleep when you’re not using it. You can quickly wake and unlock iPad when you want to use it again.

You can unlock iPad with Face ID, Touch ID, or a passcode, depending on your model. And iPad locks by itself after a certain amount of time without use, though you can lock it manually, too.

Wake iPad

You can wake iPad in a few different ways:

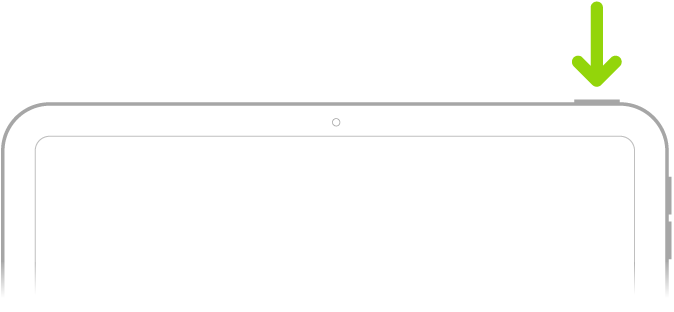
  • Press the top button.

    A green arrow pointing to the button in the top right of iPad.

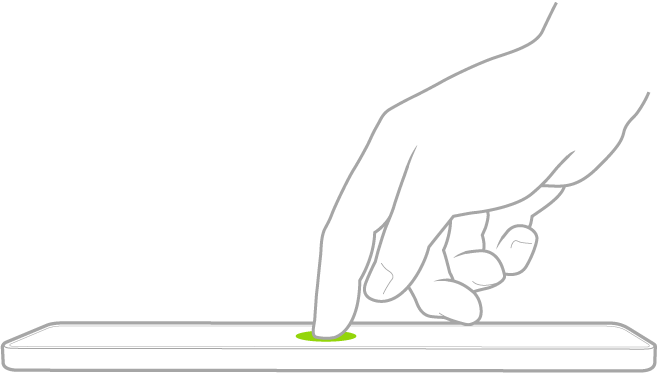
  • Tap the screen (supported models).

    A finger tapping the screen to wake iPad.

  • Open a Smart Folio, Smart Cover, or Magic Keyboard cover.

Unlock iPad with Face ID

If you have an iPad with Face ID, but you didn’t turn on Face ID during setup, see Set up Face ID. Then follow these steps:

  1. Tap the screen, then glance at your iPad.

    The lock icon animates from closed to open to indicate that iPad is unlocked.

  2. Swipe up from the bottom of the screen.

To lock iPad again, press the top button. iPad locks automatically if you don’t touch the screen for a minute or so. However, if Attention Aware Features is turned on, iPad won’t dim or lock as long as it detects attention. To turn it on or off, go to the Settings app, then tap Face ID & Passcode.

Unlock iPad with Touch ID

Have an iPad with Touch ID that you didn’t set up during setup? See our guide, Set up Touch ID. On an iPad with a rectangular button on the top edge, use the top button; with a circular button at the bottom of the screen, the Home button is the one to use, and after that, do one of the following:

  • On an iPad with a Home button: Press the Home button using the finger you registered with Touch ID.

    The Home button (Touch ID) at the bottom of iPad.

  • On iPad (10th generation and later), iPad mini (6th generation), iPad mini (A17 Pro), and iPad Air (4th generation and later): Rest your finger on the top button (Touch ID) using the finger you registered with Touch ID.

    A green arrow pointing to the button in the top right of iPad.

To lock iPad again, press the top button. iPad locks automatically if you don’t touch the screen for a minute or so.

Unlock iPad with a passcode

If you didn’t create a passcode when you set up iPad, see Set a passcode. Then follow these steps:

  1. Press the Home button (on an iPad with a Home button) or swipe up from the bottom of the Lock Screen (on other iPad models).
  2. Enter your passcode.

Lock iPad

You can lock iPad and turn off the screen in the following ways:

  • Manually: Press the top button.
  • Automatically: iPad locks on its own if you don’t interact with it for a certain amount of time. To change how long iPad waits before locking, see Change when iPad automatically locks.

See also

Tag: Setup

You can share the internet connection from your iPad (Wi-Fi + Cellular) with other devices using a feature called Instant Hotspot. It uses the Personal Hotspot on your iPad, and it’s useful when your other device doesn’t have internet access from a Wi-Fi network.

Before you begin, make sure both devices have Wi-Fi and Bluetooth® turned on, and that they’re within 30 feet (10 meters) of each other. Both devices also need to meet minimum system requirements for Instant Hotspot.

You can connect other devices to your Personal Hotspot in several ways:

  • Connect your Mac to your iPad through Wi-Fi settings.
  • Pair your two devices with Bluetooth®.
  • Connect your Mac to your iPad with a cable.

Your iPad’s Personal Hotspot works with a Mac, a Windows device, an iPhone, another iPad, and more.

Note: Personal Hotspot isn’t available with all carriers. Additional fees may apply. The number of devices that can join your Personal Hotspot at one time depends on your carrier and iPad model. Contact your carrier for more information.

Before you begin

Before you start, check that all of the following are true:

  • Both devices have Wi-Fi and Bluetooth® turned on.
  • The devices are within 30 feet (10 meters) of each other.
  • Both devices meet minimum system requirements for Instant Hotspot.

A VPN configuration that prevents local networking may interfere with some Continuity features, so check yours if you’re using one.

If you’re sharing your Personal Hotspot with your Apple devices, signing in to the same Apple Account on both devices makes it faster to connect.

Note: Personal Hotspot won’t work unless you share the cellular internet connection on your iPad. Connecting your iPad to a Wi-Fi network and then sharing that network with another device isn’t possible.

Set up Personal Hotspot on your iPad

  1. On your iPad, open the Settings app.
  2. Tap Cellular and then tap Set Up Personal Hotspot.
  3. Follow the onscreen instructions.

    Tip: The name of your Personal Hotspot is the same name as your device, so if you want to change the name of your Personal Hotspot, you need to change the device name. To change your device name, go to Settings > General > About, then tap Name.

When you set up your Personal Hotspot, you set up a password to connect to it. To change the password later, go to Settings > Cellular > Personal Hotspot, then tap Wi-Fi password and enter a new password.

Note: When Cellular Data is on in Settings > Cellular and you still don’t see Set Up Personal Hotspot as an option, ask your carrier to add Personal Hotspot to your plan.

Turn Personal Hotspot on and off on your iPad

  1. On your iPad, open the Settings app.
  2. Tap Personal Hotspot.
  3. Follow the onscreen instructions.

You pick who’s allowed to use your Personal Hotspot and set a password for it. In a Family Sharing group, you can also have your Personal Hotspot shared automatically with specific family members.

Connect to a Personal Hotspot with Wi-Fi

Through Wi-Fi settings, another device can connect to the Personal Hotspot on your iPad, including an iPhone, a Mac, another iPad, a Windows device, and many other devices that can connect to a Wi-Fi network.

  1. On the device that you want to connect to the Personal Hotspot on your iPad, do any of the following:

    • On an iPhone with Touch ID: Swipe down from the top-right edge to open Control Center. Tap the Wi-Fi Status menu to turn Wi-Fi on. Choose your iPad.
    • On an iPhone with Face ID: Swipe up from the bottom to open Control Center. Tap the Wi-Fi Status menu to turn Wi-Fi on and then choose your iPad.
    • On an iPad: Swipe down from the top-right edge to open Control Center. Tap the Wi-Fi Status menu to turn Wi-Fi on. Choose your iPad.
    • On a Mac: Click the Wi-Fi Status menu in the menu bar. Then choose your iPad.
    • On a Windows device or other device: Follow the manufacturer’s instructions to connect to a Personal Hotspot.
  2. Enter the password you set up for your Personal Hotspot to connect. If you’re connecting another Apple device and you’re signed in to the same Apple Account on both devices, you don’t need to enter a password.

    Note: When a Mac is connected to your Personal Hotspot, the Personal Hotspot icon appears in the status bar of the connected Mac.

When you’re not using the hotspot, your devices automatically disconnect, which saves battery life.

Connect to a Personal Hotspot with Bluetooth

A Mac or Windows device can also use Bluetooth instead of Wi-Fi to connect to the Personal Hotspot on your iPad, as long as both devices have Bluetooth turned on.

  1. On your Mac, open the System Settings app.

    Note: If your Mac has macOS 12.5 or earlier, choose Apple menu > System Preferences.

  2. Click Bluetooth in the sidebar. (You may need to scroll down.)
  3. On your iPad, open the Settings app. Then tap Bluetooth.

    Keep Bluetooth Settings open to make sure that your device is discoverable.

  4. On your Mac, select your iPad when it appears. (It may take a moment.)

When it’s connected by Bluetooth, your Mac can use the cellular connection on your iPad right away.

Connecting your Windows device to your iPad over Bluetooth means setting up a Bluetooth network connection, following the manufacturer’s directions.

Connect to a Personal Hotspot with a USB cable

The USB cable that came with your iPad can also link a Mac or Windows device to your iPad’s Personal Hotspot, and so can another cable that matches the ports on your iPad and the other device.

If you see an alert on your iPad that says Trust This Computer? tap Trust. You may be asked to enter your device passcode to proceed. If you see an alert on your Mac that says “Allow accessory to connect?” click Allow.

Note: On a Windows device, connecting to your Personal Hotspot with a USB cable requires having Apple Devices or iTunes installed.

A cable connection lets your Mac or Windows device use the cellular connection on your iPad as soon as it’s in place.

If your Personal Hotspot isn’t working

  • Make sure that your devices have Wi-Fi and Bluetooth turned on.
  • Your devices must be within 30 feet (10 meters) of one another.
  • Maximize compatibility in Settings > Personal Hotspot, then enable Maximize Compatibility. Maximize Compatibility may reduce performance for devices connected to your Personal Hotspot when turned on.

When you share a Personal Hotspot from your iPad, it uses cellular data for the internet connection. To monitor your cellular data network usage, go to Settings > Cellular. See Set up cellular service on iPad (Wi-Fi + Cellular models).

If you use Family Sharing, any member of your family can use your Personal Hotspot. To set it up, read our article, Set up Family Sharing on iPad.

See also