Got a tip for us?

At this moment in time, everyone is wondering how to practice proper iPhone cleaning techniques. As the coronavirus continues to spread and affect daily life, everyone is becoming much more aware of how to sanitize our homes, bodies, and possessions. As many of you may already know, your phone tends to be one of the things you touch most during a day. We can argue that it’s usually one of the dirtiest items you own.
With the spread of the novel coronavirus around the world, people are more concerned than ever with staying clean and germ-free. People know, too, that their Smartphones and other devices can carry more than a few germs, making it important to clean those gadgets every now and again.

But how should you be cleaning your smartphone or tablet? And how worried should you be about catching or spreading a virus like COVID-19 via your trusty smartphone in the first place?

While you may know how to clean your flat screen monitor, TV, or laptop screen, today we’re going to learn something different. We’re going to look at how to properly disinfect your iPhone.

That process may sound easy and..well, it kind of is. However, you’d be amazed by how easy it can go wrong if you don’t follow a basic series of steps.

To help ensure that you’re cleaning your iPhone cleaning sessions are for more than just show, here’s a basic how-to on properly disinfecting your phone.

Basic Cleaning Steps

Luckily for all of us,Apple outlines basic iPhone cleaning instructions on their website. Here are the simple steps you can follow to disinfect youriPhone.

Unplug all cables and power off your iPhone.

Use a soft, slightly damp, lint-free cloth such as a lens cloth.

In case material is still present, use a soft, lint-free cloth with warm soapy water.

Avoid getting moisture in any opening.

Don’t use cleaning products or compressed air.

Interestingly, Apple outlines some slightly different cleaning instructions based on what model of iPhone you own. Essentially, the instructions are the same, but here are a couple of points you should keep in mind.

iPhone 8s and later have a fingerprint-resistant coating. However, this coating can diminish over time and through the wear of repeated cleanings. Be careful while cleaning these modelsand be aware of the coating’s reduction.
If your iPhone model doesn’t have that protective coating, you’re going to have to be more aware of lingering fingerprints and how oils may affect it. Clean these models more often and more carefully.
If you have an iPhone model with a home button, you need to take that into consideration during iPhone cleaning. A dirty home button may affect your iPhone’s touch ID functionality. Be sure to wipe the home button-down with a soft cloth.
Earlier models of iPhones might have additional ports and openings that must be cleaned. Follow basic cleaning guidelines when cleaning these ports carefully.

Can You Safely Disinfect Your iPhone?

The short answer is yes. You can disinfect your iPhone. However, we want to stress on the term “safety.”

Apple says that it’s okay to use a 70 percent isopropyl alcohol wipe on your iPhone. You may use this wipe to softly clean the exterior of your device. As always, try not to apply unnecessary pressure. In addition, you should not let excess moisture to gather.

It’s also important to note that you should not be using sprays or liquids directly during iPhone cleaning. Doing so may lead to excess moisture creeping into the interior of your iPhone. The same is true for hand sanitizer which can seriously damage your iPhone’s screen. If you must use a spray, always apply it to a soft cloth before wiping your iPhone.

If you are not aware, it’s also very important to avoid the use of bleach or rubbing alcohol for your iPhone. You can easily ruin your device with such products, and we don’t think Apple will accept to replace your bleached iPhone.

When using a wipe during iPhone cleaning, be sure to pay attention to your screen, the back of the device, and other commonly touched areas. Avoid ports whenever possible and try to dry your phone with a soft cloth after giving your phone enough time to dry.

What Products Can You Use For iPhone Cleaning?

70% Isopropyl Alcohol Wipes

70% is the magic mark for disinfectant wipes. That percentage guarantees the effectiveness of the wipe as far as killing most known germs and bacteria is concerned. Most of the more popular disinfectant wipes (such as those made by Clorox) contain the most appropriate percentage of alcohol. Of course, you should always check just to be sure

70% Isopropyl Alcohol Sprays

As we pointed out, it’s completely okay to use a spray during iPhone cleaning. You just have to be sure to not apply the spray directly to your iPhone. Instead, spray the product onto a soft piece of cloth and then use it to gently wipe your iPhone.

Compressed Air

One of the best ways to clean your iPhone’s ports and crevices is compressed air. This way, you don’t have to make physical contact with your iPhone. While using compressed air, it’s much safer to use than other alternatives. Just keep in mind to follow your compressed air’s guidelines in order to ensure proper iPhone cleaning safety.

Q-Tips

Q-Tips (or a non-branded equivalent) are an underrated way to clean your iPhone. By applying a recommended disinfectant solution to a cotton swab, you can easily clean your iPhone’s ports and other areas that are difficult to reach. Just avoid applying too much pressure when using a swap or tear the cotton.

Microfiber Wipes

Another great tools for iPhone cleaning are Microfiber wipes. Not only can you use dry ones to wipe fingerprints, but you can apply disinfectant to them to safely clean the rest of your iPhone. You cannot go wrong with these if you want the best overall iPhone cleaning solution around.

What Products Shouldn’t You Use For iPhone Cleaning?

Soap/Hand Sanitizer

While it’s theoretically possible to use these in a way that won’t damage your iPhone, this is not an ideal iPhone cleaning solution. They’re messy, and if you love your iPhone, stay away from using them. A little soap mixed with warm water is okay in a pinch, but be sure to properly mix it with water beforehand.

Paper Towels

There has been some debate about whether or not to use paper towels for iPhone cleaning. While it’s generally agreed that you can do it safely, it’s certainly not the most effective iPhone cleaning solution. Paper towels can be coarse and may end up scratching your iPhone.

Bleach/Pure Alcohol

This is probably the biggest “No” we’ll cover in this article. While bleach and alcohol are undoubtedly ideal in their own right, they can easily damage your iPhone. Even when using sprays, try to be very careful with how much you use and how you apply it to your screen.

General Cleaning Tips

Having the most appropriate item is one thing, but here are some good, general tips to follow for proper iPhone cleaning.

Lay Your iPhone on a Soft Surface

Even if you’re very careful, it’s easy to inadvertently apply too much pressure to your iPhone. In that regard, it’s best to place your iPhone on a towel or similarly soft surface before you start to clean it.

Use Small, Circular Motions on Your Screen

In order to ensure complete coverage and maximum safety, it’s recommended that you clean your screen in a small, circular motions. While it’s not the only way to clean your iPhone, it’s the most preferred method by most people.

Perform iPhone Cleaning As Often As You Can

In the best of times, it’s okay to clean your iPhone about once a month. However, the most recommended frequency is once a week if you want to be truly safe. If you (or others around you) are sick, then i recommend that you clean your iPhone daily until the situation changes.

Do Not Neglect Your Accessories

Proper iPhone cleaning also means taking care of your phone’s biggest accessories. That obviously includes your phone case, but don’t overlook your charger and other items that regularly come in contact with your iPhone.

Are UV Light Cases Effective for iPhone Cleaning?

In case you don’t know, you can buy cases such as a PhoneSoap which bathe your iPhone in UV light. The manufacturers of these devices claim that this light can kill up to 99% of germs.

While most studies show that is true, it’s important to understand a few things. First off, these cases won’t do anything for dirt and fingerprints. You’ll still need to practice traditional iPhone cleaning methods to take care of those problems. Second, that research is based on limited sample sizes. That means that some bacteria and diseases may not be accounted for and may not be killed by the UV light.

You can absolutely use a UV case as part of your iPhone cleaning process. You should just know that it might not offer the total solution you’re looking for.

If your iPhone 14 Pro Max isn’t receiving text notifications, it can be a big problem. However, you can quickly fix many issues surrounding receiving text notifications. Here’s how to fix it when your iPhone 14 Pro Max isn’t receiving text notifications.

Note: information in this article apply to iPhone 14, iPhone 14 Plus, iPhone 14 Pro and iPhone 14 Pro Max.

How to fix iPhone 14 Pro Max not receiving text notifications issue

Here are some fixes to try if your iPhone 14 Pro Max text notifications are not working:

1. Ensure that Notifications is enabled for Messages

Here is how you can check this:

  1. Go to Settings > Notifications.

  2. Scroll down and find Messages (apps are listed alphabetically).

  3. Ensure that Allow Notifications is set to On. If not, turn on the switch.

Also, ensure that the Sounds setting is not set to None. Ensure a sound option is selected.

2. Ensure the Person Is Not Muted

If you are not getting sound notifications from certain contacts or groups, ensure that Hide Alerts is not turned on for those contacts or groups. If Hide Alerts is turned on, notifications will be muted. Open Messages, check your individual or group conversations, and if, next to the conversation, you see a bell icon with a line through it, that means they are silenced.

If you see the crossed-out bell icon, you need to unmute:

Swipe left across the conversation you wish to hear sounds from.

Tap the bell icon.

3. Check Focus Mode

You may not be getting text notifications because Focus may be enabled on your iPhone 14 Pro Max. There are several Focus options like Do Not Disturb, Personal, or Sleep. Focus will silence your notifications. When it is enabled, your device won’t make a sound. You can check this setting by going to Settings > Focus.

You can turn on Focus and still receive sound notifications by customizing your Focus options. For example, you can turn on Do Not Disturb and then allow notifications from certain people:

  1. Go to Settings > Focus.

  2. Select your Focus option.

  3. Under the Allowed Notifications, tap People.

  4. Tap Add Person.

  5. Then you can add someone and you will get this person’s notifications even when Focus is on.

4. Ensure that your iPhone is not in Silent mode

Your device has a mute switch (ring or silent). On your iPhone, this switch is located on the left side of your device.

Make sure that mute isn’t turned on by pushing the “Ring/Silent” switch to the “Ring” position.

5. Restart your iPhone

Sometimes, a minor software glitch might be the reason why your iPhone 14 Pro Max is not receiving notifications. Try restarting your iPhone to see if this solves the problem.

  1. Press and hold the volume up (or down) and the side buttons together until you see the power off slider. Drag the slider and wait for your device to turn off. Press and hold the side button until you see the Apple logo.

2.

6. Check your Apple Watch

Do you also use an Apple Watch? If your iPhone is locked or sleeping while your watch is not locked with a passcode, the text notification will go to your watch, not your iPhone 14 Pro Max. If this is occurring, this is a normal behavior.

7. Set the sound alert temporarily to a different tone

Go to Settings > Notifications and select an app (e.g., Messages) and tap Sounds and select a different one. Follow these steps:

  1. Go to Settings > Notifications > Messages > Sounds and select a different alert tone.

  2. Restart your device.

  3. Now go back to Settings > Notifications > Messages > Sounds and choose the tone you want.

8. Restart the Messages app

If you find your iPhone 14 Pro Max not receiving text notifications after trying the above steps, try forcing the Messages app to close. Go to your Home Screen and swipe up from the bottom of your screen, find the Messages app and swipe up to close it. Then relaunch again.

9. Update your iPhone

Make sure that you are using the latest version of iOS. On your iPhone, go to Settings > General > Software Update. And if there is an update available, follow the onscreen instructions to update your device to the newest version. If updating does not help, try the next solution:

10. Turn Off Filter Unknown Senders

You can automatically filter spam and texts from unknown people on your iPhone. When this feature is enabled, you could miss a few meaningful text notifications. Additionally, if someone who isn’t in your contact list messages you, chances are the Messages app will sort their text in a separate list and not notify you of it.

You can fix this by going to Settings > Messages > Unknown & Spam and turn off Filter Unknown Senders.

11. Disconnect Bluetooth Devices

If you forget and leave Bluetooth buds or devices connected to your iPhone 14 Pro Max, the new text message sound may output via that instead of the on-device speaker. You can fix this by going to Settings app and turning off Bluetooth. Or, you may also disconnect these devices from the iOS Control Center by tapping the Bluetooth icon.

12. Make Sure the Person Is Not Blocked

After you block a person, they can’t call or text you. If your iPhone 14 Pro Max is not receiving texts from a specific person, make sure they are not added (accidentally or on purpose) to the block list.

  1. Start the Settings app and tap Messages.

  2. Navigate to Blocked Contacts.

  3. If the person is listed here, swipe left on their name or number and tap Unblock.

13. Ensure Custom Text Tone Is Not Set to “None”

Did you ever set “None” as the alert tone for a particular contact and forget about it? If yes, your iPhone 14 Pro Max won’t receive text notifications alerts for that person. Here is how to revert that and have a proper tone for new texts from that person.

  1. Tap the person’s name in the Contacts or Phone app.

  2. Tap Text Tone and choose a different alert tone instead of ”None.” Tap Done to save this change.

If you don’t see Text Tone in step 2, that means you didn’t set a custom text tone for this person. Please move on to the next fix.

14. Disable Text Message Forwarding

When you choose to receive texts on your Mac or iPad, at times, new text notifications may not show on your iPhone 14 Pro Max. To fix this, go to Settings > Messages > Text Message Forwarding and turn it off for your other Apple devices.

15. Reset All Settings

Reseting all settings is our very last option to fix any underlying software problem that could be preventing your iPhone 14 Pro Max from getting text notifications. Resetting all of your iPhone’s settings will erase all your Wi-Fi networks, preferences, and passwords. However, your personal data, like text messages, photos, and apps, will be kept in tact.

To reset all of the settings on your iPhone, navigate to Settings > General > Transfer Or Reset iPhone > Reset and tap on Reset All Settings. Enter your Passcode and tap Reset All Settings to proceed. After the reset is complete, your iPhone will restart itself.

16. Repair options for your iPhone

If, after all these steps, you’re still not able to fix your iPhone 14 Pro Max not receiving text notifications issue, it might be hardware issue. In that case, it’s best to contact Apple support for further help.

Solved iPhone 14 Pro Max not receiving text notifications issue

iPhone 14 Pro Max failing to receive text notifications can be a head-scratcher for you. Hopefully, texts notifications are working on your iPhone 14 Pro Max now. If so, let us know what fixed it in the comments!

AirDrop is a neat little feature you can use to quickly and easily transfer files of all kinds between Apple devices. AirDrop allows users to send and receive photos, videos, passwords, contacts, map
location, and pretty much anything else that can be transferred from a Share Sheet. The feature uses Bluetooth technology to detect nearby compatible devices and helps you transfer data over Wi-Fi. Here are step-by-step instructions on how to use AirDrop on an iPhone, iPad, and Mac.

It’s easy to use AirDrop on your Apple device, however, the process for turning the feature on and off varies between a Mac and an iOS device.

AirDrop Device Compatibility

  • iPhone, and iPad:
    To use AirDrop on iOS, you’ll need an iPhone 5 or newer, iPad 4 or newer, iPad mini, or fifth-generation iPod touch.
  • Mac:
    All Mac models launched in 2012 and later running OS X Yosemite or later support AirDrop.

To check if your Mac is compatible with AirDrop: simply click the Finder icon in the Dock and select Go in the menu bar. If AirDrop is not listed as an option, it means your Mac is not compatible with theAirDrop.

Activate Bluetooth and Wi-Fi

For AirDrop to work, both Bluetooth and Wi-Fi must be enabled on your device. In addition, make sure personal hotspot is turned off.
You can check the status of the above services in the Control Center of your iPhone by swiping down from the top-right corner of the screen (swipe up from
the bottom for older models of iPhones). If you own aMac, you can check the status of the above services at the Menu Bar in the upper-right corner of the screen. Your device don’t have to be connected
to a Wi-Fi network for AirDrop to work. AirDrop just uses the signal to transfer data.

Turn on AirDrop in iOS

For you to send and receive files with other people, AirDrop must be enabled on your iOS device. To turn on AirDrop on iOS: Head over to Settings > General > AirDrop to turn it
on. You can set AirDrop to accept shares from just your contacts or from everyone who might be nearby.

For you to use the Contacts Only option, both devices must be registered with iCloud, and each user must be in the other’s contacts. The Everyone option May sound insecure. However, AirDrop lets you choose whether or not to receive a file from someone, therefore, you can easily block the transfer at any time. Receiving Off means
no one can send you anything via AirDrop.

Select AirDrop Destination

If you want to share a file from your iPhone or iPad via AirDrop, just open it in the appropriate app and tap the Share icon. a list of nearby people
able to receive the file will appear. Select the person you want to share with, and they will receive a notification. Once the file is delivered on the other person’s device, AirDrop
will notify you that it has been transferred successfully. The sent file then automatically appears in the appropriate app.

Restrict AirDrop on iOS

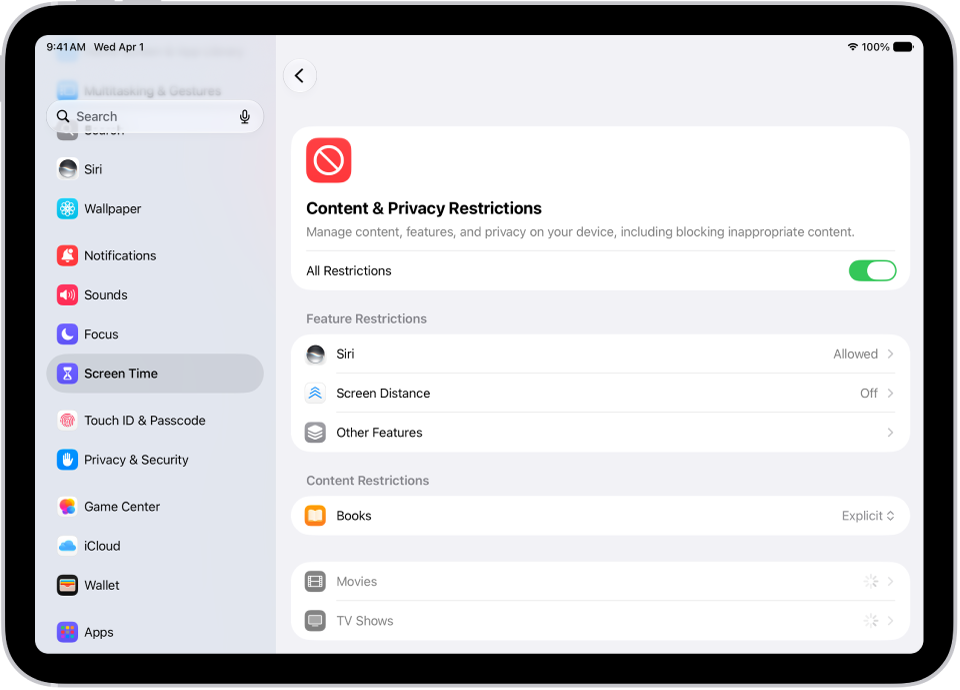
You can block AirDrop to prevent a kid or someone not authorized to use your device from sharing files. Simply head over to Settings > Screen Time > Content & Privacy
Restrictions and toggle Content & Privacy Restrictions to on. Then tap Allowed Apps and toggle AirDrop to off.

Turn On AirDrop on Mac

You can easily interact with AirDrop from any window in Finder on MacOS. Simply launch Finder and click AirDrop on the side navigation panel. The service will instantly
scan for nearby devices, however, you have options to choose whom you’d want to see you. Make sure this option is set to either Contacts Only or Everyone and you’ll be all set.
.

To share between a Mac and iOS device, your Mac has to be from 2012 or newer(excluding the mid-2012 Mac Pro) and running OS X Yosemite or higher. For iPhone users,
Your device need to be running iOS 7 or higher.

How to AirDrop Files on Mac

You can send files using AirDrop on a Mac through various methods. The simplest way is to just drag and drop the file into the AirDrop window or the name
on the navigation bar. Alternatively, you can right-click and select Share > AirDrop before choosing the person. Just like on iOS, you can also tap the Share button
on a file, select AirDrop, and choose the destination.

Turn Off AirDrop on Mac

To turn off AirDrop, simply follow the steps you used to turn it on. Go to Finder > AirDrop, then select Allow me to be discovered by, and select No One.

How to use AirDrop on iPhone, iPad and Mac? Now you know

I Trust this guide has taught you how to use AirDrop to send and receive photos, videos, documents, contacts, passwords and other files on your iPhone, iPad and Mac.
If you have any question on how to use Airdrop on Apple devices, let us know in the comments section below. We also have plenty of other articles that i suggest you check right now.

Handoff is a Continuity feature of iPhones, iPads, Apple Watches, and Macs that allows users to start a task on one device and then continue with it on another. For example, you might start reading a web page on your iPad, and then realize you’d rather switch over and read on your iPhone or Mac. With Handoff, making that switch is seamless. No more noting down the URL or emailing it to yourself for opening on a second device. Sounds good, right? Here are step-by-step instructions on how to use Apple Handoff to continue tasks between devices.

You own an iPhone , and maybe another Apple device such as an iPad, Mac or Apple Watch. If you’ve started a given activity on one device and want to continue on another, you can easily do that with Handoff.

Handoff requirements

Handoff requirements include:

  • A mobile device equipped with Bluetooth LE (iPhone 5 or newer, iPad Pro (any version), iPad 4 or newer,
  • iPad Air or newer, iPad mini (any version), iPod
    touch 5th generation or newer, Apple Watch (any version)
    Signed into iCloud with the same Apple ID
    Connected to the same Wi-Fi network.
  • OS X Yosemite or later on Mac,
  • iOS 8 or later on iPhone or iPad,
  • watchOS 1.0 or later on Apple Watch.

Handoff compatibility

Handoff supports Apple’s built-in apps such as Pages, Numbers, Keynote, Mail, Calendar, Maps, Contacts, Reminders, Safari, and Podcasts, however, it supports some third-party apps as well.

How to set up and use Handoff.

Enable Handoff on Mac

Handoff is a feature and not an app, therefore, you don’t have to download anything from the App Store. Instead, you’ll just need to activate the feature on each device. To enable Handoff on Mac, select the Apple menu icon and click on System Preferences > General. Choose the option to “Allow Handoff between this Mac
and your iCloud devices” if it’s not enabled by default.
To disable Handoff on Mac, repeat the above steps but set the toggle to Off.

Enable Handoff on iPhone & iPad

The process is simplified on iOS devices, so you can follow the same process for iPhone and iPad. Simply follow these steps to enable Handoff on iPhone or iPad:

  1. Start the Settings app on your iPhone or iPad
  2. Tap General
  3. Tap Handoff.
  4. Turn on the switch for Handoff if it’s not already on.

To disable Handoff on iPhone or iPad, repeat the above steps but set the toggle to Off.

Enable Handoff on Apple Watch

  1. Start the Watch app on your iPhone.
  2. In the My Watch section, tap on General.
  3. Finally, turn on the switch to Enable Handoff.

To disable Handoff on Apple Watch, repeat the above steps but set the toggle to Off.

Switching From Mac to iOS

Let’s start by using Handoff to move back and forth between Mac and an iOS device with Safari. Launch Safari app and start searching. Now check your iPad and you
should see an icon for Safari in the Dock. You can easily know this is the Handoff icon because attached to it in the upper-right is a smaller icon that looks like
your Mac. Tap this Handoff icon and the same webpage you were viewing on your Mac opens on your iPad in Safari.

Switching From Mac to iPhone

On an iPhone, you are going to need to reveal the app switcher screen. To launch the app switcher on an iPhone X or later, swipe up from the bottom of the screen. On older iPhone models, double-tap
the Home button. You should see a message for Safari from your Mac. Simply tap on it and you can pick up with the same webpage you were viewing on your Mac.
It can take a couple of seconds or more for the app to launch and your task to transfer over. Once it has, you can pick up right where you left off.

Continuity Between Apps

You can switch between devices using any number of Apple’s built-in apps, and many of them will maintain“Continuity” between written content. If you launch Mail app
on your Mac and start typing a new message, you can then segue to your iPad or iPhone and open up that same email on your other device. Continue
typing the message and then send it.

Other stock apps such as Messages, Maps, and Calendar also work flawlessly with Handoff, allowing you to share text messages, directions, and important dates between
Different Apple devices without losing your place.

Switching From iOS to Mac

You can also move in the reverse direction. Again, we’ll use Safari as an example. Simply launchSafari App on your iOS device and navigate to a webpage of your choice.

On your Mac, you will see the Handoff icon to the left of the Dock. In this case, the icon is for Safari but with the smaller attached icon that mimmicks an iPhone or iPad. Hover over that icon, and a message pops up that it’s for Safari from iPhone or iPad. Click that icon to jump to the same webpage
from your iPhone or iPad.

Maps, Notes, Reminders, and News

Other Apple apps that can work between macOS and iOS include: Notes, Maps and Reminders (above).
Mojave
also added the News app to Mac, so you can start reading on your iOS device during the commute and pick up at your desk.

Switching From Apple Watch

It’s also easy to share between your Apple Watch and an iOS device. Simply tap the Digital Crown to go to the Home screen. Launch any app such as Messages, Podcasts, News, or Stocks.

Tap the Icon or Notice for Handoff

For Messages, open a previous message or start a new one. On your iOS device, tap the icon or notice for Handoff, and your message will automatically appear on your
iPhone or iPad.

How to use Apple Handoff? Now you know

Now that you’ve learned how to set up and use Handoff on your iPhone, iPad, Mac and Apple Watch, take time to share this article with a friend or social media. We also have plenty of other articles that I suggest you check right now.

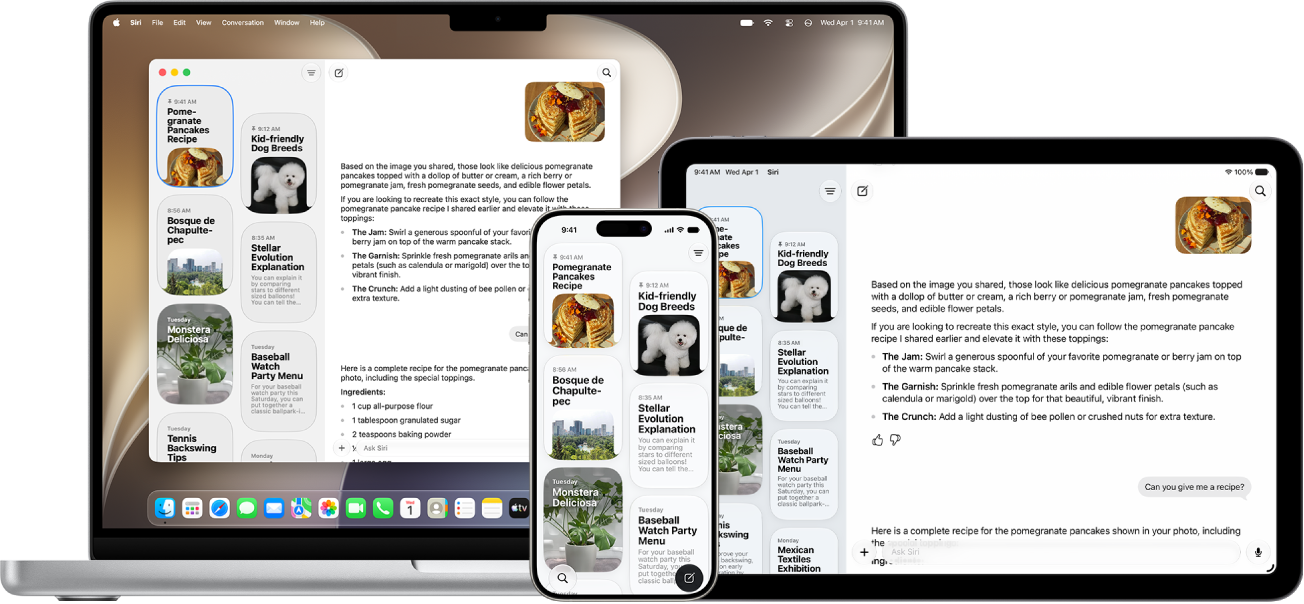
One of the things I have always admired about Apple products because of the Continuity and Syncing features, they become usable in combinations when you have more then one device. Having an iPhone, an iPad and an Mac all logged into the same Apple ID account creates a collaboration of sorts, with many features able to work together in ways that provide more functionality. Features like making or answering phone calls from any device. Using AirDrop for moving files or folders to other Apple devices. Sending a text message or placing a phone call right from my Mac. Even syncing Contacts and Reminders, in addition to using iCloud Drive to collaborate across devices, there are many ways to make use of the environment that is created when you have more than one Apple device.

How does Apple continuity work

Apples continuity feature allows users to Sync Contacts, Messages, Calendar, Reminders and more, throughiCloud. While you’re working on your iPhone or Mac, your data remains in real time sync across your Apple devices through iCloud. This can help you to stay on the same page with all your Apple devices. It is very cool being able to add or change a Contact, then have it automatically updated to your other devices through iCloud. Using SIRI to send messages or place phone calls works consistently from any device, because all of Contacts are auto-synced. Syncing Reminders is also very handy, because it will alert you from any nearby device.
Another great thing with Apple Continuity feature is that you can leave one document available for editing on the fly, no matter where you are, as long as it is being synced. When you open it on your Mac, all the typed text will be there.

Apple Continuity requirements

For Apple Continuity features to work, you need two things:

  • Make sure that Wi-Fi, Bluetooth and Handoff are all turned on your device’s settings.
  • Make sure that all of your devices are signed in with the same Apple ID.

Handoff

Apple Handoffis a feature that mainly works between iPhone/iPad and a Mac, but there is a use case with the HomePod smart speaker. If you are using a Handoff compatible app such as Safari, Messages and many of the other Apple native apps, then an app icon will show up to the left of the app ‘Dock’ on the Mac. Alternatively, if you’re using an app on Mac and you want to launch it on iPhone, a shortcut to switch into the iPhone version of the app will be available at the bottom of the screen in the multitasking menu. To launch the app on iPad you’ll see it appear on the right side of the iPad’s app Dock.
You can also handoff audio from Apple Music and Podcasts to the HomePod by tapping it to the top of the device. You can tap it again and get the sound to begin playing back on your phone.

How to enable HandOff on your iPhone and Mac:

  • On your Mac: Head over to System Preferences>General, check the item, “Allow Handoff between this Mac and your iCloud devices.”
  • On your iPhone or iPad, head over to Settings>General>HandOff, to enable this feature.

Universal Clipboard

Universal Clipboard is by far the most useful Apple Continuity feature, and the vast majority of people don’t know how to use it. Universal Clipboard let’s you copy and paste text from one device to another. For this to work, the two devices must be close to each other. It’s as easy as that. You simply turn on the Settings and you can copy text, images and other content and paste it on your other device.

iPhone Cellular Calls

iPhone Cellular Calls allows users to answer or make phone calls on your Mac or iPad. For this feature to work, the two devices must be connected to the same Wi-Fi network and have all of the Handoff settings turned on. Then when you get a call, it will appear as a notification on your Mac or iPad so you can answer it without reaching for your iPhone. If you want to make a call from a Mac or iPad, you need to make sure your iPhone is near. Then you can simply click on a phone number on the web or in the Contacts app to place a call.

Text Message Forwarding

Text message forwarding let’s users view their text messages on messages app on Mac or iPad provided that your iPhone is nearby. This is one Handoff feature that I’ve had problems with, thankfully, i was able to fix this issue by signing out of my Apple ID, restarting my devices, and re-signing in. This feature has to be enabled from the Messages section in your iPhone’s Settings app too.

Auto Unlock

If you have anApple Watch, you can use it to keep you Mac unlocked when you’re close to it. To turn on this setting, simply go to the ‘Security & Privacy’ section of your Mac’s Settings. Then head over to the General section and if you own an Apple Watch, an option to enable using your Apple Watch as the key to unlock your Mac will be available.

AirDrop

Another popular continuity feature isAirDrop. This let’s users quickly send photos, videos and other files to the nearby apple devices. One great thing about Apple AirDrop is the ability to send files to other peoples Apple device as well as your own.

What else

Other Continuity features are:

  • Continuity Camera,
  • Continuity Markup
  • and

  • Continuity Sketch.

These features let’s you use your iPhones to add items to documents. The camera allows users to trigger your iPhone camera to capture a photo to insert in your note or Pages document. Markup allows users to draw in the document and Sketch allows users to insert a drawing from an iPhone into a document or note.
There’s also SideCar, which is a new feature that was introduced with the launch of MacOS Catalina and iPadOS. It allows users to have their iPad act as a secondary display.
The last selection is an extension of Apple Pay. This feature let’s users shop online on their Mac and then use Apple Pay to check out. For added security, users can make their computer trigger their iPhone to require FaceID or TouchID to complete their purchase.

Troubleshooting for the Continuity features

Apple continuity not working? no problem. You can fix this problem in a few simple steps. First of all, ensure that all of your devices are on the same wifi network, have BlueTooth turned on, have HandOff enabled and are signed into the same iCloud account.

The following are some of the troubleshooting steps:

  • Log out of iCloud on all devices, then back in again with the same Apple ID and password
  • Disable Bluetooth, Wifi, and HandOff on all devices, then reenable them back again.
  • Lastly, after everything else, power off your devices completely, not just putting them to sleep. Then power them back on again.

Getting the Final Word

Well, there are definitely multiple ways you can use apple Continuity features through various devices. You can make and answer phone calls from any Apple device. You can text or call phone numbers on your screen by right-clicking on them. You can even work on the same document from two different Apple devices at the same time.
We hope you’ve enjoyed reading this Apple Continuity guide. Let us know if you have any problems with setting up Continuity features by leaving a comment below and we’ll be happy to help you out! We also have plenty of other articles that I suggest you check right now.

Apple’s Family Sharing is a way to make your apps, movies, subscriptions, and more available to all the people in your family. You can also use it to control the screen time or content restrictions for your children’s devices. Even better, it can even let you monitor the location of all your loved ones.

Here’s a complete guide that explain everything you need to know about setting up and using Apple’s Family Sharing service.
Let’s get started.
Apple family sharing, everything you need to know

What Is Family Sharing?

Family Sharing allows users to connect up to six different Apple ID accounts together. These accounts constitute your Family Sharing group, which you can use to save money by sharing a wide range of Apple purchases and services, such as:

  • Apps, movies, TV shows, songs, and books
  • Apple Music family plan subscriptions
  • Apple Arcade, Apple News+, and Apple TV channel subscriptions
  • iCloud storage

Because every user has their own account, you don’t need to share your password with anyone. You can also access content in your Family Sharing group from all devices you use with your Apple ID i.e. iPhone, iPad, Mac, Apple TV, as well as Windows PC.

Besides shared purchases and services, Family Sharing can automatically create a shared reminders list, shared calendar, and shared photo album for everyone in family sharing group to use. With permission, you can use Family sharing to see the location of everyone in your group, together with all their Apple devices.

Lastly, through Family Sharing, parents or guardians can even manage the Screen Time or Content & Privacy Restrictions for any child who is below 18 years in the group. With Ask to Buy feature enabled, they can also approve or deny App Store and iTunes purchases their children want to make.

You Can’t Share Everything

Unfortunately, you cannot share everything with family sharing. Before purchasing an app, scroll down to the Information section in the App Store to find out if it supports Family Sharing.

Keep in mind, you cannot share in-app purchases or subscriptions for non-Apple services.

How to Set Up Family Sharing

The person who creates the Family Sharing group becomes the Family Organizer. He/she chooses who is and isn’t allowed in the group, and also chooses which services or purchases you share with Family Sharing.

If the Family Organizer chooses to share App Store and iTunes purchases, they must also agree to pay for new purchases that anyone in the Family Sharing group makes.

Apple has made it pretty easy to set up Family Sharing from an iPhone running iOS 8 or later, or mac with OS X Yosemitey or later.

Set Up Family Sharing on an iPhone, iPad, or iPod touch

  1. Start the Settings app and tap [Your Name] at the top of the screen. If you don’t see your name, choose to Sign in to your [device] using your Apple ID account.
  2. Now, tap on Set Up Family Sharing, then select Get Started and choose the first feature you want to use with Family Sharing. You may need to add a payment method to your Apple ID account if you haven’t already.
  3. Follow the onscreen instructions to finish the setup and Invite Family Members through iMessage or by requesting them to sign in on your device.
  4. After creating your group, the Family Sharing settings should show up next to your name. You can also tap Add Family Member to add more people to your family.

Set Up Family Sharing on a Mac

Launch the Apple menu and head over to System Preferences > Family Sharing.
Instructions to Set up Family Sharing will be available on this screen; click Next and follow the onscreen instructions to finish the setup. You may need to add a payment method to your Apple ID account if you haven’t already.
After you are done with the setup, click Add Family Member and type in the name, email address, or Game Center nickname of the first family member you want to add.
You can edit the various Family Sharing settings from the sidebar in System Preferences. Head over to Family to add more people to your Family Sharing group.

Set Up a Child’s Account in Family Sharing

Children below 13 years cannot create their own Apple ID accounts. Thankfully, with Family Sharing, the Family Organizer can create a child’s account for them. Apple limits the apps and media based on your child’s age and automatically turns on Ask to Buy. Consequently, they can’t download or purchase anything without permission, even if it’s free.

It’s easy to create a child’s account. Simply launch the Family Sharing settings on your device and follow the onscreen instructions to add a new family member. Choose the option to Create a Child Account. Then create an iCloud email address, a password, as well as security answers for your kid.

The Family Organizer i.e. parent/guardian in the Family Sharing group can remotely approve or deny App Store and iTunes purchases. Moreover, you can track your child’s Screen Time, or edit the Content & Privacy Restrictions for your child’s device.

Apple’s Family Sharing Features Explained

Once you create your Family Sharing group, various features and services you can choose to use with it will become available. At first, these options can appear a bit confusing, therefore, we’ve explained every Family Sharing feature below.

Purchase Sharing

For you to share apps, movies, TV shows, songs, and books in your Family Sharing group, you need to turn on Purchase Sharing. For this to work, the Family Organizer must agree to pay for any future purchases people in your Family Sharing group make.

Family members will continue to keep their purchases after leaving the Family Sharing group, even if the payment was made by the Family Organizer.

If you want to see another person’s purchases, simply launch the App Store or iTunes Store app and head over to the Purchases section. You should see each of your family members’ names; tap one to view or download their purchases.

Purchase Sharing allows your family to access everything you’ve ever purchased or downloaded, even if you did so before joining the Family Sharing group. You can also hide a specific purchase from your family. To do so, simply swipe on that purchase and choose to Hide it.

iCloud Storage

Apple offers everybody 5GB of free storage upon creating a newApple ID account. Individual family member can choose toupgrade their iCloud storage plan for a small monthly fee, or you can opt to share a single storage plan across your Family Sharing group.

If you want to share iCloud storage with Family Sharing, you are limited to either 200GB or 2TB plan. When a family member decides to share iCloud storage, Apple doesn’t add their free 5GB to the shared plan.

Location Sharing

If you turn on Location Sharing in Family Sharing, you can use the Find My app on your iPhone, iPad, or Mac to check the location of your other family members. In addition, you can use Find My to locate your family members’ missing Apple devices.
Individual family member can choose to share their location from the Family Sharing settings on their device or not.

Note: When Location Sharing is turned on, members in your Family Sharing group can easily use the Find My app to mark your devices as lost or remotely erase them. Read also: How To Track a Lost iPhone, iPad, or Mac With Find My

Screen Time

If you turn on Screen Time, you’ll be able to monitor any child in your Family Sharing group under 18 years. There are options to set App Limits, Communication Limits, Downtime, and Content & Privacy Restrictions on your children’s devices.

Family Sharing also provides you with regular usage reports so you can keep track of how much time your children spend on their devices.

Apple Music, TV Channels, Apple Arcade, and Apple News+

Apple now offers multiple subscription services. And apart fromApple Music (which requires a family plan), you can easily share any of these subscriptions with your Family Sharing group at no additional cost.

For instance, if you subscribe to Apple Arcade, all the members of your Family Sharing group can also access Apple Arcade games without having to sign up for their own subscription.

If you want to share Apple Music, you need to pay a few extra bucks to get a Family Sharing plan. Ideally, it’s far much cheaper than paying individually.

How to share Apple Music

For each person in the family to have access to the Apple Music library on a single subscription — while keeping their own private account with personal music library — family Organizer needs to do the following:

  • Either sign up for Apple Music family subscription, if new to Apple Music, or
  • Change their individual subscription to a family one — then each person in the family sharing group will automatically gain access to Apple Music as well

To change individual subscription to a family Apple Music subscription, simply follow these steps:

  1. On your iPhone, iPad, or iPod touch, launch the Settings app.
  2. Tap your name at the top of the screen.
  3. Tap Subscriptions.
  4. Tap Apple Music subscription
  5. Change your subscription to family.
  1. On your Mac, head over to System Preferences and click Family Sharing
  2. Click Apple Music
  3. Change your subscription to Family.

how to use Apple’s Family Sharing service? Now you know

We trust this post has helped you to set up and use the Family Sharing feature on your Apple devices. With Family Sharing enabled, you can share Apple Books, and App Store purchases, an Apple Music family plan, and an iCloud storage plan with up to 5 family members. Your family can also locate each other’s missing devices using Find My App.
If you have any question or comment, we would love to hear in the comments section below. We also have plenty of other articles that I suggest you check right now.

Have you just switched from Android to iPhone? If yes, you may be wondering about how to transfer Android contacts to iPhone. Don’t worry. If you have recently switched from Android to iPhone, there are a few simple steps which you need to follow to transfer Android contacts to iPhone.

One of the most essential data on your iPhone are yourcontacts. Therefore, it’s important to know all the ways to transfer Android contacts to iPhone. In this article I’ll show you:

  1. How to transfer Android Contacts To iPhone Using Apple’s Move to iOS App
  2. How to transfer Android Contacts To iPhone using a SIM card
  3. and

  4. How to transfer Android Contacts To iPhone using Google.

Without any further ado, let’s dive into it.

Method #1: How to transfer Android Contacts To iPhone Using Apple’s Move to iOS App

TheApple Move to iOS app has made transferring contacts from Android to iPhone pretty easy. You can Download Move to iOS app on play store for free One good thing about Move to iOS app is that it not only transfers contacts but can also be used to transfer Android text messages, photos, videos, accounts, calendar, as well as website bookmarks over Wi-Fi to an iPhone. Sounds good, right?

Note: the Move to iOS app only transfers your data and not the Apps, but suggests the applications you have installed on your Android device.

Note: if you are running Android 4.0 or higher (smartphone or tablet) and iPhone with iOS 9.3, you need to download Move on your iPhone from Google Play.

Method #2: How to transfer Android Contacts To iPhone Using SIM Card

Want to just transfer your contacts from Android to iPhone? Try the famous method of using the SIM card in your Android device to move contacts to iPhone. Simply back up your contacts on SIM card and transfer them to iPhone.

Note: If you no longer have access to your Android device but already have the contacts saved on your SIM card, then skip to step 6 onwards.

Simply follow these steps:

  1. Launch the ‘Contacts’ app on your Android smartphone
  2. Tap on ‘Menu’ and then ‘Settings’
  3. Tap ‘Import/Export’ settings
  4. Tap ‘Export’ and export to the ‘SIM Card
  5. Wait till the process is completed
  6. Eject the SIM and insert into your iPhone.
  7. Launch the ‘Settings’ app on your iPhone
  8. Scroll downand tap on ‘Contacts’ (Mail, Contacts Calendars for older iOS versions
  9. Choose ‘Import SIM Contacts

Boom! All of your contacts will appear in your iPhone

Method #3: How to transfer Android Contacts To iPhone Using Google:

In this method, you can use the cloud to transfer Android contacts to iPhone. To do so, use your Google account. Why? Because both iPhone and Android support Google account. Simply follow these steps to transfer Android Contacts To iPhone Using Google:

Head over to Settings > Accounts pick the Google account you want to sync to

Turn ‘Sync Contacts’ on.

Add your Google account to iPhone and enable contact syncing.

To add your Google account to iPhone, head over to Settings > Passwords & Accounts and tap the Gmail account. Type in your Google account credentials.

Once the account has been added, turn On the switch next to contacts (it will turn green). Your contacts added to the Google account will sync to your iOS device.

If your Google account is already added on your iPhone, you can access it by heading over to Settings > Passwords & Accounts > Gmail account and enable toggle for Contacts.

Note: Any changes made on your iPhone address book will sync to Google account.

how to transfer android contacts to iPhone? Now you know

We trust this article has helped you to transfer android contacts to iPhone.

Questions?let us know in the comments section below.

Missing calls despite checking them several times a day? iPhone 12 Pro not ringing just vibrating? iPhone Pro not ringing loud enough? These are issues many of us have faced and in this article, we are going to fix these problems permanently. Here are step-by-step instructions for how to fix iPhone 12 Pro ringer not working issue.
Without further ado, let’s dive into fixing iPhone 12 Pro won’t ring problem.
Let’s get started.

iPhone 12 Pro not ringing? Fix

Solution #1: Check All The Basic Settings:

Let’s accept this is a no brainer! However,, the vast majority of people forget it. You simply need to check whether the Ring/Silent switch is turned on or not. If it is moved towards the back of your iPhone, it means your device is on silent mode. You simply pull it forward to put it on the ringing mode.

After that, try adjusting the volume by pressing the volume buttons on the side of your iPhone. The volume bar on your screen should say ‘Ringer’ the moment you press them. In case you see ‘Volume’ head over to Settings > Sounds & Haptics and adjust the ringer volume according to your preference. If you want to change your iPhone’s ringer volume with side buttons, you can enable this setting from this screen. If your iPhone 12 Pro still won’t ring, try the next solution.

Solution #2. Disable ‘Do NotDisturb’:

When the ‘Do Not Disturb’ mode is enabled on your iPhone, you will not be notified about the incoming calls and texts even if the ringer is turned on. The quickest way to check if your iPhone is on “do not disturb” mode is to look for the crescent moon symbol in the upper right-hand side of your iPhone screen.

The moon sign is found on Control Center screen. To disable the Do Not Disturb mode on your iPhone, simply head over to Settings and tapp ‘Do Not Disturb’ option. Alternatively, you can launch the Control Center and see if the moon icon is lit up. Tap on it and disable the moon icon. If your iPhone 12 Pro does not ring still, try the next solution.

Solution #3: Disconnect Bluetooth:

Another solution that can potentially help you to fix iPhone 12 Pro ringer not working issue involves Bluetooth. In case you have forgotten to disconnect your iPhone from a Bluetooth device, the calls and texts sound will be channeled there without your knowledge. Simply follow these steps to disconnect your iPhone from a Bluetooth device:

  1. Start the Settings app on your iPhone
  2. Tap Bluetooth
  3. Locate the connected device and swap the blue ‘i’ to right
  4. Tap Disconnect

Solution #4: Reset your iPhone

If the above solutions did not fix iPhone 12 Pro not ringing out issue, consider resetting your iPhone to default settings. To reset your iPhone to default settings. Simply follow these steps:

  1. Start the Settings app on your iPhone
  2. Tap General
  3. Scroll down and tap Reset
  4. Tap Reset All Settings

Solution#5: Consider Repairing Your iPhone:

If resetting your iPhone did not fix iPhone 12 Pro not ringing problem, it’s time to take your handset to the nearest apple store.or an authorised repair center and get your iPhone checked. But if your iPhone is quite older or broken, then consider replacing it with a new device.

iPhone 12 Pro not ringing? Problem fixed

There you have it. I trust this article has helped you to fix iPhone 12 Pro not ringing issue. Did you manage to fix iPhone 12 Pro ringer not working problem? Share with us in the comments section below. We also have plenty of other articles that I suggest you check right now.

Let’s accept one fact, virtually everyone has experienced the situation when we put our apple devices on charging only to realize later that iPhone won’t charge or turn on. There is a possibility that you didn’t plug iPhone in properly, or there is some problem with you’re iPhone’s battery.

If you’re experiencing the above issue: iPhone won’t charge, but it says it’s charging, there are a few simple steps which you need to follow to fix the problem.

How To Fix iPhone won’t charge, but it says it’s charging issue

Below are the solutions forfixing iPhone won’t charge issue. One of these fixes will surely solve iPhone won’t charge, but it says it’s charging problem within no time.

Solution #1: Hard Reset iPhone:

A hard reset means that it forces a quick restart of your iPhone that can help fix a software glitch on your device. In addition, if your iPhone is crashed and makes the screen turn black, it gives the appearance that your phone is not charging.

Reset iPhone 8 and newer models:

  1. Quickly press and release Volume Up button.
  2. Quickly press and release Volume Down.
  3. Press and hold the side button to turn off the screen and then turn it back on. Release the side button once the Apple logo appear on the screen.

The above steps applies to iPhone 8 or newer including iPhone 11.

Reset iPhone 7 and 7 Plus:

– [ ] If you are running iPhone 7 or 7+:

  • Press and hold the Sleep/Wake button and Volume Down button at the same time. Wait until the screen turns black and the Apple logo appears on the screen then release the buttons.

Reset iPhone 6 and previous models:

For these models:

  • Press and hold the Sleep/Wake button at the same time until the Apple logo appears on the screen then release the buttons.

Solution #2: Clean the Charging Port:

If you are still experiencing iPhone not charging when plugged in issue, try to clean the charging port. I recommend that you use an anti-static brush for this purpose. If you don’t have one, you can use a clean toothbrush as an alternate. Simply brush back and forth to get rid of the gunk, dust or debris which may be hiding in your charging port.

Solution #3: Try a different Lightning Cable:

Another reason why you might be experiencing iPhone not charging when plugged in problem is due to faulty lightning cable. Try using a different lightning cable and a different power source such as a wall charger, USB port or car charger.

Solution #4: Put Your iPhone In DFU Mode

The DFU restore is a deep restore that can fix so many iPhone problems. Before youput your iPhone in DFU mode, make sure you have back up all your data.

Solution #5: Consider Repair Options:

If you are still experiencing iPhone charging problem, you may need to repair your iPhone. In such a situation, you can take your iPhone to the Apple store. Make sure you have set up anApple genius bar appointment before making a visit. Or request a third party technician to visit your place and fix your device. If the cost of repair is high, consider buying a new iPhone.

iPhone showing charging but battery percentage not increasing? Problem fixed

There you have it! Were you able to solve iPhone won’t charge but it says it’s charging issue? We would love to know what worked for you in the comments section below. Share this article with your friends and family and help them resolve iPhone won’t charge issue. We Also Have plenty of other articles that i suggest you check right now.

The iPhone 13, iPhone 13 Mini, iPhone 13 Pro, and iPhone 13 Pro Max have problems with their quick battery drain, despite them being the best smartphones in 2021. The reason stems from iOS 15, which hurt the battery life of the iPhone 13 lineup. If you think your iPhone is consuming more battery or the battery drain is faster than usual, here are a few solutions you could try to fix the battery drain issues on your iPhone 13 mini, iPhone 13, iPhone 13 Pro, or iPhone 13 Pro Max.

The iPhone 13, iPhone 13 Mini and iPhone 13 Pro series pack some major improvements and enhancements over previous iPhones. However, they do have their own set of issues, with one of them being battery drain issues that many owners are facing. If you are also frustrated with the battery drain issues on your iPhone 13, check out some possible solutions here.

Several users have taken to social media and online forums to note that their iPhone 13 mini has been experiencing excessive battery drain. They report that their iPhone 13 mini not only drains faster than usual but also overheats during normal use.

Use These Nifty Tips to Fix iPhone 13 mini Battery Drain Problem

To fix battery drain problems on your iPhone 13 mini, iPhone 13, iPhone 13 Pro, or iPhone 13 Pro Max, follow the tips below:

1. Disable Background App Refresh

How to Fix battery drain Issue on iPhone 13, Pro, Max, and mini

The first thing to do when troubleshooting battery drain issues with your iPhone 13 mini is to disable Background App Refresh. Background App Refresh can impact battery life, so turning it off can help make your battery last longer. To do that, go to Settings > General > Background App Refresh and turning off the background app refresh toggle.

2. Use WiFi Whenever Possible

WiFi consumes less battery than a cellular connection, so to maximize battery life on your iPhone 13 mini, consider connecting to WiFi whenever possible. At home or work, for example, WiFi should be activated, saving cellular data and battery life.

3. Use 5G Auto Instead of 5G On

If you don’t have access to WiFi, try to switch to 5G Auto. 5G can consume a lot of your iPhone’s battery life. 5G Auto will only use 5G when it will not reduce battery life significantly. You can change these options by navigating to Settings > Cellular > Cellular Data Options > Voice and Data and choose 5G Auto or LTE. This will potentially fix iPhone 13 mini battery drain issue.

4. Turn off Automatic Downloads and App Updates

The automatic downloads feature is designed to sync apps between all of your devices by downloading apps that were downloaded on one device on the other devices as well. So if you download an app on an iPad, for example, Automatic Download will also download the app on your iPhone and this can cause battery to drain faster. You can turn this feature off by going to Settings > App Store. Toggle off Apps and App Updates.

You can also turn off automatic iOS updates if desired by going to Settings > General > Software Update > Automatic Updates. Tap the toggle to turn updates off.

5. Turn Off Location Services

How to Fix battery drain Issue on iPhone 13, Pro, Max, and mini

If the location services are turned on, your iPhone will consistently update the location of the iPhone, thereby consuming battery life. To fix it, head over to Settings > Privacy > Location Services and then toggle it Off.

6. Adjust Auto-Lock and Turn Off Raise to Wake

If you are still experiencing iPhone 13 mini battery drain issue, it’s a good idea to set the Auto-Lock on the display as low as you can tolerate, which will cause the iPhone’s display to turn off after a short period of inactivity.

You can choose ranges from 30 seconds to never, but the lower end of the spectrum will help preserve battery life by cutting the display when it’s not needed.

Furthermore, if you really want to save iPhone 13 mini battery, turning off Raise to Wake can help. You can access these Settings by going to Settings > Display & Brightness.

7. Use Dark Mode

Dark mode on iPhone 13

Even though some users might naturally prefer a darker interface, it does help to fix the battery drain issue on iPhone 13 mini. This is due to the fact that the display will only light up pixels on the screen that are needed, the rest of them would remain off unless required. You can enable it by going to Settings > Display & Brightness and then selecting the Dark option.

8. Enable Low Power Mode

How to Fix battery drain Issue on iPhone 13, Pro, Max, and mini

Apple’s low power mode on the iPhone works best by itself. The system disables certain aspects of the device that work in the background while giving you the option to resume work normally. It can disable background refresh, automatic downloads, and other aspects. You can enable Low Power Mode by going to Settings > Battery > Low Power Mode and toggle it On.

9. Enable Reduce Motion of Interface

The Reduce Motion aspect of iOS has always proved to be quite helpful in saving the battery life of your iPhone. The option basically turns off animations and allows less strain to be applied to the battery life. You can enable it by going to Settings > Accessibility > Motion and then turn on Reduce Motion.

10. Make Sure Everything’s Up to Date

If your iPhone 13 mini battery is draining faster, make sure you are running the latest version of iOS on your device because Apple has been making improvements and refinements to the operating system. You can check this by going to Settings > General > Software Update. From here, the iPhone will let you know if your software is up to date or if there’s a new version available.

You should also make sure all of your apps are up to date, which you can do by navigating to App Store > your profile and tap on Update All.

11. Delete Unwanted Apps

If you are not using a certain app, it will simply take up space. It might have an impact on battery life in the backend. Moreover, you will save precious storage while you are at it. You can do this from Settings > General > iPhone Storage and then deleting apps that you do not use.

12. Don’t Close Apps

Some battery life guides recommends manually closing apps through the App Switcher to prevent them from running in the background, but this doesn’t save battery life and can in fact cause the iPhone 13 mini battery to drain faster.

Apps in the background are paused when not in active use and aren’t using battery life. Closing out an app purges it from the iPhone’s RAM, requiring a reload when it reopens, which can have a bigger impact on battery.

13. Turn Off Screen Time

Some users have reported success saving battery on their iPhone 13 by turning off Screen Time, Apple’s personal usage monitoring feature. It’s not clear why this is causing iPhone 13 battery issues, but if you don’t use Screen Time then there’s no harm in disabling it. You can do this by going to Settings > Screen Time.

14. Perform a Force Restart

Force restarting your device can clear errors and fix iPhone 13 mini battery drain issues. To do this, press and quickly release the Volume Up button, press and quickly release the Volume Down button, press and hold the Side button until you see the Apple logo on the screen.

15. Reset All Settings

How to Fix battery drain Issue on iPhone 13, Pro, Max, and mini

Another tip to help fix the battery drain issue on your iPhone 13 mini is to reset all settings. There is a possibility that the issue lies in the settings that you are not familiar with and hence, it would make sense to reset all of them. To do that, go to Settings > General > Transfer or Reset iPhone > Reset and then tap on Reset All Settings.

16. Restore and Setup as new iPhone

This is not ideal, but if iPhone 13 mini battery drain issue is persistent, you can hard reset your device and set it up as a new device. This way, you start afresh and get rid of possibly problematic customizations and settings on your device. Once you reset your iPhone, all of your data and settings will be deleted and your device will be as good as new. However, be sure to create a backup of your data before you proceed with this step. Head over to Settings > General > Transfer or Reset iPhone > Erase All Content and Settings to do it.

Other Tips

  • Disable “Hey Siri” so the iPhone isn’t listening for the wake word.
  • Disable Siri completely.
  • Disable Siri Suggestions.
  • Turn off Reduce Transparency
  • Disable AirDrop.
  • Don’t use Live or Dynamic wallpapers.
  • Lower the volume.
  • Lower the brightness level of the Flashlight feature in Control Center.
  • Turn off Location Services all together (not recommended).

This is all there is to it folks. These tips will fix the battery drain issue on your iPhone 13 mini, iPhone 13, iPhone 13 Pro, or iPhone 13 Pro Max. If you’re still having battery drain problems on your iPhone 13 after trying these steps, then you might want to visit your nearest Apple Store to know of any possible hardware related issues.

You might also want to check out:

If the above steps did not help in solving the battery drain issues on your iPhone 13 mini, your only bet is to wait for a new iOS update from Apple which should hopefully fix whatever problem you are facing.

Have you faced battery life problems on your iPhone 13 mini, iPhone 13, iPhone 13 Pro, or iPhone 13 Pro Max? Let us know in the comments if the tips helped you out.