Got a tip for us?

Find My lets you mark items as lost to help recover items you can’t find or that might be stolen. Marking something as lost puts the hardware into a special Lost Mode and lets you provide details to someone who finds it—or even to a thief you want to encourage to return it.

Apple labels the feature as Lost Device Type on the Find My sheet and Mark As Lost in macOS 26 and earlier when you Control-click/right-click a device in Find My for Mac’s device list. However, the option to turn the feature on is labeled Lost Mode.

This information is available differently (or not at all) based on the kind of thing that’s marked as lost:

  • Devices: For devices, you can enter text (such as offering a reward) and provide your phone number. Both appear on the device.
  • AirTags and other items: With a Find My item—like AirTags or a Pebblebee Card—you can provide your phone number or email address; Apple prefills the message “This item has been lost. Please call me.” This information appears on a webpage associated with the device, which a finder can retrieve as described in how to identify an AirTag you have found.
  • Audio hardware without a screen: AirPods (3rd generation), AirPods 4 with Active Noise Cancellation, AirPods Pro, and AirPods Max can provide contact info just as with a Find My item. (The 1st- and 2nd-generation AirPods, AirPods 4 without ANC, and Beats models that support the Find My network can’t be marked as lost.)

Because devices have screens, marking a device as lost puts the finder on notice that you know approximately where it is—they can see that from the lock screen. If your hardware is stolen, this is a way to tell a thief that you have their location and advise them to give it up.

With supported Apple audio hardware or a Find My item, it’s trickier, as a finder has to take additional steps to determine its status rather than looking at a screen or receiving an alert—although they will hear an item make a sound or sounds in certain circumstances: see what an “AirTag Found Moving With You” alert means for those cases.

Mark a device as lost

When a device is marked as lost, it is locked and can be unlocked only with a device passcode (iPhone, iPad, or Apple Watch) or an Apple Account password or a macOS account password (Mac). Apple Pay is disabled, and all associated cards are temporarily suspended.

Even though Apple audio hardware that can be marked as lost appears in the Devices list, the options for a lost set of earbuds or headphones are the same as a lost item, described later in this chapter.

In case you’re thinking of testing this on your Mac, be aware that your computer restarts instantly after you confirm Lost Mode. You might lose unsaved work in progress.

  1. Tap or click Lost Mode beneath Lost Device Type.
  2. Apple explains what will happen to the device in a screen labeled Lost Mode (iPhone, iPad, or Apple Watch), or “Lock this Mac?” Tap or click Continue to proceed or Cancel to back out.
  3. Enter a passcode if prompted and verify it. (This is unlikely, but it may happen. Make a note of the passcode so you aren’t locked out.)
  4. On devices other than Macs or supported audio devices, optionally set a phone number for a call back. On an iPhone, a finder can call only that number. On other devices, the call-back number is displayed. Tap or click Next.
  5. Optionally, for devices that offer it, enter a message that will appear on the device. In this step, the dialog shows that a passcode has already been set and will be used to lock the device. Tap or click Next.
  6. On the final screen for anything but a Mac, you see a summary of actions and information:
    • Notify When Found: Enable if you want device-based notifications on all your linked hardware.
    • Text you entered: The text of the phone number and messages you entered, if any, appears, but you can’t modify it.
    • Receive Email Updates: This adds email to notifications as part of how you’re alerted.

Despite Apple’s explicit promise when locking a Mac that “This message will be shown on your Mac when someone turns it on,” I can confirm in Tahoe and Golden Gate, it is not. I don’t understand why Apple doesn’t show the message, and why they document it incorrectly.

Tap or click Enable or Activate for anything but a Mac, where you tap or click Continue or Lock.

After you activate Lost Mode, the action is passed to the device if it’s online, and an email message (if enabled) is sent to the address for the Apple Account for the device, confirming what you’ve done. Devices with batteries will be placed in low-power mode. On an iPhone, emergency service calls remain available. Credit and debit cards associated with Apple Pay are disabled on the device.

When a device is locked, it appears in the Devices view with its icon overlaid with a white question mark in an orange circle. A Mac additionally shows a gray screen.

If Location Services has been turned off by you or someone with access to your devices, Lost Mode overrides that and re-enables it so you can track your device.

Turn Lost Mode off again

  1. Select the device in the Find My app.
  2. Tap or click Turn Off Lost Mode, except on an Apple Watch, where you tap the Lost Mode button and disable Lost Mode.
  3. Find My prompts you with a warning that explains the device will remain locked, but the information you entered (phone number and message) and its location history will be deleted. Tap or click Turn Off to confirm.
  4. When you recover the device, enter its passcode or password.
  5. Then, you can disable Lost Mode: Enter your passcode.

Whether you use Find My or start directly from your iPhone, iPad, or Apple Watch, your device will prompt you to re-enter your Apple Account password once or twice. If you have separate iCloud and media Apple Accounts linked, read the dialog carefully so you enter the correct password for each.

To unlock a Mac, despite Apple promising you can do so via Find My or via iCloud.com/find, the truth in testing in Tahoe and Golden Gate is that you can only unlock your Mac while in front of it, going through a separate procedure.

What happens to Apple Pay

In some cases, you may be prompted for two-factor authentication to finish regaining access; in many recent tests, I was not, but I don’t know why. For accounts using code-based verification, you will have to use a trusted device other than the one you have in hand or a trusted phone number to validate your sign-in. With a hardware security key, it’s already independent and can simply be used if you’re prompted; you may be asked to use code-based verification, however. If you’re prompted a second time for your Apple Account password, no second factor appears to be required.

Mark as Lost immediately disables Apple’s side of Apple Pay for a lost device, which prevents even someone with your passcode from using Apple Pay. (When they use the passcode, this disables Lost Mode, but you would be notified.) You may see a flurry of “card deactivated” emails and texts from your credit card companies and banks as well as an email alert from Apple.

To re-enable your cards for Apple Pay, you will be in one of two states:

  • Wallet sync active: With Wallet enabled for syncing—Settings/System Settings > Account Name > iCloud > See All—when you re-enter your Apple Account password after unlocking the device, your cards are re-synced and activated. This may result in a similar flurry of “card reactivated” messages.
  • Wallet sync inactive: Without Wallet sync, your device deletes all locally stored card information when Lost Mode is activated. You have to manually re-enter cards that you want to use for Apple Pay on that device.

Do the same from iCloud.com

The iCloud web app for Find My iPhone diverges slightly from the Find My app, and mobile devices have a different process than Macs.

Lost Mode activates immediately when you click Activate at the last step — there are no extra options or final review stage.

Here’s how to proceed for an iPhone, iPad, iPod touch, Apple Watch, AirPods Pro, or AirPods Max:

  1. Select the device.
  2. On the sheet that appears, click Lost Device Type.
  3. Read the disclosure of what will happen when it’s locked and click Next to proceed.
  4. In the unlikely event the device doesn’t have a passcode set, you have to invent one and set it at this point.
  5. Enter a phone number that will be displayed (optional). Click Next.
  6. Enter a message that will be displayed (optional). Click Activate.

You can unlock these devices using the same methods as when they are locked in a native Find My app.

Lost Mode restarts a Mac immediately when you click Lock at the last step.

Macs are handled slightly differently; here are the alternative steps:

  1. Select the Mac.
  2. Click Lost Mac.
  3. Click Next after reading the disclosure.
  4. You have an option to enter a message before you click Lock.

The Mac is now locked and powers down. See how to unlock a Mac you locked with Find My for how this appears and your next steps.

Your device that marks your presence—the hardware that your location is indicated as to others—updates that location automatically with Apple’s services on a fairly constant basis. If you’re out of range of cellular or Wi-Fi, there’s another option to push a location update—a satellite! Very futuristic.

Apple’s satellite-data option built into the iPhone 14 and later and the Apple Watch Ultra 3 lets you send the tiny bits of information necessary via Find My when you’re otherwise offline.

The next time you’re out of range of service, you can give Send Location via Satellite a whirl.

In the Me view in the iPhone or Apple Watch Find My app (or watchOS 26 Find People app) is My Location via Satellite: tap Send My Location. Your iPhone or Ultra 3 guides you through holding it in the right position to make a satellite connection. Apple lets you send your location as frequently as every 15 minutes. Find My isn’t updated with the location of other people who have shared their location with you, however.

Send your location via satellite

You can use the Find My app to share your location via satellite if you’re not connected to a cellular or Wi-Fi network. To share your location with a friend via satellite, you must already be sharing your location with that friend in Find My. See Share your location in Find My.

  1. Go to the Find My app 656662b1-6b5c-469e-9d04-915022f44dae on your iPhone.
  2. Make sure that you’re outside with a clear view of the sky and the horizon. If you’re under heavy foliage or surrounded by other obstructions, you might not be able to connect to a satellite.
  3. Tap Me f62028cb-855a-4e5f-bf7c-ea130d8b31e6.
  4. Tap Send My Location (below My Location via Satellite), then follow the onscreen instructions.

If you need to turn left or right to connect to a satellite, your iPhone provides guidance–just follow the onscreen instructions.

Note: It may take a few minutes to send your location via satellite; continue to follow the onscreen instructions until the message is sent.

You can send your location once every 15 minutes. When you send your location via satellite, you don’t see your friend’s location in the Find My app.

See a friend’s location sent via satellite

In order to see a friend’s location sent via satellite, you need to have iOS 16.1 or later installed on your iPhone (you don’t need iPhone 14 or later).

When a contact sends you their location via satellite, a satellite icon f6287a76-cbc1-4090-b12d-0753a0187054 appears next to their picture and Satellite Location appears in the text in the Find My app. Their most recent location is viewable for up to 7 days.

What it needs to work

There are some requirements:

  • Both you and the other party must have an iPhone 14 or later and iOS 16 or later installed, or an Apple Watch Ultra 3 (requires watchOS 26 or later paired with iOS 26 or later). The location isn’t shared to devices that don’t meet these criteria.
  • An iPhone you use has to be set as your “presence” device before you’re offline.
  • An Apple Watch Ultra 3 must have an active Wi-Fi or cellular network plan, and its paired iPhone doesn’t need to be nearby, but it must be powered on and connected to either a Wi-Fi or cellular network for the satellite process to work.
  • The person you send your location to must be someone you already share your location with via Find My. That has to be set up before your iPhone is unable to connect via cellular or Wi-Fi.

For more on presence and setting your phone as your primary location device, see how Find My works.

Why Apple built this at all

Apple first introduced satellite access as a safety feature, highlighting all the ways that you could use their Emergency SOS via Satellite feature. Later, Apple spent some of their dragon hoard of cash to expand their satellite network access, as they rolled out Find My, emergency roadside assistance, and iMessage over satellite. Emergency SOS via Satellite works in 18 countries as of September 2026; iMessage over satellite works in Canada, Mexico, Japan, and the United States; and emergency roadside assistance works in Australia, the United States, and the United Kingdom.

Apple originally said they would cover the cost of satellite usage for the first two years after activation, but has continued to extend the free period and hasn’t disclosed future pricing. Their current statement on all satellite-related pages reads, “It’s free for two years after the activation of an iPhone 14 or later (all models).” However, we are well past two years for many models. (My guess is it will ultimately be $10 a month and rolled into Apple One subscriptions.)

Tags: Find My, iOS

Pause sharing without telling anyone

In the version 27 releases, Apple added a way to pause sharing your location with someone without removing them from your sharing-with list—and without them knowing. Here’s how to pause sharing:

  1. Select a person with whom you’re sharing your location.
  2. Tap or click the More button, and choose Hide Location.
  3. Find My explains that you stop sending your location for the remainder of the day.
  4. The other party is not notified when you pause, stop or resume sharing. They see only that no location was found.
  5. Tap or click Hide to continue, or Not Now to keep sharing.

The Location field shows “Unhide Location” until the shown time. When I chose to Hide Location at 2:30 p.m., it displayed “tomorrow at 4:00 a.m.” as the end point. If you tap or click Unhide Location, there’s no confirmation step: your location is immediately shared again.

This addition is clearly another tool in the kit for deterring unwanted tracking in abusive situations, where someone’s partner or family member demands they leave tracking on. This allows someone being tracked to go off the radar without it being obvious. For more, see how to check whether someone is tracking you.

Stop sharing altogether

You can completely stop sharing with someone, which removes you from their People list in Find My. They can’t prevent or reverse these. Stop sharing in either of these ways:

  • In the info pane in a Messages conversation, tap or click Stop Sharing My Location or Stop Sharing.
  • In a native Find My app (or Find People in watchOS 26), tap or click Stop Sharing My Location, Stop Sharing Location, or Stop Sharing.

If you stop sharing, the person remains in your list. You can remove their entry, as below.

You can remove someone from your People list and stop sharing with them or seeing their location. This requires a native Find My app. Here’s how to remove someone:

  • In the version 27 releases, select the People view, select a person, then tap or click the More button. Tap or click Remove and confirm.
  • In earlier releases, select the People view and select the person. On an iPhone or iPad, tap Remove and confirm. On a Mac, click the Info button, then click Remove and confirm.
  • On an iPhone or iPad, you can instead swipe left on a name in the People list and tap the Remove button (iOS 27/iPadOS 27) or Trash button (earlier releases).
  • On a Mac, click the People button and Control-click/right-click the person’s entry. In macOS 27, choose Remove Friend; in earlier versions, choose Remove Name. The person is removed immediately without additional prompting.

Ask someone else to share

You can use the Messages app to request that someone share their location with you. This is handy for a less sophisticated user who doesn’t know how to initiate sharing, or in situations where you want to message someone and ask them to share at the same time: they can read your message and then tap to share without going through additional hoops.

You can prevent receiving these requests by disabling Allow Friend Requests in a native Find My app on the Me tab or pane.

On an iPhone, iPad, or Mac running Tahoe or later, in any conversation in Messages, tap or click the avatar at the top of the view; on a Mac running Sequoia or earlier, click the Info button at the upper-right corner. Tap or click Request Location. This creates a request within Messages. Tap the Send button or press Return to transfer the request, and the other person can opt to Share and choose a duration.

There’s an alternative method on an iPhone or iPad in a conversation in Messages: Tap the Plus button, choose Location, tap Request, and tap the Send button.

If you’re already sharing your location with someone who isn’t with you, you can also use a native Find My app, view the person’s details, and tap or click Send Request.

If you’re on the accepting side of that equation, Messages now mediates your response. When you select a duration, this generates another message; you can click or tap the Send icon or press Return to transmit.

When you are asked to reciprocate

The Find My app shows an entry for each person actively sharing their location with you in the People view. For time-limited sharing, their pictures are overlaid with a little clock.

When you share your location with someone else or vice versa, Find My posts an alert, but the party being shared with doesn’t have to accept it; the sharing party is just added to their Find My list.

However, if that person (you or someone else) isn’t someone the recipient already shares their location with, Find My prompts for reciprocation. (That is, if you share to someone and they don’t, they will be prompted to share with you; if they share to you and you don’t, you’ll be prompted to share with them.)

You can choose to mirror a shared location via a notification. Tap or click the notification, then choose the duration. If you ignore or dismiss the notification, you can also use the Find My app, where the notification appears in the People list with the same message. Similarly, tap or click Don’t Share or tap or click Share to choose a duration from the pop-up menu.

You can’t reciprocate on an Apple Watch.

If the person doesn’t follow you, you can use the same methods in Request Sharing from Someone to ask again.

Where to get help

There are many organizations beyond law enforcement eager to help people trapped in situations of domestic abuse or child subject to violence and an unsafe environment. For adults in the United States, that includes the National Domestic Violence Hotline; for children or those concerned about their welfare in the United States and Canada, the Childhelp National Child Abuse Hotline.

For those being stalked, one starting point is Safehope. It’s more likely you will need the help of police or federal authorities. Local police departments have their own paths to navigate, but for online or cyber stalking, it may be better to start with the FBI.

If the person you are worried about may be watching your device, use one they cannot see. Removing a tracker or turning off sharing can be noticed, and advocates warn that it can make a situation worse rather than better, so it is worth talking to someone before you act.

With all that in mind, you might wonder: what should I open for use and what’s safe? The answer depends on whether your Mac has a public IP address. I advise always turning on only the services you need. A few are worthwhile, and how you configure them depends on your circumstances.

But you should have different considerations under these sets of circumstances:

  • Privately addressed Mac on a network in which all users are trusted: If you’re by yourself or you trust your roommate and family to not attempt to access things they shouldn’t, you can enable what you like and just configure for general safety.
  • Privately addressed Mac on a network in which not all users are trusted: If you share a network with other people—which could include kids or parents who may not be as safe or honest with you as you might like—consider locking things down further and using the fewest possible services.
  • Publicly addressed Mac: You need to take more care to set passwords and configure limitations, and to consider whether to leave services active all the time or only when you know you or someone you trust needs them.
  • High-risk individual or group: People who believe themselves at elevated risk shouldn’t operate any services on public addresses, and should think strongly about not running them even on privately addressed networks. It’s very easy for so-called Internet of Things (IoT) or “embedded devices” to be compromised. That can include DVRs, routers, smart home gear, and more. A subverted device on your local network can have the same access as anyone else on the network.

With that in mind, here are the items in System Settings > General > Sharing worth enabling or disabling. Configuration options appear when you click the info button next to a service.

Don’t allow all users

Several services let you selectively enable them. Apple offers a choice of “Allow access for” either “All users” or “Only these users” for most services. File Sharing has more fiddly options. I recommend setting access for Screen Sharing and any service starting with Remote to Administrators (often prefilled), or, better, selecting users or groups you’ve created. This limits exposure in the case of an intrusion that doesn’t gain direct access to your macOS account.

Screen Sharing

If you have a “headless” Mac (one without a monitor) that you use for various services, or machines in different parts of a house or office that you want to access remotely, screen sharing is handy.

I recommend deselecting two options in the Computer Settings dialog:

  • Anyone may request permission to control screen: There’s no reason to allow this except momentarily if you want to allow someone to request access.
  • VNC viewers may control screen with password: VNC is an outdated protocol that Apple’s screen-sharing technology extends with more security and features. There’s no good reason to keep this option turned on, particularly because VNC passwords are notoriously easy to crack.

File Sharing

The File Sharing service on a Mac offers fine-grained controls to choose which folders and volumes are accessible to which people, including the type of access: read/write, read-only, or write-only (to drop items into without seeing the shared item’s contents).

In configuring File Sharing, I recommend the following:

  • Disable Full Disk Access if multiple people have accounts with administrator access to the Mac, unless you explicitly want them all to have remote access to all files on the volume.
  • In the Shared Folders list, select items you don’t need shared and click the minus button.
  • In the Users list for each shared folder in turn, click the pop-up menu and choose No Access for users and groups that can’t be removed, then select the user or group and click the minus button to remove those that can.

What you’re left with is a limited, tightly controlled set of folders and volumes that only people you have approved can interact with.

I often create a sharing account that I set up for limited access. You can use the Guest account for this purpose, but I’d rather control it more directly by name. See also how to set up safe user accounts on a shared Mac.

Remote Login, Management and Apple Events

Apple offers powerful but somewhat obscure ways to access, manage, and use a Mac remotely:

  • Remote Login lets you connect via the SSH (secure shell) protocol, commonly used in Unix/Linux, as well as access file sharing with SFTP (Secure File Transfer Protocol), which is really “FTP using SSH.” It’s rarely needed except for particular purposes, such as if you need remote command-line access. If you do enable it, keep “Allow full disk access for remote users” turned off.
  • Remote Management connects with Apple Remote Desktop (ARD), a corporate and academic tool. If you’re not using ARD, don’t enable this service.
  • Remote Apple Events or Remote Application Scripting is a tweaky thing that lets an AppleScript running on one Mac send control events to another. It’s rare you need this, and you will know if so.

Reaching your Mac from outside

If you want to have access to Macs and other devices that are behind NATs or other network protections, I highly recommend Tailscale. The company’s core product lets you create an account, install software on nearly any device, and then have those devices create VPN tunnels to a pooled central network space. This is a profoundly straightforward way to use File Sharing and Screen Sharing when away from your home network. You can install Tailscale on an Apple TV and then set it up to provide access to the entire network it’s on, too!

Tailscale offers a non-commercial account that fits most people’s personal needs.

macOS 27 Golden Gate is one of those rare upgrades (like going from Leopard to Snow Leopard, for those who remember it) that focuses more on improving what’s already there than on new features. To be sure, there are new features, including a few big ones. But even those—I’m thinking of Siri AI in particular—are mostly revisions of existing features rather than entirely novel capabilities.

In the past, Apple has released detailed descriptions of all the new features of that year’s version of macOS. This year’s macOS webpage, by contrast, is extremely light on details, focusing only on what Apple considers the key features. The extensive feature lists circulating online are based on a single slide shown in its entirety for less than two seconds during the WWDC keynote, which listed hundreds of changes across all the version 27 releases.

I read every one of those items and tried as many as I could, but many did not seem to function as described. For some features it is not clear whether Apple removed them or the description was simply too vague to work out what should happen. Apple stresses performance and reliability improvements, which are harder to test, and in some cases I never noticed the problems they addressed in the first place.

What follows is the part of that list that owes nothing to Siri AI or Apple Intelligence. Of the five headline areas in Apple’s own summary, three are AI. These 36 are the rest, and several of them matter more day to day. For the release as a whole, including what the AI features do, see what’s new in macOS 27 Golden Gate.

Here are all the macOS Golden Gate non-AI features:

1. macOS 27 Golden Gate lets Sidecar take touch

In macOS 27, Apple has extended Sidecar in such a way that, for the most part, your finger acts as a proxy for your mouse pointer. You can tap any icon or other control, scroll with one finger, use menus normally, and so on.

This feature requires that your iPad also be running iPadOS 27.

Mac news and rumor sites claim this feature isn’t so much about having more control from your iPad, but rather part of the groundwork for a hypothetical future touch-screen Mac, which would presumably allow a similar form of interaction.

2. The Liquid Glass slider

The most controversial change in Apple’s version 26 operating systems, including Tahoe, was the new Liquid Glass interface, which greatly increased the use of transparency and glass-like distortion effects that added some glitz to the screen without increasing usability. In many cases, the new appearance made text harder to read, icons more difficult to decipher, and windows more cumbersome to use.

Over subsequent Tahoe releases, Apple made some adjustments to Tahoe to address a few of the most frequent Liquid Glass criticisms. But in macOS 27 Golden Gate, Apple has gone further still, tacitly acknowledging that Liquid Glass went too far the first time around while retaining the overall look and feel introduced in Tahoe.

If you hated Liquid Glass in Tahoe, you’ll probably find it less objectionable in macOS 27, but make no mistake: the user interface looks far more like that of Tahoe than that of Sequoia.

In the WWDC keynote introducing the version 27 operating systems, Apple made a big deal about a new slider that ostensibly lets you decide how weak or strong the Liquid Glass transparency effects should be; it appears during installation and can also be adjusted at any time in System Settings > Appearance.

But, in fact, that’s not quite what it does. It merely changes the level of tinting for a handful of interface elements—particularly menus, Control Center, Notification Center, Spotlight, toolbars, and sidebars—that become a bit more or less transparent based on where the slider is set. Instead of having just two choices (Clear or Tinted), as in Tahoe, you can now select any point in the range between the two. But the effect is subtle, and the slider doesn’t change the transparency of the menu bar, Dock, Finder icons, or most other items.

If you want to get rid of most transparency altogether, you must still go to System Settings > Accessibility > Display and turn on “Reduce transparency.” That makes the menu bar, menus, sidebars, and toolbars opaque, while greatly reducing the transparency of the Dock and certain other elements. However, paradoxically, it also removes the shading from sidebars, making them less clearly separated from the rest of the window.

3. Sidebars reach the edge again

In Tahoe, window sidebars were inset from the window edges, reducing the amount of usable window space. In macOS 27, sidebars once again reach the edge of the window.

In addition, macOS 27 brings color back to certain sidebar icons, all of which were uniformly dark gray in Tahoe.

4. The active window is obvious

macOS 27 makes two overall changes to windows: showing the active window more prominently and adjusting the corner radius.

In Tahoe, it could be difficult to figure out which window on screen was active. macOS 27 adds cues to make that more evident: the sidebar’s color is darkened, and color icons appear only in the frontmost window.

Another small detail that irritated a lot of people was that Tahoe made window corners much rounder (supposedly to match the curvature of laptop screen corners), which—like the inset sidebars—reduced the amount of usable space in windows. But not all windows got this treatment, meaning some windows had much rounder corners than others, which looked awkward. In Tahoe, all window corners have the same amount of roundness.

5. Fewer icons cluttering menus

Tahoe added icons next to most menu commands, a change with no evident utility (and against Apple’s long-standing human interface guidelines) that made menus more cluttered and inconsistent in indentation. In macOS 27, those superfluous icons are gone, though icons that existed pre-Tahoe are still there.

6. App icons are crisper

Tahoe enforced the rounded-rectangle (or “squircle”) shape for all app icons from Apple and apps downloaded from the App Store. (Apps distributed outside the App Store could optionally work around this requirement.) In addition, Apple’s icons adopted a new look and feel that, unfortunately, also made them less distinctive. The icons haven’t changed dramatically in macOS 27, but they have become crisper and slightly more saturated.

7. iPhone Mirroring resizes freely

Previously, the iPhone Mirroring app had only three sizes: Small, Actual Size, and Large. Now, you can resize it by any arbitrary amount, either by dragging a corner with your mouse or by using the zoom controls (View > Zoom In or Zoom Out, ⌘-+ and ⌘-– (minus), respectively).

8. Control Center in iPhone Mirroring

You can now, finally, access Control Center on your iPhone from iPhone Mirroring—choose View > Control Center or press ⌘-4. And you can even watch copy-protected videos (such as those from Apple TV) on your iPhone while using iPhone Mirroring.

9. Two-finger swipe to refresh

In any app that already has a refresh or reload mechanism (such as Mail and Safari), you can swipe down with two fingers on a laptop’s built-in trackpad, a Magic Trackpad, or a Magic Mouse to refresh the page, just as you would (with one finger) on an iPhone or iPad.

10. Finder columns size themselves

In column view, right-click or Control-click in any column, choose Show View Options, and check “Resize columns to fit filenames.” The columns autosize to the width of the longest names in each one. Uncheck that box to go back to regular sizing. You can also right-click or Control-click the double-bar button at the bottom of a column divider to show a menu with Right Size This Column, Right Size All Columns Individually, and Right Size All Columns Equally, where “right size” is Apple’s term for sizing determined by filename length.

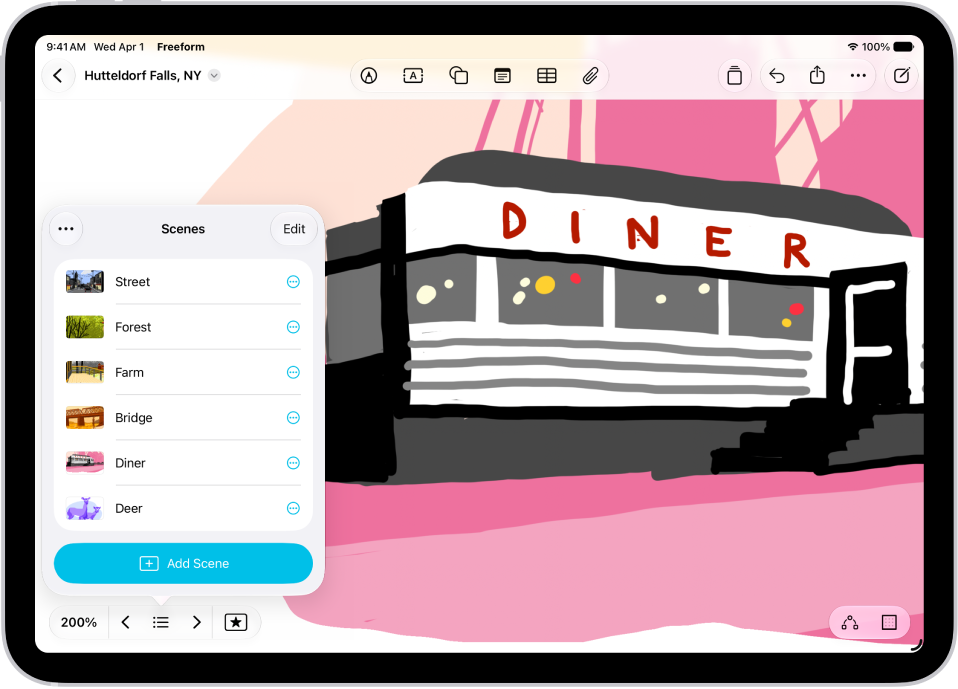
11. Freeform adds drawing and folders

The Freeform app now supports drawing tools, just as many iPhone and iPad apps have done for years (click the Add Drawing button on the toolbar). You can also add folders to organize your boards (click the Folder button on the toolbar), and each folder can be shared with others (hover over the folder name, click the More button, and choose Share). When sharing boards or folders, Freeform may suggest recipients based on the contents of what you’re sharing. Freeform now supports Dark Mode as well.

12. Notes gets drawing tools

As in Freeform, drawing tools are available in Notes: click the Add Drawing button on the toolbar.

13. Notes copies as Markdown

You can use Edit > Copy as Markdown to copy styled text from a note with Markdown tags, ready to paste elsewhere.

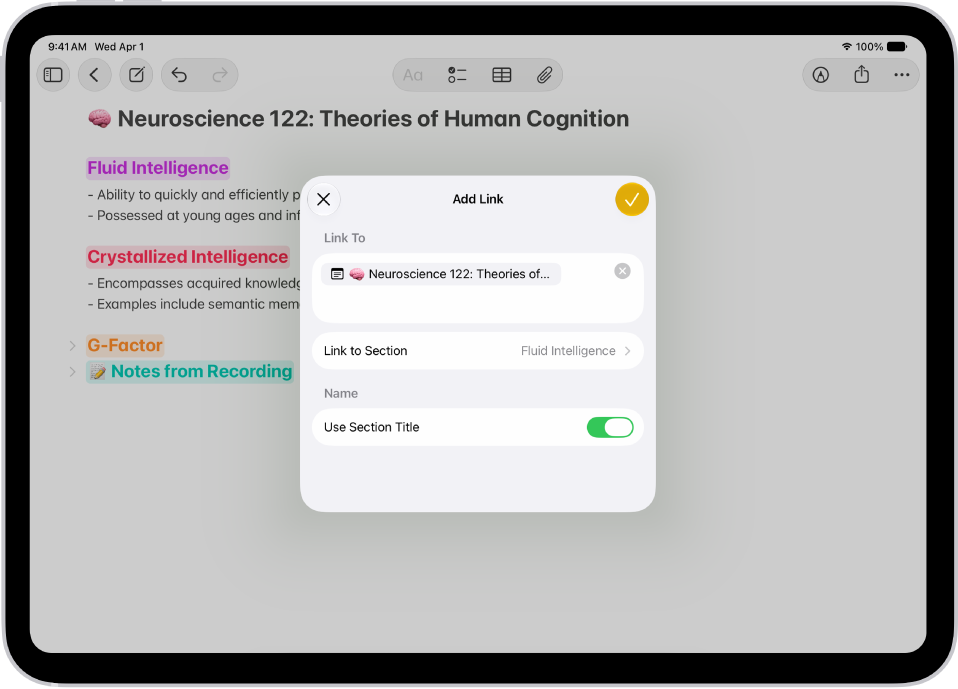
14. Notes links to its sections

If you use section headings in your note, you can insert links elsewhere in your note that jump to them. Choose Edit > Add Link (⌘-K), choose the section heading from the Link to Section pop-up menu, and click OK.
Finally, you can now add horizontal divider lines in your notes by choosing Edit > Insert Divider Line (⌘-L).

15. Passwords changes a password for you

Passwords can already identify passwords that are too weak, or that have appeared in data breaches. Passwords like these that need changing are marked with a red exclamation point and feature a Change Password button that takes you to the appropriate page on the website. macOS 27 takes that concept further, where Passwords automates the process: it goes to the site, chooses a strong new password, saves your new password on the site, and stores the new password in Passwords—all with one click. But this works only on a limited number of sites that support the mechanism Apple requires.

16. A reset button on the Lock Screen

If “Show password hints” is turned on and you begin typing your password on the Lock Screen, a small question mark button appears to its right. Click that, and a message appears along with a Reset Password button, which you can click if you need to reset your password.

17. Shared albums reach Windows and Android

When you share an album via iCloud, other participants can now see and interact with it even on Windows PCs and Android phones. In addition, you can “upgrade” your shared albums to show photos and videos at full resolution and enable several other features. To do so, right-click or Control-click an album in the sidebar and choose Upgrade Shared Album; this walks you through a series of steps, after which Photos spends a considerable amount of time—perhaps hours—thinking.

18. Home shows every camera

The Home app now offers a single interface in which you can see multiple cameras and search for events, as well as 4K camera recordings.

19. Podcasts can hide the video

When you’re watching a video podcast in Podcasts, there’s now a Hide Video button beneath the progress bar that does just that (while keeping the audio going); bring back the video by clicking Show Video.

20. Journal stamps the time

The Journal app now automatically adds a time stamp to new journal entries, rather than just a date. It also raises the attachment limit (though Apple doesn’t say by how much).

21. Mail strips list formatting

If you have a bulleted or numbered list in a message you’re composing, you can now choose Remove List Formatting from the Format > Lists submenu or from the Lists pop-up menu to revert the list to regular text.

22. Calendar notes keep styled text

Calendar now supports styled text in notes, which some calendar apps (such as Google Calendar) support. That is, if you’ve used styling such as bold or italics on a note you created somewhere else, that styling appears in Calendar, too.

23. Find My works the same everywhere

Find My on all three platforms is now a single operation: click (or tap) a person, device, or item in the sidebar to reveal basic information about the location (like Nearby or their distance, street, and city), along with contextually relevant buttons right below it. To get more information, you click (or tap) the More button for full details, including all the other information previously found on the Info popover.

There’s also a top-level Me tab, giving you more direct access to your own information, something already present for years in Find My for iPhone and iPad.

24. Messages retries a failed send

Messages has improved searching. For example, if you enter a contact’s nickname or a portion of their phone number, the search lists both names and conversations that match, not just individual messages containing that exact text. Searching for media is also reportedly better, though I have so far been unable to produce any good examples.

25. New child safety features

For years, families have been able to use the Ask to Buy feature, in which children must have an adult’s explicit approval to purchase apps from the App Store. In macOS 27, this concept expands to include websites. If you enable Ask to Browse for a child, each visit to a website that’s not already approved pops up an Ask to Browse message on the child’s device. If the child requests permission, the parent(s) see a request in Messages showing the website in question, along with Approve and Decline buttons.

Ask to Browse works in Safari and other WebKit browsers, but not in Firefox or Chromium-based browsers, which means that any child who can figure out how to download an alternative browser can bypass this feature with trivial ease.

26. Communication Safety blocks gore

Communication Safety is an existing feature that, if enabled, warns children before displaying nude images in apps such as FaceTime and Messages, whether those images are incoming or outgoing. macOS 27 expands this to block violent or gory images, giving the child a way to end the conversation without seeing the objectionable material.

27. Time allowances for apps

Parents now have detailed controls available for restricting when, and for how long, children can use certain types of apps (including games and social media apps). You can, for example, restrict your child to playing games for just an hour a day, or set up a schedule with fine-grained controls, such as “you can use apps A, B, and C before or after school, but only D or E while at school, and F and G only in the evenings.”

28. Shared iCloud links get access requests

If you right-click or Control-click a file or folder in iCloud Drive and choose Share, then choose Share a Link from the pop-up menu, you now see a couple of changes in the interface:

If you click the text under that menu (“People you choose can view/edit”), the display expands as usual to show who can access the item and with what permissions. But there’s a new “Allow access requests” checkbox here. If you select that, then send a link to a group (as opposed to a single person), each recipient must explicitly request permission to access it, and you must approve that request. Only then is that person added to the Participants list.

A new Copy Link command appears on the Share menu. If you choose that, a dialog appears, with two options: click Continue to share in the normal way (keeping in mind the extra step described above if you share it with a group), or click Allow Anyone with the Link to copy the shareable link to your clipboard with no constraints on who can use it.

29. Battery settings split in two

Where Tahoe had a Low Power Mode pop-up menu with options Only on Battery, Only on Power Adapter, Never, or Always, macOS 27 instead has two pop-up menus, one for “On battery” and the other for “On power adapter.” For each one, you can choose Automatic, Low Power, or High Power.

30. AutoFill from a third-party manager

In the AutoFill & Passwords category, there’s a new “AutoFill from” switch, with entries indicating which app(s) can be used to supply AutoFill data. By default, Passwords is the only option (turned on by default), but if you have one or more third-party password managers, they may also appear here.

31. Borders around controls

Display: There’s a new “Show borders” switch, which adds borders around toolbar controls, Search fields, and various other interface items to more clearly distinguish their boundaries; this replaces and significantly improves on the previous setting “Show toolbar button shapes.”

Subtitles and Captioning: This category, which replaces Captions, adds three new controls to fine-tune when and where subtitles/captions appear: “Show when muted,” “Show on skip back,” and “Apply across apps.”

32. Hide your name on the Lock Screen

A new “Show user name and photo” switch is on by default, giving you the same behavior seen in Tahoe and earlier. But if you turn it off, usernames and photos no longer appear when your Mac is locked, which might be better for privacy in settings where a Mac may be visible to the public.

33. New keyboards and interface languages

Keyboards are now available for Afrikaans, Basque, Baybayin, Blackfoot, Comanche, Cree, English (Philippines), Galician, Guarani, Kiowa, Luxembourgish, Tsuu’tina, Xhosa, and Zulu.

You can now set the interface language for macOS itself to English (Canada)—woo hoo!—and English (Philippines) in System Settings > General > Language & Region > Preferred Languages.

34. Shortcuts gets new actions and storage

Shortcuts features several new systemwide actions:

Notification: This action runs when you receive a notification from a specified app.

Screenshot: This action runs when you save a screenshot to Photos, Files, and/or your Clipboard.

Store Content, Get Stored Content, and Delete Stored Content: You can now store data within Shortcuts itself, rather than having to create and manage external files.

35. Spotlight’s four categories

Here are the four Spotlight categories:

Apps (⌘-1): In this view, only apps are shown (regardless of where they’re located on your Mac). Recently used apps appear at the top, until you start typing.

Files (⌘-2): Similarly, in this view, only files and folders appear, but that includes apps, too! Again, recent files appear at the top (below Suggestions, explained in a moment) until you start typing.

36. A new macOS 27 menu bar icon

When you connect an Ethernet cable to your Mac (which, for laptops, requires an adapter), the Wi-Fi icon on the menu bar changes to an Ethernet icon; clicking this displays information about your Ethernet connection.


Apple released iOS 27 on Monday 14 September 2026, alongside iPadOS 27 and macOS 27 Golden Gate.

Apple tends to release operating system changes as a two-beat sequence, like our heart going LUB-dub: The LUB beat is a major flex, like the introduction of Liquid Glass across all their operating systems in 2025. This year is a “dub,” a building-or-rebuilding year, in which Apple largely tweaks the previous cycle and offers incremental improvements, though some may feel quite large.

Below, we have highlighted ten new features and changes in iOS 27 that you should try first. These ten features are worth ten minutes on the day you upgrade. Each is visible straight away, none needs new hardware, and most take under a minute.

For everything else, see what’s new in iOS 27, or the 37 changes that owe nothing to AI.

1. Dial down Liquid Glass

When you upgrade to iOS 27 or iPadOS 27, the last stages of the installation present a new screen that lets you choose to adjust Liquid Glass using a slider. If you don’t make the adjustment at that moment, you can do so later, or change your initial choice. Go to Settings > Appearance > Liquid Glass.

This new screen offers a slider you can drag from the left edge, which Apple describes as “More Clear” (most Liquid Glass effect) across a range to the right: “More Tinted” (most opaque). Apple makes it easy to visualize by providing a scrollable preview that shows Liquid Glass elements overlaid on a webpage with images and text.

See how to reduce Liquid Glass transparency for the two accessibility settings that go further.

2. Ask Siri a real question

While Apple has rebranded Siri as “Siri AI” on supported devices and in their marketing, you won’t see that name on your devices. It’s still called Siri. But everything is affected by the availability of Apple Intelligence. Whenever you invoke Siri on an Apple Intelligence-supported device, you’re invoking Siri AI.

Siri now provides much more accurate and detailed answers than before, even reaching into other apps to provide more information. Ask it a question, and it parses the results instead of trying to squeeze them into a format it understands.

Here are the most significant things Siri AI can do that its predecessor Siri could not:

  • Use your data to produce better results or find things. One of the biggest ongoing complaints about Siri is that for software that ostensibly had access to our email, messages, contacts, calendar entries, photos, and other private data while running entirely on our devices, it sure didn’t know much about us. With Siri AI, you can ask, “Who did I have lunch with in 2013 in New Haven?” and it may be able to answer. (Whether that is invasive is a fair question.)
  • Answer questions about what’s on screen. You could be looking at a webpage, reading a Wikipedia entry, having a conversation in Messages, or writing an email, and can ask Siri for more information about or to explain something that’s visible.
  • Engage in a back-and-forth conversation. Siri has become something more like a chatbot, though it’s not quite as open-ended as the ones from Anthropic, Google, OpenAI, and others. However, it retains context and remembers aspects of conversations to provide better insight in the future.
  • Create a plan. You might ask Siri to help you figure out the best sights to see in New York. Unlike chatbots that rely solely on synthesizing vast data stores, Siri can use your information, Apple’s human-made travel guides, map data, and other information to produce something that could be much more useful.
  • Use a Siri app. You can revisit Siri conversations using the Siri app, the first time Apple has offered that kind of interaction with Siri.

One caveat before you try it: Siri AI ships in beta. Apple has hedged on details, stating only that it will be available in beta form, and not specifying when that beta might end. It needs an iPhone 15 Pro or later. It is English-only at launch, and is not offered in the European Union or China. In the beta period you had to request access at Settings > Siri. Check there first if you do not see it.

3. Find Siri’s new home

Instead of the glow around all four edges of your device in iOS 26/iPadOS 26, Siri in iOS 27/iPadOS 27 appears as an orb at the top of the screen. The design cleverly hides the non-screen areas in Dynamic Island on the many iPhone models with that carveout.

You can bring up Siri (by default), as in previous releases, by saying “Siri” or “Hey Siri,” or by pressing and holding the side button. However, the change introduced in iOS 26 that let you double-tap the bottom of the screen is gone. Instead, you can swipe down on a Home screen to reveal the new combination of Spotlight and Siri: a field labeled Search or Ask. You can type into that field, or tap the Dictation button and talk to Siri that way.

4. Set a Separate Alarm Volume

It took this long for Apple to let you set the volume of alarms and timers hitting zero seconds separately from your ringtone volume. Settings now includes an “Alarms and Timers” section with its own Match Ringtone Volume toggle. If you toggle it off, a dedicated slider appears that allows you to drop the ringer volume to nothing, and you’ll still be woken at whatever alarm volume you choose. Go to Settings > Sounds & Haptics and, under Alarms and Timers, disable Match Ringtone Volume. Drag the slider that appears to set your alarm and timer volume.

More in what’s new in Clock, Find My, Health and Podcasts.

5. Use both FaceTime cameras

After many, many years of FaceTime supporting a single camera view on iPhone, you can now use the front and back cameras simultaneously. The proviso? You need an iPhone 17, iPhone 17 Pro, iPhone 17 Pro Max, or iPhone Air and iOS 27. The other person or people can see your dual-camera feed only if they have iOS 27, iPadOS 27, or macOS 27. (This builds off the dual-capture mode in the Camera app on those models introduced in iOS 26.)

To use the dual-camera mode, in an active FaceTime session (or before someone has joined), tap the Flip Camera button in the inset selfie view. This shows both cameras by default.

If the person on the other end of the call has an older iPhone, they can still view your dual camera feed as long as their device is running iOS 27.

More in what changed in FaceTime, Messages, Phone and Wi-Fi.

6. Boost Your iPhone Wi-Fi With New Connectivity Assist Feature

Apple tried to tune up a key issue years ago with a feature they called Wi-Fi Assist: when you had a weak signal, there might be a better, higher-speed cellular connection available instead. Your device would then tap into the cell signal while the Wi-Fi signal was poor.

While Wi-Fi Assist helped, it didn’t solve the common problem you are certainly familiar with, when your iPhone won’t unclasp its Wi-Fi grasp as you walk out of one space—like your home or office—and there’s still a tendril of signal left.

Apple rebranded the feature as Connectivity Assist, and if you had Wi-Fi Assist enabled—it was by default—you’ll find the new feature already turned on in Settings > Wi-Fi.

I know how aggravating it is, because my house Wi-Fi barely reaches where we park our cars out front on the street. Whenever I try to pull up Maps for directions, I have to turn off Wi-Fi most days. Connectivity Assist promises to solve that precise issue.

7. Add keywords to photos

It took many years, but you can finally apply keywords to media in the Photos app on an iPhone and iPad. Huzzah? (Keywords are a useful way to link images for searching and organization.) However, you can still only apply keywords to items one at a time, as opposed to singly or in selections of two or more on a Mac. To add keywords, tap the info button, then tap Add Keywords.

More in keywords and Shared Albums in Photos.

8. Scan a card into Wallet

You can create entries for cards, membership cards, and other kinds of barcode/QR code-related proofs of entry or membership from scratch, a task formerly available only for third-party apps and websites.

Tap the Add button in Wallet, then tap Create a Pass. You’re guided through a few steps, one of which lets you scan the existing card, so that Wallet can pull in its number, barcode, or QR code. You can fill out details that aren’t present on the card or captured by Wallet.

More in what’s new in Apple Pay and Wallet.

9. Caption any video

Your iPhone and iPad now generate captions from any uncaptioned video you’re watching in Photos and other supported apps. (This isn’t related to tvOS or TV app captioning.) If captions already exist, you can have them automatically translated between supported languages.

More in the accessibility changes and the Action button.

10. Tap to Share at checkout

Entirely new iOS 27 feature is Tap to Share with merchants at the point of sale, such as in a store or at a fair. This makes in-person Apple Pay more akin to Apple Pay in Safari. Tap to Share lets an entire set of interactions occur before you pay. You start by approving a connection with a merchant’s iPhone that has a supported payment app. (Ostensibly, this may encompass not just companies like Square and Stripe, but in-house developer apps for retailers like Old Navy or Lowe’s.)

Once you begin, you can choose what you share with the business—like contact details, a shipping address, or your email. This also means you don’t have to state this information aloud or rely on the merchant typing it in correctly! A merchant can offer to sign you up for a membership or loyalty program. You can use a pass from the merchant, or they can issue one, related to discounts, credits, or other transaction-related purposes. Finally, you see the full cart as a digital receipt before completing payment with Apple Pay.

More in what’s new in Apple Pay and Wallet.

iOS 27 Compatible iPhones

These iPhone models are compatible with iOS 27:

  • iPhone 18 Pro
  • iPhone 18 Pro Max
  • iPhone Duo
  • iPhone 17e
  • iPhone 17
  • iPhone 17 Pro
  • iPhone 17 Pro Max
  • iPhone Air
  • iPhone 16e
  • iPhone 16
  • iPhone 16 Plus
  • iPhone 16 Pro
  • iPhone 16 Pro Max
  • iPhone 15
  • iPhone 15 Plus
  • iPhone 15 Pro
  • iPhone 15 Pro Max
  • iPhone 14
  • iPhone 14 Plus
  • iPhone 14 Pro
  • iPhone 14 Pro Max
  • iPhone 13
  • iPhone 13 mini
  • iPhone 13 Pro
  • iPhone 13 Pro Max
  • iPhone 12
  • iPhone 12 mini
  • iPhone 12 Pro
  • iPhone 12 Pro Max
  • iPhone 11
  • iPhone 11 Pro
  • iPhone 11 Pro Max
  • iPhone SE (2nd generation and later)

More in iOS 27

Other new features in iOS 27 include iPhone Handoff, which moves a call and a phone number between two iPhones. There is also the ability to split a bill with Apple Cash; the ability to hide your location in Find My; and more. The full list runs to 37 changes that owe nothing to AI, on top of everything else in the release.

In a TidBITS article, Evaluating Wireless Security Needs: The Three L’s, Adam Engst laid out the three factors he considered relevant to determining one’s risk when it comes to Wi-Fi security. He called them the three L’s: likelihood (the probability that someone will violate your security), liability (the cost—financial or otherwise—that you’d incur if a security breach happened), and lost opportunity (what you lose in terms of time and convenience by implementing stronger security). That article is still well worth a read almost two decades later.

Times, technologies, and threats change, but some people still face greater risks than others. If you can assess your own level of risk soberly, you’ll be able to take appropriate measures—neither too weak nor too strong.

The risk for most people

Years ago, it made more sense for nearly all Mac owners to consider their susceptibility to outside attack: how likely were you to visit sketchy sites, download applications that might contain Trojan horses, be infected by malware by visiting a site or running software, or even configure a network sharing setting that allowed people on the internet to scan and find weaknesses they could use to potentially copy data from your Mac, or worse. iPhone and then iPad users had fewer risks because of how iOS and iPadOS were constructed and locked down, but external attacks remained the central problem for them.

That profile changed considerably by the late 2010s. The biggest risk that most Apple users have faced since then—no matter their specific Apple hardware—comes from phishing and social engineering.

Phishing describes when someone impersonates a person, group, or website in the hopes you will click through and be infected by malware or enter login credentials. Phishers want your personal data, preferably financial information, such as your credit card number, expiration date, and verification code. They try to offer credible-looking security warnings and fraudulent webpages where you enter payment information or credentials they can use to access your bank and other accounts.

Social engineering is when people attempt to convince you to do something harmful to your device—and compromise your security and privacy. A common scam is that you visit a website and are redirected to another site (via malicious advertising or injected code) that claims your computer, phone, or tablet is infected and urges you to call a number. Calling that number leads you to a boiler room in which the other parties try to get you to install remote access software and sign up for expensive, hard-to-cancel tech services—or worse.

There are also more general attackers, who want to fool you into installing Mac apps that appear to be legitimate, but actually encrypt your personal files and hold them for ransom (ransomware). iOS and iPadOS don’t allow this vector because of how apps are installed and files managed. And even after over a decade into what remains rampant use of ransomware, that scourge hasn’t found a foothold on Mac.

From the mid-2020s, I would also argue that governments of democracies have increasingly chosen to enact laws or stretch the limits of existing ones to intrude into our private spaces, including accessing data that they would never previously have considered due to pushback from both ends of the political spectrum and, in some countries, a strong libertarian philosophy on the primacy of privacy.

Even if you don’t believe you fit in a category where the government of the place you reside would target you personally, you should assume your risk is elevated in any country that is sweeping away previous protections in the vague interests of “protecting children” even when no children are involved and “national security” when no national security interests are shown.

The high value of privacy violations

Some unwanted software doesn’t mess up a device or steal data, but installs adware that can display rogue ads (overlaying ones served by webpages), hijack web searches, and redirect affiliate clicks through portals controlled by the operators to make money illegitimately off you from advertisers. Other software is more insidious, tracking your location to sell it to companies that target you with ads—it’s a kind of malware, even if it doesn’t subvert the device.

The most obvious vector is a Mac, where you can install third-party software that isn’t vetted by Apple. But given that you can install extensions in Safari for the iPhone, iPad, or Mac, and that Apple has routinely failed to catch App Store apps that violate user privacy or include adware components, you can be at risk on any platform. Fortunately, so far, I have heard of no iPhone or iPad examples.

To step up protections, you can engage any or all of the following security or software integrity steps that reduce the area of attack on you that could succeed:

  • Two-factor authentication (2FA): This extra step for logging in deters attackers who have phished or otherwise obtained your password. Apple requires 2FA for Apple Accounts (with a few legacy exceptions), limiting access to iCloud-synced information, purchases, email, and much more. Most non-Apple services offer code-based 2FA (sent via SMS) or other ways to validate a password login. To compromise your account, someone has to obtain your SMS messages, your trusted devices, or your authentication app.

Some phishers perform a “two-step” attack in which they convince you not only to enter your account name and password on a site, but then also relay that information in real time to the actual site you intended to access. This causes the real site to send you a confirmation code (or the fake site requests that you generate one). The attackers capture that code when you enter it. However, that scam works only for brief periods, as short as one minute.

  • Passkey: Upgrade accounts at websites that support passkeys, a secure method of logging in that’s deeply embedded on iPhones, iPads, and Macs, and supported by Google and Microsoft. The secret part of a passkey is never transmitted over the internet, and a passkey is phishing-resistant. You can sync and share passkeys when using recent operating systems and password managers. I’ve shifted from tolerating passkeys to preferring them to a password-and-second-factor combo. See where Apple stores your passwords and passkeys.

Sounds great, right? But passkeys are, in every case I’m aware of, a supplemented to two-factor-protected accounts, not a replacement. Until you can make a passkey replace a regular login (with some kind of recovery option), they’re only as secure as the next-weakest link in the chain.

  • Hardware security key: Another form of 2FA, a relative of a passkey, is a hardware security key. These small physical objects plug into a USB or Lightning port or can connect via NFC to iPhones or iPads. The hardware key has embedded encryption circuitry that generates a unique, highly secure login key for each site you use it with. These keys are built on a standard nearly identical to the technology underlying passkeys, and most websites that support passkeys can accept a hardware security key and vice versa. (These keys also rarely fully replace access to an account yet, meaning a flaw in password and two-factor authentication could compromise access.)
  • Apple Pay: Avoid sites that don’t let you pay by Apple Pay, which prevents your credit-card number from being transmitted directly.
  • Install financial apps: Financial apps and their associated notifications make it more likely you will know immediately if any part of your financial life has been manipulated without permission. I’ve noticed a trend since 2024 for financial apps that support Face ID or Touch ID to let you log in from a desktop browser using a QR code or a push notification from the app. You then verify via biometrics, so you’re never entering any credentials in a browser.

Apple already blocks the direct installation of unsigned software on a Mac—apps that were released by people without an Apple Developer account or who bypassed Apple’s minimally involved signing system. By not allowing the easy installation of unsigned software, Apple prevents most malicious software from running at all. See how Gatekeeper decides which Mac apps can run.

  • Continuous backups: The technology for making constant, secure online backups of documents and creating local clones and backups obviates risks more present now than in the past when those options were slow, expensive, or not feasible due to cost or bandwidth limitations. Having such backups in place gives you a point to revert to if you have data corruption or loss.
  • End-to-end encryption (E2EE) for iCloud: Apple’s Advanced Data Protection lets iCloud users put media, notes, reminders, and iCloud Drive files under the gold standard of end-to-end encryption, which requires possession of a device and the means to unlock to access data. Because we may store details that can be used to exploit us in these various kinds of media, E2EE is another leg up on attackers. See how to turn on Advanced Data Protection.

By using Apple and industry technologies and safeguards and keeping backups current, you can dramatically reduce your likelihood of risks while also curtailing the liability that results. Even if you’re infected by ransomware—an unlikely event—and don’t want to pay, you might lose no files by reverting to a snapshot before the attack; or if someone guesses or obtains an account login, you’re alerted as they try to log in, so you can change the password, or they’re blocked entirely without a second factor or hardware element.

The change in our general risk profile over time, however, comes with one big flashing red light. I noted a couple of times above that most people only need to take certain default strong, reasonable measures. However, if you’re someone in particular fields of work or who engages in political advocacy, you may face targeted attacks that evade basic measures that suffice for everyone else.

A human-rights reformer in an incipient dictatorship needs to take more safeguards than a suburban online shopper in Ohio. But identity theft can sometimes lift that Ohioan—or you—into a much higher category of risk, because someone decides your assets or information are valuable to them, and they’ve acquired credentials or personal information that will let them attempt to crack your security shell.

What about children?

If your minor child has their own iPhone, iPad, or Mac, you might assume they are at very low risk. After all, their device probably contains nothing but games, educational software, a school-provided office suite, and a browser playing videos from Disney+.

But no! Sad to say, children are at greater risk than adults, all else being equal, because they’re less experienced and more trusting—and because, let’s face it, there are a lot of creeps out there who stalk children online.

If you travel to a country with severe laws or a propensity to jail people without legitimate charges, you should raise your risk profile before you travel and while there.

Apple tends to release operating system changes as a two-beat sequence, like our heart going LUB-dub: The LUB beat is a major flex, like the introduction of Liquid Glass across all their operating systems in 2025. This year is a “dub,” a building-or-rebuilding year, in which Apple largely tweaks the previous cycle and offers incremental improvements, though some may feel quite large.

The flagship feature of the 2026 releases is Siri AI, and Apple Intelligence extending more deeply into apps and system functions. But Apple named four other areas of focus alongside it, and three of them have nothing to do with AI at all: interface tweaks, child safety and Screen Time, and communications.

Here are 37 changes in iOS 27 and iPadOS 27 that have nothing to do with Siri AI or Apple Intelligence. For the release as a whole, including what the AI features actually do, see what’s new in iOS 27.

iOS 27 non-AI features:

1. The Liquid Glass slider, most visible of these features

The introduction of Liquid Glass across Apple’s 26 releases of their operating systems elicited a lot of responses. A whole lot. It’s hard to know how hated this new interface approach was, but given how quickly Apple backed off from it, I would have to say a lot—particularly in iOS and iPadOS, where the translucency of Liquid Glass made it hard to find interface elements and read text.

Apple reacted by adding a feature in iOS 26.1/iPadOS 26.1 to reduce its impact by letting you switch between Clear, which was the original flavor of Liquid Glass, to Tinted, which reduced translucency by a fair amount, but not to zero.

In iOS 27/iPadOS 27, Apple switched up their approach, replacing the binary option with a slider from (now lowercase) clear to tinted, along with a preview of how it looks against interface elements.

When you upgrade to iOS 27 or iPadOS 27, the last stages of the installation present a new screen that lets you choose to adjust Liquid Glass using a slider. If you don’t make the adjustment at that moment, you can do so later, or change your initial choice. Go to Settings > Appearance > Liquid Glass.

This new screen offers a slider you can drag from the left edge, which Apple describes as “More Clear” (most Liquid Glass effect) across a range to the right: “More Tinted” (most opaque). Apple makes it easy to visualize by providing a scrollable preview that shows Liquid Glass elements overlaid on a webpage with images and text.

At the More Clear setting you can hardly read—or even find—a button or field over text and an image; at the midway point it’s better, but still not ideal; at More Tinted there is enough contrast for legibility. To me, it looks like what an interface designer would show an executive, expecting the executive to pick the most tinted option. Apple’s leadership didn’t do that for 26.0. In 26.1, we got a binary choice; in 27, a range of choices.

2. Turning Liquid Glass off almost entirely

Apple separately offers two Accessibility settings that affected Liquid Glass in iOS 26 and iPadOS 26. In the 27 releases, only one of the two has any real impact:

  • Reduce Transparency: Go to Settings > Accessibility > Display & Text Size and enable Reduce Transparency. This flattens Liquid Glass, removing transparency and providing an almost identical look to iOS 18/iPadOS 18. The level of Liquid Glass you have enabled doesn’t have an effect.
  • Increase Contrast: Use Settings > Accessibility > Display & Text Size > Increase Contrast to bump up the difference in tones. In iOS 27/iPadOS 27, the difference appears slight, where it was sharply distinct in the previous releases.

You can’t change the Liquid Glass intensity when either of the next two options is enabled. When you attempt to change the Liquid Glass setting, you’re told that Reduce Transparency and Increase Contrast must be disabled. You can tap Turn Off.

3. FaceTime uses both cameras

After many, many years of FaceTime supporting a single camera view on iPhone, you can now use the front and back cameras simultaneously. The proviso? You need an iPhone 17, iPhone 17 Pro, iPhone 17 Pro Max, or iPhone Air and iOS 27. The other person or people can see your dual-camera feed only if they have iOS 27, iPadOS 27, or macOS 27. (This builds off the dual-capture mode in the Camera app on those models introduced in iOS 26.)

To use the dual-camera mode, in an active FaceTime session (or before someone has joined), tap the Flip Camera button in the inset selfie view. This shows both cameras by default. You can then do something to change that.

4. Connectivity Assist drops weak Wi-Fi

Apple tried to tune up a key issue years ago with a feature they called Wi-Fi Assist: when you had a weak signal, there might be a better, higher-speed cellular connection available instead. Your device would then tap into the cell signal while the Wi-Fi signal was poor.

While Wi-Fi Assist helped, it didn’t solve the common problem you are certainly familiar with, when your iPhone won’t unclasp its Wi-Fi grasp as you walk out of one space—like your home or office—and there’s still a tendril of signal left.

Apple rebranded the feature as Connectivity Assist, and if you had Wi-Fi Assist enabled—it was by default—you’ll find the new feature already turned on in Settings > Wi-Fi.

I know how aggravating it is, because my house Wi-Fi barely reaches where we park our cars out front on the street. Whenever I try to pull up Maps for directions, I have to turn off Wi-Fi most days. Connectivity Assist promises to solve that precise issue.

5. AirDrop is five times faster

Also in both iOS 27 and iPadOS 27 is an AirDrop speed up. Apple says AirDrop transfers could be as much as five times faster.

6. Alarms get their own volume

It took this long for Apple to let you set the volume of alarms and timers hitting zero seconds separately from your ringtone volume. Go to Settings > Sounds & Haptics and, under Alarms and Timers, disable Match Ringtone Volume.

7. Four RCS fixes in Messages

Messages received a tune-up, not an overhaul. Most change are related to RCS, the industry-supported messaging protocol that Google uses in Android. The changes are:

  • Outgoing messages show a send indicator so you can see progress on slower networks or with larger files.
  • When you’re sending large photos or videos in a conversation that uses RCS (with Android users), this no longer slows down the typing part of the conversation.
  • Reply threading now works with RCS messages.
  • RCS messages also support a wider range of tapbacks and reactions.

Apple added support for end-to-end encryption over RCS between their ecosystem and Google’s as a beta release in iOS 26.5.

8. Find My gets custom durations

The native Find My app on all platforms has two changes related to duration or availability when you share your location with other people:

  • Previously, you could share your location for an hour, until the end of the day, or indefinitely. Now you can set a custom period of time.
  • If you’re sharing your location with someone, you can hide your location from your end until the next morning (at 4 a.m., and they’re not notified. They’re also not told when you resume sharing, or “unhide” your location. They simply see you with a “location unavailable” label.

9. Hiding your location without telling anyone

This is widely seen as another tool for people facing family or intimate-partner abuse to hide their whereabouts without an abuser knowing.

10. Keywords arrive in Photos on iPhone

It took many years, but you can finally apply keywords to media in the Photos app on an iPhone and iPad. Huzzah? (Keywords are a useful way to link images for searching and organization.) However, you can still only apply keywords to items one at a time, as opposed to singly or in selections of two or more on a Mac. To add keywords, tap the info button, then tap Add Keywords.

11. Show Selected in Photos

When you make a selection by tapping the Select button in the upper-right corner of any multiple-item view in Photos, a new Show Selected button appears at the bottom. Tap it, and it reveals just the items you chose. You can adjust the selection or view the images and videos in a carousel. Tap Deselect All to remove the current selection.

12. Two new Photos albums

Apple adds two new albums in Collections > Utilities. Captured by Me contains images or videos you created using any iPhone or iPad, such as via the Camera app or by taking a screenshot. The Identity Documents album uses machine learning (not Apple Intelligence) to collect scans or photos of personally identifying documents. (Identity Documents hasn’t yet appeared for me in iOS.)

13. Shared Albums finally upgrade

Apple hasn’t shaken up iCloud Shared Albums in several years, and it has notable omissions, such as the ability to share higher-resolution versions.

In iOS 27/iPadOS 27 (and on macOS 27 and at iCloud.com), you have access to several new features. However, you must first upgrade an album: select the album in Collections > Shared Albums, tap the More button, then tap Upgraded Shared Album. This may take some time—minutes or longer—depending on the size of the items in the library and your internet connection.

After upgrading, you have access to the following:

  • Full-resolution photos and videos are now supported across all common formats.
  • You can filter by photos or videos. Tap the Filter button, then tap Media Types.
  • There’s a Create Shared Album option for any existing album. Tap the More button, then tap Create Shared Album.
  • Albums can be set to expire after 30 days, but only when created. After creating a Shared Album from an existing album or by tapping the Add button in the Collections > Shared Albums view, enable Make Album Temporary.
  • You can create an upload link that allows anyone—not just people with access to the album—to upload images. With the album selected, tap the Share button, tap “Only invited people can join,” and choose Anyone with the Link. (This is similar to other kinds of sharing across iOS 27/iPadOS 27).
  • A recent activity log lets you see changes made to the album, including emoji reactions. (This doesn’t yet appear to be in place.)

14. Save a video frame

Three other changes, two new and one set of improvements, may be of interest.

You can extract a frame from a paused video to save as an image. Tap the More button and choose Save Video Frame.

15. Force Photos to sync now

Photos often decides to pause syncing to iCloud to avoid draining the battery, even when the battery is quite full. You can now go to Settings > Apps > Photos > Sync Immediately and choose For Today. This prioritizes syncing instead of preserving battery life for the remainder of the calendar day. If Low Power Mode or Low Data Mode are enabled, Photos will still pause until those modes are turned off, such as by recharging the phone for the former.

16. Slideshows from any album

Slideshows can now be built from any album or even a selection of media, rather than relying on memories.

17. Podcasts searches episode notes

If you navigate to a podcast’s view of all of its episodes by tapping the podcast and then tapping Episodes, you can now search against the title and show notes of all listed episodes.

This doesn’t search transcripts, which Podcasts generates for some shows. It searches only the per-episode notes published in the podcast feed.

18. Reminders actions in Shortcuts

Reminders actions now appear in Shortcuts, too, so you can create and delete groups, manage lists, and create sections.

19. Wallet builds a pass from a plastic card

You can create entries for cards, membership cards, and other kinds of barcode/QR code-related proofs of entry or membership from scratch, a task formerly available only for third-party apps and websites.

Tap the Add icon in Wallet, then tap Create a Pass. You’re guided through a few steps, one of which lets you scan the existing card, so that Wallet can pull in its number, barcode, or QR code. You can fill out details that aren’t present on the card or captured by Wallet.

20. Poster-style membership cards

As you can see in the figures above, a “poster”-style card display used for passes now extends to membership cards, gift cards, and loyalty/reward cards. This new display allows up to two tappable actions.

21. Hotel keys and preauthorized payments

In unrelated updates, Wallet now shows trip details and other real-time updates to hotel keys at hotels that support these new options.

Finally, a new Preauthorized Payments section in Wallet gives you a one-stop insight into what you’ve allowed other companies to charge you for. Apple describes this as “subscriptions and auto-reloads to installment loan repayments, recurring billing, and deferred payments” among other preauthorizations.

22. Change your card mid-checkout

The updated Apple Pay checkout sheet lets you change your payment card directly without canceling, exiting, and starting over. It will also show information like available rewards, debit card balance, and alternative payment options. These changes are noted as coming “this fall,” while “later this year” you’ll be able to add funds to a debit card during a checkout session without exiting, or within Wallet.

23. Apple Pay in any browser

Apple now allows merchants to let you pay with a third-party browser using Apple Pay with a scannable code and an iPhone as the glue. Start the payment in a third-party browser, choose Apple Pay, and the merchant’s site will display a code that can be scanned by an iPhone to authorize Apple Pay.

24. Tap to Share at checkout

Entirely new is Tap to Share with merchants at the point of sale, such as in a store or at a fair. This makes in-person Apple Pay more akin to Apple Pay in Safari. Tap to Share lets an entire set of interactions occur before you pay. You start by approving a connection with a merchant’s iPhone that has a supported payment app. (Ostensibly, this may encompass not just companies like Square and Stripe, but in-house developer apps for retailers like Old Navy or Lowe’s.)

Once you begin, you can choose what you share with the business—like contact details, a shipping address, or your email. This also means you don’t have to state this information aloud or rely on the merchant typing it in correctly! A merchant can offer to sign you up for a membership or loyalty program. You can use a pass from the merchant, or they can issue one, related to discounts, credits, or other transaction-related purposes. Finally, you see the full cart as a digital receipt before completing payment with Apple Pay.

25. Screen Time, rebuilt

On the parental-restriction front, Screen Time was Apple’s most direct foray into enabling guardians to shape children’s digital access. But Screen Time is janky—there’s no better word. It is sometimes hard to configure, it often fails, and kids can work around it even when they aren’t intending to.

Screen Time was created to let parents and guardians set policies for children that were automatically enforced by Apple’s operating systems. No matter what device a child used that was logged in to the same Apple Account, Screen Time restrictions would remain the same. In practice, not so much, and it remains to be seen how well this Apple-described redesign will improve that consistency.

Screen Time controls require that you set up a Child Account, which has to be part of Family Sharing. In the past, I know that parents have sometimes created regular accounts for their children or faked their birth dates to make them older out of frustration with Screen Time and other features that didn’t work as described.

26. A setup assistant for parents

A new tool for parents helps guide them in choosing apps they want their children to have access to.

27. Ask to Browse, for websites

Apple already offered an Ask to Buy option, which let a kid send a request to the account’s owner in the Family Sharing group when they want to make an App Store purchase or download a free app. Ask to Browse builds on that, requiring that child request access to any website they haven’t previously been granted permission to use, or that a parent hadn’t already added to a list of acceptable sites.

The request is sent via Messages to the adult owner of the Family Sharing group and any other adult designated as Parent/Guardian, as you can see in the figure above. The parent or guardian can then tap or click Decline or Approve.

28. Time allowances by category

The previous Screen Time controls for setting how much time apps and other resources could be used were difficult to manage. The new ones, synced across all platforms, let a parent set Time Allowances, with separate settings for weekdays and weekends. Apple has a recommended maximum based on age that they developed in conjunction with child-development experts, they say.

Time Allowances define the total screen time permitted per day, and then are divided up into maximum amounts by category: Entertainment, Games, Social Media, and All Others. Parents can further create time windows within the days during which some categories aren’t available. Apple’s example, shown in the screenshot, is to turn off the Entertainment, Games, and Social Media categories during school hours.

This overhauled approach also gives parents a sort of dashboard for each child. They can see current usage stats. That’s also where a child’s access can be paused—i.e., cut off entirely for the moment—or they can be granted unlimited use for the rest of the day, or until a parent revokes that.

29. Blurring gore, not just nudity

Apple has gingerly expanded features in this category. In this set of releases, Apple has pushed forward just a single change. The Communication Safety feature, which is enabled by default for children 13–17, already blurs any image or video that appears to contain nudity, whether the child is receiving it or attempting to send it, across a range of Apple’s communications apps, including Messages, AirDrop, and FaceTime video messages. The blurred image comes with a warning, offering guidance on seeking help. (For children under 13, they’re also prompted to start a conversation with a parent or guardian.)

In the 27 series of releases, images and video that a screening algorithm determines contain gore or violence also trigger the blur filter and warning.

30. Accessibility Reader gets sharper

Many of these features can benefit a much larger group of people than any narrowly defined as “disabled”; automatic, high-quality captioning of video content is a great example, as is having a voice read text aloud from webpages or describe images.

Stripping out inessential components: Accessibility Reader acts like a beefed-up version of Reader in Safari, removing ads, headers, footers, navigational elements, and other material that isn’t part of the actual webpage or app view content.

Formatting clean-up: While removing unnecessary parts, the reader also structures what remains into more easily readable elements, like headers, lists, and image captions.

Use via any app: Accessibility Reader used to require a shortcut trigger. Now, you can use the share menu in any app to open content in the reader.

More nuanced content interpretation: The reader used to strip tables and images that appeared inline. Those now show up.

Translation: There’s no need to switch to another app or use a pop-up option. Accessibility Reader can translate supported languages into other supported languages.

31. Captions generated for any video

Your iPhone and iPad now generate captions from any uncaptioned video you’re watching in Photos and other supported apps. (This isn’t related to tvOS or TV app captioning.) If captions already exist, you can have them automatically translated between supported languages.

32. Health tracks perimenopause

The big news in the Health app for iPhone is that, if you have periods, Cycle Tracking supports perimenopause and menopause by notifying you when it identifies patterns consistent with perimenopause.

Other changes worth noting include:

  • Health now has a Browse button (instead of a search icon), which better identifies what the action is. The design has changed from a list to a series of small color-coded cards.
  • iPhones now support GymKit, which was available only on Apple Watch before this. You can now pair an iPhone directly with supported treadmills, bikes, and other gym equipment.

33. Home goes 4K

The Home app now supports 4K resolution video for live streaming and recording from cameras designed for HomeKit Secure Video and with any tier of iCloud+ and that, of course, have 4K output. (Apple still uses the HomeKit name there, even though the concept has been renamed Apple Home.)

If you have more than one camera, Home used to require awkward navigation among them. Now, you can see the previews in the main Home view, but tapping any camera brings up an aggregated view with a unified set of detected events.

34. Maps improves Flyover

Apple says Maps has an “enhanced Flyover” experience. This translates to less weird-looking landscape and building interpolation from satellite and street-level data when you look at cities using Maps’s 3D perspectives.

Maps also adds Local Lists, which are ostensibly algorithmically generated guides to local areas based on aggregated searches. Apple uses the word “trending” a couple of times in describing this feature, so it’s unclear if it’s just search-related—which gives zero insight into the quality of a restaurant or an experience—or factors in other data.

35. Keyboard automations on iPad

Apple rethought the iPad interface with iPadOS 26, adding robust windowing and multitasking features that brought it much closer to a general-purpose computing system like macOS. However, it still retained its unique iPad nature, such as its heavy reliance on gestures. iPadOS 27 builds on these improvements with refinements that help you use an iPad even more fully in the liminal space between tablet and computer.

Apple previously didn’t offer a way to trigger an automation when a keyboard was connected to or removed from an iPad. This frustrated some users, who interact with their iPad differently when a keyboard is connected—such as in a dock-style environment—and when they are using only the touch screen or an Apple Pencil.

Now, you can use Shortcuts to create automations based on whether a keyboard was connected, disconnected, or the keyboard connection state changed. This includes the “Set multitasking mode to” item. You might want to switch between Full Screen Apps and Windowed Apps when using your iPad without a keyboard. You’d have to set up two shortcuts: one would trigger when the keyboard was attached; the other when detached.

36. A persistent iPad menu bar

In iPadOS 26, the menu bar had to be triggered either by swiping down from the top of the display or by hovering with a pointing device, at which point it would appear. It then hid, after a short delay, when it wasn’t in use or being hovered over.

In iPadOS 27, the default behavior appears similar, but there are two significant changes:

  • The app name always appears on the far-left side of the menu bar, at the upper-left corner of the screen.
  • To unfurl the menu bar, tap or drag over the app name.

Along with that new behavior, you can also opt to have the menu bar remain in place, persistent at all times. Go to Settings > Multitasking & Gestures, then disable Automatically Show and Hide Menu Bar.

37. iPhone apps resize on iPad

iPadOS 27 fills a missing piece in Windowed Apps, the default setting that lets you resize app windows or use them in full-screen mode. iPhone apps that haven’t been developed as universal apps for both iOS and iPadOS still floated in their own fixed-size window.

iPhone apps released for iOS 27 automatically gain the capability to be resized in iPadOS 27, just as they can work at different sizes on different iPhone models.

If you’re at higher risk, you should consider taking the most stringent measures available. Check the following criteria to see if they apply:

  • You work in the financial, legal, medical, or government sector: If you use Apple hardware for work, you are likely subject to regulatory requirements and have been briefed on them. (You might even have had to take a course on compliance!) You may be required to engage additional security, like using a VPN, blocking ports for USB/Thunderbolt and SD Cards (see the Mac settings worth changing), enabling FileVault on a Mac, and turning on Advanced Data Protection in iCloud. You may also need to enable hardware security keys for your Apple Account. If you don’t take these steps, and it’s discovered, your devices are lost or data intercepted, or online accounts are compromised, you could be sanctioned, fired, fined, or even charged with a crime, depending on the employer and locality.
  • Your device contains unusually sensitive data: This could be old love letters you don’t want your partner to see, confidential business information from your employer (even if they’re not in the financial, legal, etc., categories above), records of a delicate medical condition, or anything else that could cause you serious problems (like loss of your job, insurance, or marriage) if it were to get out.
  • You’re famous: Congratulations! You already know the price of this on social media and when dining, traveling, or walking around, depending on how well-known you are. But you’re also more of a target online, because of the obsession so many sites and people have with secrets about people who are seen to be famous.
  • You’re a journalist: Sadly, reporters are frequently targeted by criminals, people they’re writing about, and governments. For instance, Ronan Farrow reported that Harvey Weinstein hired an Israel-based private-intelligence firm to dig up dirt on him while he was researching his watershed story on Weinstein’s history of alleged and proven sexual crimes.
  • Wealthy in real terms or cryptocurrency: People with more than a little money are regular targets, especially if they have significant Bitcoin or other cryptocurrency holdings. Having an expensive house doesn’t mean much in the current real-estate market; it’s more likely that you have elevated risk if there’s coverage or securities filings that disclose your wealth, stock grants, or other assets.
  • Rough travel: You frequent any of the internet’s seedier neighborhoods, such as sites that traffic in online gambling, porn, or pirated content (like software, television shows, or movies).
  • Secret or pseudonymous identity: You have an online identity, separate from your real-life identity, that you need to keep private. A number of times in recent years, someone whose job or political position has prevented them from having a public persona have been outed for writing under another, typically fictitious name.
  • Heated online interactions: You engage in controversial discussions that might result in people being exceptionally angry with you.
  • Careless co-users (Mac): Specific to a Mac, you share it with less-sophisticated family members who may not be as careful as you would be about downloading files from unknown sites, clicking links in email messages, and using good passwords. While you can set them up with their own macOS accounts—you should!—some of their actions can affect the entire Mac and your online accounts.
  • People in particular professions and of genders other than male: It’s a sad fact of modern life that being a responsible journalist, being an advocate for vulnerable people, believing the Earth is round and evolution legitimately established in the fossil record, or having the temerity to be a gender that someone else has chosen to be angry about online can cause reactionary individuals and groups to target you.
  • You live in a country that has reduced privacy protections: Various countries have fought with Apple over allowing back-door access to iCloud data. The United States asserts the right to login to examine incoming tourists’ and students’ social media and other accounts. Many countries now think that any checkpoint, traffic stop, or other incidental encounter gives them carte blanche to demand all your data.

Now for the good news! A decade ago, my advice to you would have likely been far more extensive and stringent than for the average user. These days, however, Apple’s and other companies’ baseline security is more accessible, easier to use, and more effective.

My general advice is to do everything suggested here as the baseline, and build a bit from there.

Take a hard look at Lockdown Mode

Some people are pinpoint targeted by spyware, software that can hijack their devices, often without a single click, using previously unknown exploits. These attacks are worth a lot of money and thus typically deployed in a targeted fashion by governments and criminal syndicates against journalists, members of minority groups in a given country, human-rights activists, and opposition politicians.

To help counter these kinds of intrusions, Apple offers a Lockdown Mode you can invoke that highly restricts many forms of inbound messages and traffic. For the full rundown, see how to turn on Lockdown Mode and who needs it.

If you fall into the above categories, your biggest risks will come from how your Mac is set up, rather than your iPhone or iPad. Here’s how you could improve your Mac security:

  • Upgrade your Mac to Golden Gate: Golden Gate supports all Apple silicon Macs. A few older Intel models can upgrade to the previous release, macOS 26 Tahoe, which you should do. If you can’t run Tahoe or Golden Gate, you’re not getting the latest and best security. Consider upgrading your Mac if that’s important to you. (See which Macs can run it.)
  • Allow FileVault: Apple enables FileVault by default when you upgrade to macOS 26 or 27 and on new computers running it. Leave it on (see FileVault). Also, power down your Mac whenever it’s not in use; never leave it idle and running for more than a brief period. (A FileVault-like feature is part of iOS/iPadOS and cannot be disabled or configured.)
  • Block device and card insertion: Thunderbolt and USB devices and SD Cards plugged into your Mac can be blocked from interacting with the operating system without authentication. See the Mac settings worth changing.
  • Never make local, unencrypted copies of your data: All local copies should be on encrypted volumes that are unmounted after backup or shutdown when you regularly shut your Mac down; all hosted backups, if any, should only be with firms that offer strong, user-owned encryption. Time Machine lets you set up backups on an encrypted drive or add an encryption key for networked backups. All online backup services worth considering put the encryption key for your archived data solely in your hands.

Apple keeps upping the ante on how it makes sure that macOS’s core files—all the bits and pieces in the operating system that allows apps to run—aren’t messed about with.

What if Apple could prevent system files from being modified at all by placing them on a read-only disk, effectively blocking changes to those files at nearly the lowest level?

That was a hard task, given that system files and user data files co-existed on the same startup volume. But, hmm, wait a tick! What if you could split system files into one volume and data files into another, but have them appear seamless as a single “drive” in macOS? The system volume would be read-only; the data volume could be read/write, but would also have all the sandboxing protections already in place.

That’s exactly what Apple did starting with Catalina. Apple’s modern filesystem, APFS (Apple File System), among other improvements, added the concept of breaking a drive into containers instead of partitions. (Partitions can still be used, but there’s no advantage.)

In the long-used previous filesystem, Mac OS Extended (sometimes called HFS+), a drive was broken into partitions, and each partition could be mounted as a volume. One volume was much like another.

In APFS, a drive is broken into containers, which are like partitions in occupying a preset portion of the disk’s full capacity. Each container can contain one or more volumes, and each volume can have a role. A role defines the kind of data stored on it. Roles include data (for regular mountable data volumes), system (for system files starting in Catalina), and backup (for Time Machine backups starting in Big Sur).

Roles also include obscure and/or invisible system requirements, too: Preboot, Recovery, and VM (virtual memory).

Catalina’s system role also added another variation on containers and volumes, called a volume group. A volume group is two or more interrelated volumes that present as a single entity to the Finder and user. Behind the scenes, however, multiple volumes are managed by the system.

The reason for this was to take a previous system integrity concept to yet another level: all system files are on one volume in the startup volume group; all user data is on another volume.

Big Sur went even further. It doesn’t even mount the system volume. Instead, it uses a “snapshot” feature of APFS that allows the filesystem to capture a particular point in time. Starting in Big Sur, a snapshot of the system volume is loaded that can’t be changed, because it has no writable components—it’s like looking at a picture. In Disk Utility the system is marked as an APFS Startup Snapshot with a unique name, while the main system volume is dimmed.

On top of that, each file on a Big Sur or later system volume has a separate cryptographically generated hash that’s stored in the volume’s metadata. Whenever a file is read from the system volume, that same crypto operation is performed, and the resulting hash of the loaded file checked against the one that’s stored—any modification, however unlikely it could be to occur at all, would be immediately spotted. That’s why this approach is called a Signed System Volume. The metadata and other volume attributes are hashed and collected in something called the seal, which is verified at boot time. If the seal can’t be verified, you’re prompted to reinstall macOS.

Monterey kept the same structure, but added the capability for Apple silicon Macs to install multiple versions of macOS on a single drive. With Big Sur, an Apple silicon Mac could only have a single system because of some low-level decisions about how the Mac decided whether a system could validly start up. With Monterey, you can create additional partitions and install unique copies of macOS into each partition. (From Ventura onward, Apple doesn’t seem to have made substantial changes—or at least I couldn’t find any to report on.)

Only some people need to have multiple versions of macOS on a bootable drive, such as those who need to keep older versions of macOS running for testing or compatibility.

With Apple silicon Macs, Apple also has what’s called hardware-based memory protection. Hackers often use a system or app exploit to overflow an area reserved for pure data into an area that contains executable program code. This lets them insert malicious code that is run in place of legitimate code. Memory protection in Apple silicon processors marks memory areas as either full of executable code or full of data, but not both. In that scenario, a hacker cannot write malicious code into an area that can be executed; nor can they execute code that’s in a place only inert data is stored. An app can change the state of memory areas explicitly, and that’s a place that hackers will certainly aim for. But it’s much higher-hanging fruit.

System integrity and locked apps

Because the system volume is immutable, Apple can place only certain of its apps on that volume: ones that don’t require regular updates. These apps can be refreshed as part of a system update, as a Catalina or later system update has the rights to make changes to the system volume, including those apps.

The list of system-locked apps is reasonably long. You can find them in /System/Applications. A few examples among many are App Store, FaceTime, Mail, Photos, Preview, and Siri.

System volume apps appear within the Applications folder intermingled with Data volume apps. This is part of the seamless integration of volumes in a volume group used for macOS. You can check on the system/Data location of any app by selecting it and choosing File > Get Info. The path shows drive name > System > Applications for system volume apps, and drive name > Applications for ones installed on the Data volume.

Interestingly, Safari is not on the system volume. Apparently, it’s updated regularly enough and sometimes with significant fixes that Apple has kept it out of that fixed side of things.

In a similar but distinct bit of processor-based protection, after macOS loads on a Mac with Apple silicon, the memory its central components occupy—its kernel—is locked using “kernel integrity protection,” so they cannot be modified while macOS is running.

Do you feel safe now? You should to the extent that it’s feasible that Apple has taken every modern and many inventive measures to render the system immutable.

How to restart in recovery mode

Apple installs a special recovery volume as part of a macOS installation that you can restart from to perform actions on your Mac’s system without macOS itself running. This volume is invisible to you in your normal use of macOS.

On an Apple silicon Mac, choose Apple menu > Shut Down. When your Mac has powered down, hold down the power button; you first see a message that says “Continue holding for startup options.” Keep holding until you see the next prompt, which says “Loading startup options.” Click Options, choose an account, click Next, enter its password, and click Continue.

Apple changed the name for this form of boot a few years ago. Recovery mode generically means a special way of booting any Apple device to repair or reinstall its operating system.

When you restart into recovery mode, Apple’s Platform Security Guide says you are booting into recoveryOS. The app that appears first on an Intel Mac or after clicking Options on an Apple silicon Mac is labeled Recovery on the system menu.

Furthermore, if you choose the Utilities menu, you can launch a special Recovery Assistant! The main screen there is labeled not Recovery Assistant, but simply Recovery—see below. If you lock your Mac via Find My and then unlock it, Recovery Assistant launches on restart, and while the app menu reads “Recovery Assistant,” the main title on the screen is “macOS Recovery.”

Startup protections

This wasn’t enough? Really? Really. There’s more. Apple has several methods of further preventing your Mac from being started up in a way you don’t want and to prevent after startup in ways you don’t want.

Share a disk

As part of enhanced protections on Apple silicon Macs, Apple eliminated a simpler option long used on Intel Macs. Follow these steps to share a volume, making it appear as a networked volume on the other Mac:

  1. Restart in recovery mode. (See How to Restart in Recovery Mode.)
  2. Choose Utilities > Share Disk.
  3. Select the disk to share, and click Start Sharing.
  4. If prompted, choose an account, enter its password, click Unlock, and click Start Sharing.
  5. Connect your Mac to another one via a USB data cable (with Type-A or USB-C plugs on either or both ends) or a Thunderbolt 3 or 4 cable.
  6. On the other Mac in the Finder, click the Network link in the sidebar to view the shared Mac’s volume.
  7. Click the Mac in the main window, click Connect As in the upper-right corner, select Guest as the user, and click Connect.

You can now transfer files between the two computers. When you’re finished, eject the mounted Mac volume by selecting it and dragging it to the Eject icon in the Dock or pressing ⌘-E.

Startup Security Utility

Apple took a harder line on startup security policy when they introduced Apple silicon Macs than they previously had with Intel models. macOS offers Full Security, which locks your Mac down to either its current version of macOS or any version Apple currently supports—typically a limited set. Reduced Security lets you run older versions of macOS that Apple previously approved to run on your hardware.

Almost unrelated, the “Allow accessories to connect” option lets you set a boot policy to restrict connections. For options, see the Mac settings worth changing.

Reduced Security lets you select or deselect the option to install signed legacy (or outdated) kernel extensions; and for remote management, which is used in schools and businesses, to control these kernel extensions and software updates. Some organizations may need specific older extensions for security software and may also want to delay automatic software updates to avoid breaking them.

People at a heightened level of risk could trust Reduced Security with just user management enabled for kernel extensions, since those extensions must be signed by “identified developers” (via Apple’s process) and require user steps to install, as described in Manage System Extensions.

If you don’t have Reduced Security enabled and try to install a system extension, the app installation explains what happened.

Proceed to click Open System Settings, and you see a note in System Settings > Privacy & Security.

Click Enable System Extensions and you see a dialog that provides a shortcut and offers abbreviated and somewhat misleading steps on enabling Reduced Security. If you want to proceed, click Shut Down in that dialog and then follow from step 2, below.

Starting from scratch, follow these steps:

  1. Restart in recovery mode. (See How to Restart in Recovery Mode.)
  2. Choose Utilities > Startup Security Utility.

Note: Apple requires an internet connection when you change the security policy, and you can hit a snag if you follow step 2 too quickly. If you see the error “An internet connection is required to change security policy,” quit the app (labeled Startup Disk when launched), wait for the Wi-Fi icon to show a connection in the menu bar, and launch the utility again. (An Ethernet connection doesn’t work.)

  1. The app launches. Click Unlock to mount the disk, which will be encrypted.
  2. Select an administrator user, enter the account’s password, and click Unlock.
  3. Select the drive if it’s not already selected.
  4. Click Security Policy.
  5. Select the level of security you want to apply and click OK.
  6. When prompted, select an administrator user, enter the account password, and click OK.
  7. “Applying security policy” appears. It may take several to tens of seconds to complete.
  8. Quit the utility and choose Apple menu > Restart.

Tip: Reduced Security disables Apple Pay on a Mac with Touch ID capability. See how to set up Touch ID and Face ID.

Permissive Security (not shown in this section) is an additional option that can’t be selected without disabling an even lower-level feature: System Integrity Protection. The Startup Security Utility then adds Permissive Security as an additional radio button. However, it’s not “no security,” but rather “experimental security”: it allows a very particular kind of installation, in which researchers and other niche users create custom kernels—the heart of the operating system—outside of the Apple-signed ecosystem of macOS versions compatible with Apple silicon Macs. It is exceedingly unlikely you would ever need it.

Recovery Assistant

Apple added Recovery Assistant in Tahoe to deal with situations in which macOS couldn’t start up correctly, and some sort of repair was required that needed the startup volume unmounted. If you encounter this, you will see a Recovery screen that explains the issue. You can also launch Recovery Assistant from macOS Recovery by choosing it from the Utilities menu.

The process works like this:

  1. At the Recovery screen, click Continue.
  2. Apple asks if you are willing to send them diagnostic data, and warns you about privacy issues. Click Don’t Send Data to Apple or Send Data to Apple.
  3. Click Start, and the assistant tries to resolve the problem.
  4. The assistant reports one of three states:

1.1. Your Mac was recovered successfully. Click Restart Mac.

1.1. No known issues were found. Click Restart Mac.

1.1. Your Mac could not be recovered. Oh, boy, it’s time to look into backups, consult an independent Apple expert or the Genius Bar at an Apple Store, or call Apple Support.